
We’ve all been there. You land on a Shopify store, excited about a product, only to be met with that little loading spinner where a beautiful photo should be. A few seconds feel like an eternity, and poof—you’re gone. For you, the store owner, this isn’t just a tech glitch; it’s a silent conversion killer. Every second of delay sends a potential customer straight to your competition.
That frustration is real, and it’s costing businesses sales they never even knew they lost.

This guide is here to shift your perspective. Finding the “best photo size for websites” isn’t about memorizing a magic number. In 2025, it’s about mastering a feeling—the feeling of a lightning-fast, visually stunning store that builds trust from the first click.
Think of it like preparing the perfect meal. You need the right ingredients, the right portions, and the right cooking method. It’s the same with your store’s images. The three pillars are:
- Dimensions (the frame): The actual width and height of your image, measured in pixels.
- File Size (the weight): How “heavy” the image is, measured in kilobytes (KB).
- Format (the file type): The digital wrapper for your image, like JPG, PNG, or the game-changing WebP.
Get this trio right, and you’ll build a store that doesn’t just attract visitors—it captivates them and turns them into loyal customers.
The Real Cost of Heavy Images
It’s so easy to upload a gorgeous photo from your camera roll and call it a day. But those big, unoptimized images carry a hidden cost that hits your bottom line. Your store’s performance isn’t just a nice-to-have; it’s the foundation of the entire customer experience.
Here’s a quick look at what this really means for your business.
Your Quick Guide to the Three Pillars of Image Optimization
| Pillar | What It Means for Your Store | The Impact on Your Sales |
|---|---|---|
| Dimensions | Sizing your images to fit their specific containers on the page—not too big, not too small. | Prevents wasted loading time on oversized images, keeping customers engaged. |
| File Size | Keeping your image files as lightweight as possible without sacrificing quality. | Directly boosts page speed, which can increase conversion rates and slash bounce rates. |
| Format | Choosing the most efficient file type (like WebP) for the best quality-to-size ratio. | Faster-loading, high-quality images build trust and make your products look incredible. |
Mastering these areas isn’t about tweaking pixels—it’s about creating a better, faster, and more profitable shopping experience.
Believe it or not, images often make up a staggering 40-44% of a webpage’s total weight. They are the single biggest factor in how quickly your site loads. And when that’s ignored, the consequences are real. Slow-loading images can increase bounce rates by up to 32%—that’s nearly a third of your hard-won visitors leaving before they even see what you have to offer.
On the flip side, the payoff for speed is huge. Sites that load in under two seconds can see a 15% higher conversion rate. This isn’t just about tech specs; it’s about respecting your customer’s time. A fast, seamless experience signals professionalism and care, encouraging shoppers to stick around.
Your product photos are your digital salespeople. If they’re slow to show up for work, you’re losing sales you never even knew you had.
Getting your images right is one of the most powerful SEO tips for your Shopify store you can put into action today. Let’s dive in.
Matching Image Dimensions to Your Store’s Layout
Forget trying to memorize a laundry list of pixel dimensions. Honestly, it’s not about the numbers. The real secret is to simply fit the frame you’re given.
Think about it like this: would you hang a tiny 4×6 photo in a massive, wall-sized frame? It would look lost, amateurish, and just plain awkward. The same principle applies directly to your website.
One of the most common speed-killing mistakes we see is someone uploading a massive 5000-pixel photo straight from their camera to fill a banner space that’s only 1800 pixels wide. That’s like trying to shove a king-size mattress through a mail slot. It slows everything down to a crawl before your customer even lays eyes on a single product.
So, let’s talk about the practical dimensions you’ll actually need for the most important parts of your Shopify store.
Your Store’s Visual Blueprint
Think of these as your starting lineup, not an unbreakable set of rules. Your specific Shopify theme might have its own preferences, but these dimensions will give you a rock-solid foundation for a store that’s both gorgeous and lightning-fast.
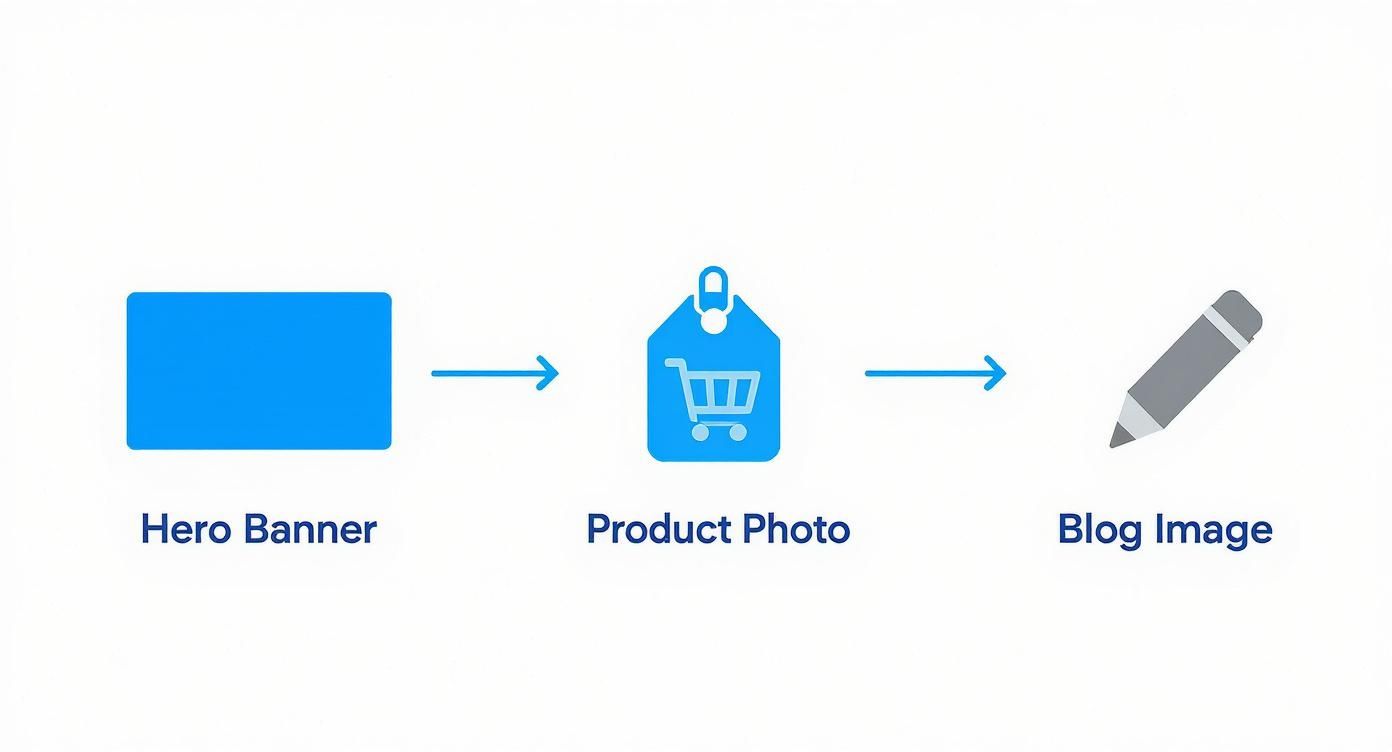
- Hero Banners: This is your grand entrance. Aim for a width between 1800 and 2500 pixels. This is the sweet spot that keeps your main banner looking crisp on big desktop screens without bogging down your site.
- Product Photos: Here, clarity and consistency are king. A square format is the gold standard for a reason—it creates a clean, predictable grid. Shoot for dimensions between 800 x 800 pixels and 1200 x 1200 pixels. This size is perfect for letting Shopify’s zoom feature shine, giving shoppers that up-close detail they crave.
- Blog & Collection Images: These are your supporting actors, adding flavor and context. A width of around 1200 pixels is perfect. It’s detailed enough to draw people in without adding unnecessary weight.
Of course, getting the final image right starts with a great initial shot. If you want to level up your photography game from the very beginning, our guide on good cameras for product photography has options for every budget.
Why Aspect Ratio Is Your Secret Weapon
Pixels are only half the story. The real pro move is maintaining a consistent aspect ratio across your images. Simply put, this is the relationship between an image’s width and its height.
A 1000 x 1000 pixel image has a 1:1 (square) aspect ratio. A 1800 x 1200 pixel image has a 3:2 aspect ratio. It’s that simple.
Consistency is the cornerstone of trust in eCommerce. When every product photo on your collection pages is the exact same shape and size, it creates a seamless, professional, and trustworthy experience.
Imagine walking into your favorite high-end boutique. Everything is perfectly arranged, creating a calm, inviting atmosphere. That’s the exact feeling you’re trying to build online. Mismatched images, on the other hand, just look messy and unprofessional.
By resizing all your product images to the same dimensions—say, 1080 x 1080 pixels—before you upload them, you guarantee your collections look polished. This isn’t just about aesthetics; it’s a silent signal to your customers that you care about the details.
Choosing Your Image Format: JPG, PNG, or the Modern Champ, WebP
Deciding on an image format used to be a simple choice. Today, the wrong pick can grind your entire store to a halt. Let’s cut through the noise and make this simple.
Think of it like choosing the right tool for a job. You wouldn’t use a sledgehammer to hang a picture frame, would you? The same idea applies here. Getting the format right is a huge piece of the puzzle when it comes to finding the best photo size for websites.
Why WebP Is Your New Best Friend
If you take one thing away from this section, let it be this: start using WebP. It’s the modern, high-performance powerhouse for a reason.
WebP delivers stunning image quality at a tiny fraction of the file size of older formats. We’re talking a file size reduction of 25% to 35% compared to a JPG, with no noticeable drop in quality. That translates directly into faster page loads, which is pure gold for your customers, especially those shopping on their phones.
The conversation has shifted. It’s no longer if you should use WebP, but how you can implement it across your store for maximum speed.
But What About JPG and PNG?
Of course, the classics still have their place. Knowing when to use each one is a genuine superpower for site speed.
- JPG (or JPEG): This is your trusty, all-around workhorse. It’s perfect for complex, colorful images like detailed product photos or vibrant lifestyle shots from brands like Everlane or Allbirds.
- PNG: This one’s the specialist. Its claim to fame is transparency. Need to place your logo on a colored background without that clunky white box? PNG is your only real choice. The trade-off is much larger file sizes.
For a deeper dive into the technical side of things, this guide on the best image format for web is an excellent resource.
The Ultimate Image Format Showdown: WebP vs. JPG vs. PNG
To make it even clearer, here’s a quick-reference table. Think of this as your cheat sheet for choosing the right format every single time.
| Image Format | Best For | Key Benefit | When to Avoid |
|---|---|---|---|
| WebP | Almost everything: product shots, hero banners, blog images. | Speed. Offers the best balance of tiny file sizes and high quality. | When you absolutely need transparency (though WebP supports it, PNG is still more common). |
| JPG | Complex photographs with lots of colors and gradients. | Universal compatibility and great compression for photos. | Images that require a transparent background. |
| PNG | Logos, icons, and any graphic that needs a transparent background. | Lossless quality and full transparency support. | Large, complex photographs. The file sizes will be massive. |
Ultimately, your goal is to use WebP as your default, falling back to JPG for photos when needed and PNG only when transparency is a must.
Browser Support Is No Longer an Excuse
Years ago, the main argument against WebP was spotty browser support. That excuse is officially a thing of the past. In 2025, WebP is universally supported across all modern browsers—Chrome, Firefox, Safari, Edge, you name it.
And the best part? If you’re on a platform like Shopify, this is largely handled for you. Shopify automatically detects which browsers support WebP and serves that format for the fastest load times, seamlessly falling back to JPG or PNG for the rare visitor on an older browser. It’s a win-win.
The Art of Image Compression Without Losing Quality
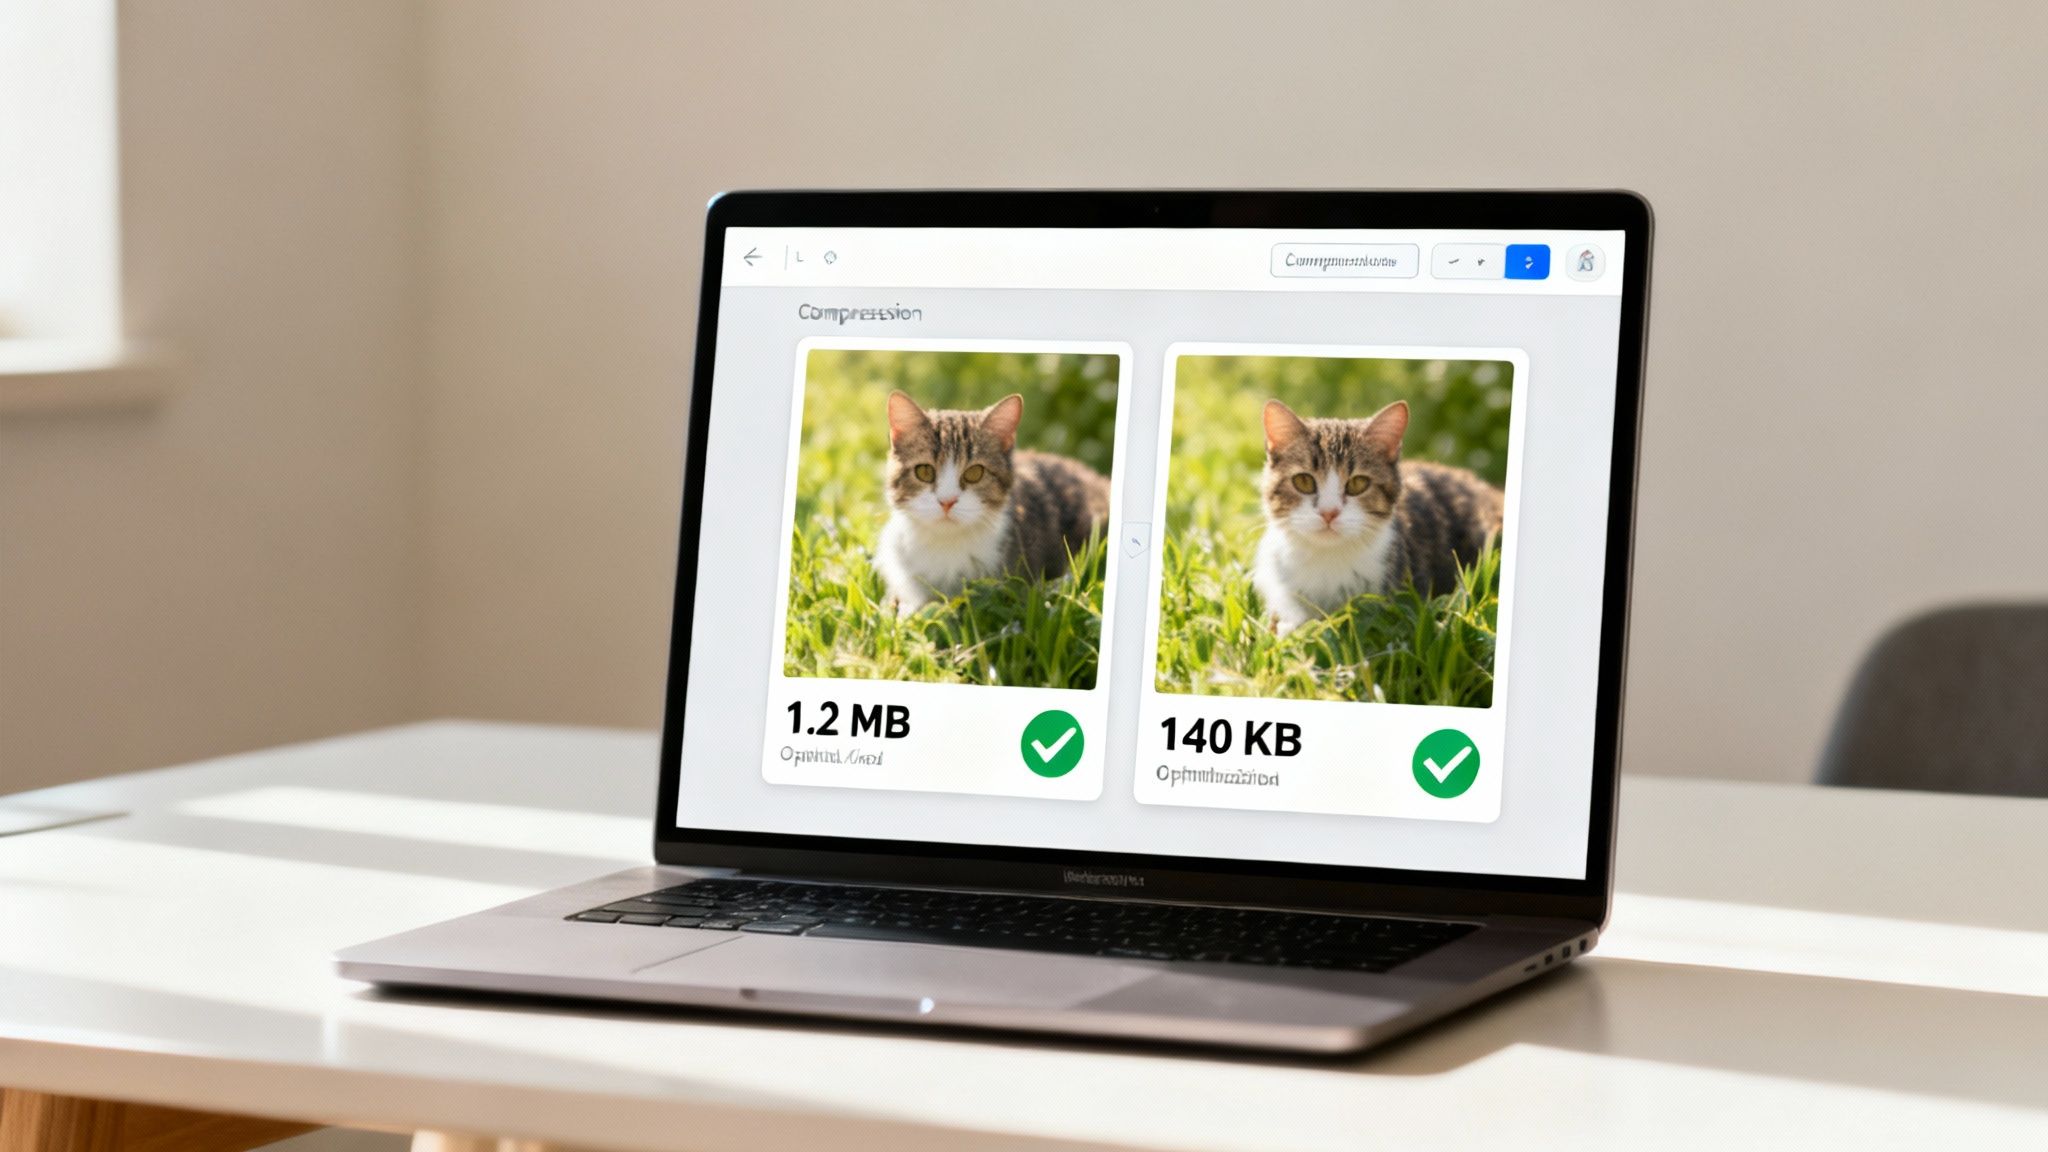
This is where the real magic happens. If getting your image dimensions right is the foundation, then compression is the secret sauce that makes your store feel lightning-fast. It’s the craft of making your image files incredibly lightweight without turning your stunning product shots into a pixelated mess.
Think of it like a professional packer who can somehow fit an entire wardrobe into a single carry-on. They aren’t throwing clothes away; they’re just being incredibly smart with the space they have. That’s what good image compression does for your website’s speed.
Lossy vs Lossless: The Two Sides of Compression
As you dive into compression, you’ll hear two terms thrown around: lossy and lossless. They might sound technical, but the idea behind them is pretty straightforward.
Lossless Compression: Imagine a vacuum-sealed bag. It squeezes all the air out, but when you open it, everything inside is exactly as it was. Every single pixel is preserved. This is fantastic for sharp logos, but the file size reduction isn’t as dramatic.
Lossy Compression: This is the more aggressive—and often more effective—approach for photos. It cleverly removes tiny bits of information the human eye isn’t likely to notice. A touch of lossy compression can slash your file size with no visible drop in quality. Go too far, though, and you’ll start seeing that dreaded blurriness.
The real skill isn’t about choosing one over the other. It’s about finding that sweet spot where your images are feather-light but still look breathtakingly crisp.
Your target file sizes are your North Star for performance. Aim for most product images to land under 150 KB, and keep those big, beautiful hero images under 300 KB. Hitting these numbers is an absolute game-changer for page speed.
Tools That Make Compression Easy
The best part? You don’t need to be a Photoshop guru to master this. There are amazing, user-friendly tools that do all the heavy lifting for you.
Here are a few favorites we always recommend to merchants:
- TinyPNG / TinyJPG: A wildly popular web-based tool. Just upload your files, and it applies smart lossy compression to shrink them, often by 50% or more, without you even noticing a difference.
- ImageOptim: This free Mac app is ruthlessly efficient. It strips out all the unnecessary fluff from your image files to get you the smallest possible size.
- Shopify’s Built-in Optimization: Don’t forget, Shopify automatically applies its own compression when you upload images. Think of it as a safety net. For the best performance, though, always compress your images before you upload. This puts you in total control.
Sometimes, after a heavy compression, you might find an image has lost a bit of its sharpness. A quality online image upscaler can intelligently enhance the resolution, giving you the best of both worlds.
Ultimately, compression isn’t a chore; it’s an opportunity. By taking a few extra seconds to run your images through one of these tools, you are directly investing in a faster, more profitable online store.
Serving the Perfect Image Size to Every Device

Your customers are everywhere—on sprawling desktop monitors, crisp tablets, and phones of every imaginable size. So why would you force a tiny phone screen to download a massive, desktop-sized image? It’s like making someone drink their morning espresso out of a giant soup bowl. It just doesn’t make sense.
This is where responsive images come in. It’s one of the smartest solutions in modern web design, and it’s a game-changer for page speed.
Think of it like a coffee shop that offers small, medium, and large cups. The browser intelligently asks the device, “What size cup do you need?” and then grabs the perfect fit. This simple act ensures no one gets more than they need, which translates to a blazing-fast experience for every single visitor.
How Responsive Images Work Their Magic
The technology that makes this possible is a clever bit of code called srcset (short for “source set”). You don’t need to be a developer to get the concept. It’s simply a menu of different-sized versions of the same image that you offer to the browser.
When a customer lands on your product page, their browser reads this menu and says, “Aha! This person is on a standard smartphone, so I’ll grab the medium-sized image.”
All they experience is a site that loads incredibly fast with images that look perfectly crisp on their screen. This is the key to understanding the best photo size for websites—there isn’t just one size, there are several, each with a specific job to do.
By serving the right image to the right device, you’re not just saving bandwidth; you’re showing respect for your customer’s time and data. That’s a powerful way to build trust.
The Good News: Your Shopify Theme Does the Heavy Lifting
Feeling a bit overwhelmed by the code? Take a deep breath. Here’s the best part: if you’re using a modern Shopify theme, this is almost certainly being handled for you automatically.
When you upload a high-quality product photo, Shopify gets to work creating multiple smaller versions of it in the background. Your theme is then coded to use srcset to serve the most appropriate version to each visitor. It’s a beautifully automated system designed to make your store fast, right out of the box.
So, your main job isn’t to code this yourself. It’s to provide Shopify with a great, high-resolution source image to work with. Think of it as giving a talented chef (your theme) the highest-quality ingredients.
How to Check if Your Site Is Truly Responsive
You can put on your detective hat and check this for yourself in about 30 seconds. This is a fantastic skill for spotting performance issues.
Here’s how to see it in action:
- Open Your Store in Chrome: Navigate to a product page with a large, clear image.
- Right-Click and Inspect: Right-click directly on the product image and choose “Inspect” from the menu. This will open the developer tools panel.
- Look for
srcset: You’ll see the page’s HTML code. The line of code for your image will be highlighted, and if it’s responsive, you’ll see an attribute calledsrcsetfollowed by a list of image URLs with different sizes.
If you see that srcset, you can rest easy knowing your theme is working hard to deliver a tailored, fast experience for every shopper.
Your Simple Step-by-Step Image Optimization Workflow
Alright, theory is one thing, but action is where the magic happens. Let’s forge everything we’ve talked about into a simple, repeatable process. This is your pre-flight checklist for every single image you upload.
Think of this as your recipe for creating a lightning-fast shopping experience. When you make this a habit, optimization stops being a chore and becomes one of your most powerful tools for boosting conversions.
The Six-Step Optimization Checklist
Here’s the entire workflow from start to finish. Internalize these steps, and you’ll never second-guess whether your images are hurting your site speed again.
Start with a High-Quality Source: You can always shrink a great image, but you can’t magically add detail to a small, pixelated one. Always begin with the highest resolution photo you have.
Crop and Resize for the Frame: Before anything else, tailor the image for its specific home. Is this a sprawling 2000px hero banner? Or a crisp 1080px square product shot? Resize it to the exact dimensions needed.
Choose the Best Format: Now, make the call. Is it a photograph? WebP or JPG is the way to go. Does it need a transparent background, like your logo? That’s a job for PNG. For over 90% of your store’s images, WebP will give you the best blend of quality and speed.
This simple workflow isn’t about being a technical expert. It’s about being a smart merchant who understands that every kilobyte saved is a better experience for your customer.
Finalizing Your Image for Launch
With the technical side sorted, these last two steps get your image ready for the spotlight—for both your customers and the search engines.
Compress Like a Pro: This is where the real performance gains are unlocked. Run your perfectly sized image through a tool like TinyPNG. Your mission: get product photos under 150 KB and hero images under 300 KB
Name Your File for SEO: Never upload
IMG_8472.jpg. That tells Google nothing. Instead, give your file a descriptive, keyword-rich name likeblue-linen-button-down-shirt.webp. It’s a small detail that packs a huge SEO punch.Upload to Shopify: You’re ready. Upload your masterpiece, knowing it’s lean, fast, and ready to impress.
If you want to dig even deeper into this topic, check out this fantastic resource: A Guide to Sizing Images for Websites. Making this process second nature is one of the single most impactful things you can do for your store’s speed and, ultimately, your sales.
Your Image Optimization Questions Answered
We get it. Even with the best workflow, questions come up. Image optimization can feel like a minefield of technical jargon. Let’s clear the air and tackle some of the most common questions we hear from Shopify merchants.
Does Shopify Automatically Compress My Images?
Yes, Shopify does compress images for you when you upload them. Think of it as a helpful safety net.
But here’s the pro tip: for the absolute best results, you should always optimize your images before you upload them. Pre-optimizing gives you total control to crush that file size down to its absolute minimum—and that’s the secret to unlocking elite-level page speed.
What Is the Best Resolution for Website Photos: 72 DPI or 300 DPI?
This is one of the biggest myths in web design, a ghost from the world of print that just won’t go away! For websites, DPI (Dots Per Inch) is completely irrelevant. Seriously. Web browsers don’t even look at it.
What truly matters are two things: the pixel dimensions (like 1200px wide) and the final file size (like 125 KB). Your entire focus should be on getting the pixel dimensions right for the space the image fills on the screen, then compressing it as much as possible. You can officially forget about DPI forever.
Can I Use AI Tools to Help Optimize My Images?
Absolutely, and in 2025, you’d be crazy not to! Modern AI tools are a complete game-changer for finding the perfect photo size for websites and nailing your optimization.
Many of these tools can intelligently analyze an image and apply the perfect level of compression, shrinking the file size while preserving stunning visual quality. Some can even auto-generate all the different sizes you need for responsive designs. Using them is a brilliant way to supercharge your workflow and get far better results, faster.
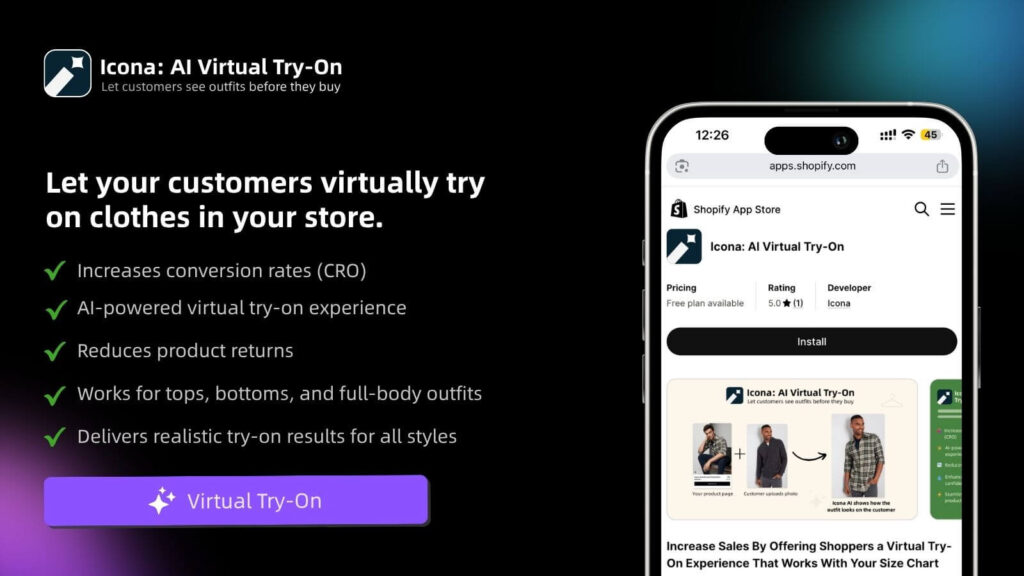
Now that your images are sharp and speedy, the next step is bringing them to life. With Icona, you can move beyond static photos and offer an AI-powered virtual try-on right on your product pages. Let shoppers see exactly how your clothes look on their own bodies, boosting their confidence and driving your sales. Learn more and get started at our website.
We’ve all been there. You land on a Shopify store, intrigued by a product, but the photos are… just okay. A little dark, a bit blurry, and they don’t really tell you a story. So you close the tab and move on. What separates a store that gets a click from one that gets a sale? More often than not, it’s stunning pro product photography.
Your images aren’t just placeholders; they’re your most dedicated salesperson, working 24/7 to turn casual browsers into loyal customers. In 2025, they’re the digital handshake that builds trust before a customer ever clicks “add to cart.”
Why Great Photos Aren’t Just an Expense—They’re an Investment
Let me tell you a story every founder can relate to. A small, direct-to-consumer skincare brand was stuck. They knew their formulas were incredible, but their Shopify analytics told a different story: flat conversion rates. Their photos were clean, sure, but they lacked the feeling needed to convey the luxury inside the bottle.
Frustrated but not defeated, they had a breakthrough. They stopped seeing photography as an expense and started treating it as a core growth strategy. They didn’t hire a big agency. Instead, they got obsessed with light and storytelling. They swapped sterile, flat images for shots that showed off the product’s rich texture, used soft, natural light to create a sense of calm, and added subtle props that hinted at a self-care ritual.
The result? Within three months of relaunching their product pages with the new visuals, their conversion rate more than doubled.
The Psychology Behind a Picture That Sells
That brand’s success wasn’t a fluke. It’s a perfect example of how visual commerce works in 2025. When a customer can’t touch, feel, or smell your product, your photos have to do all the heavy lifting. In a split second, they communicate your brand’s quality, trustworthiness, and the value you’re offering. In a world where attention is the new currency, a powerful image is what stops the scroll.
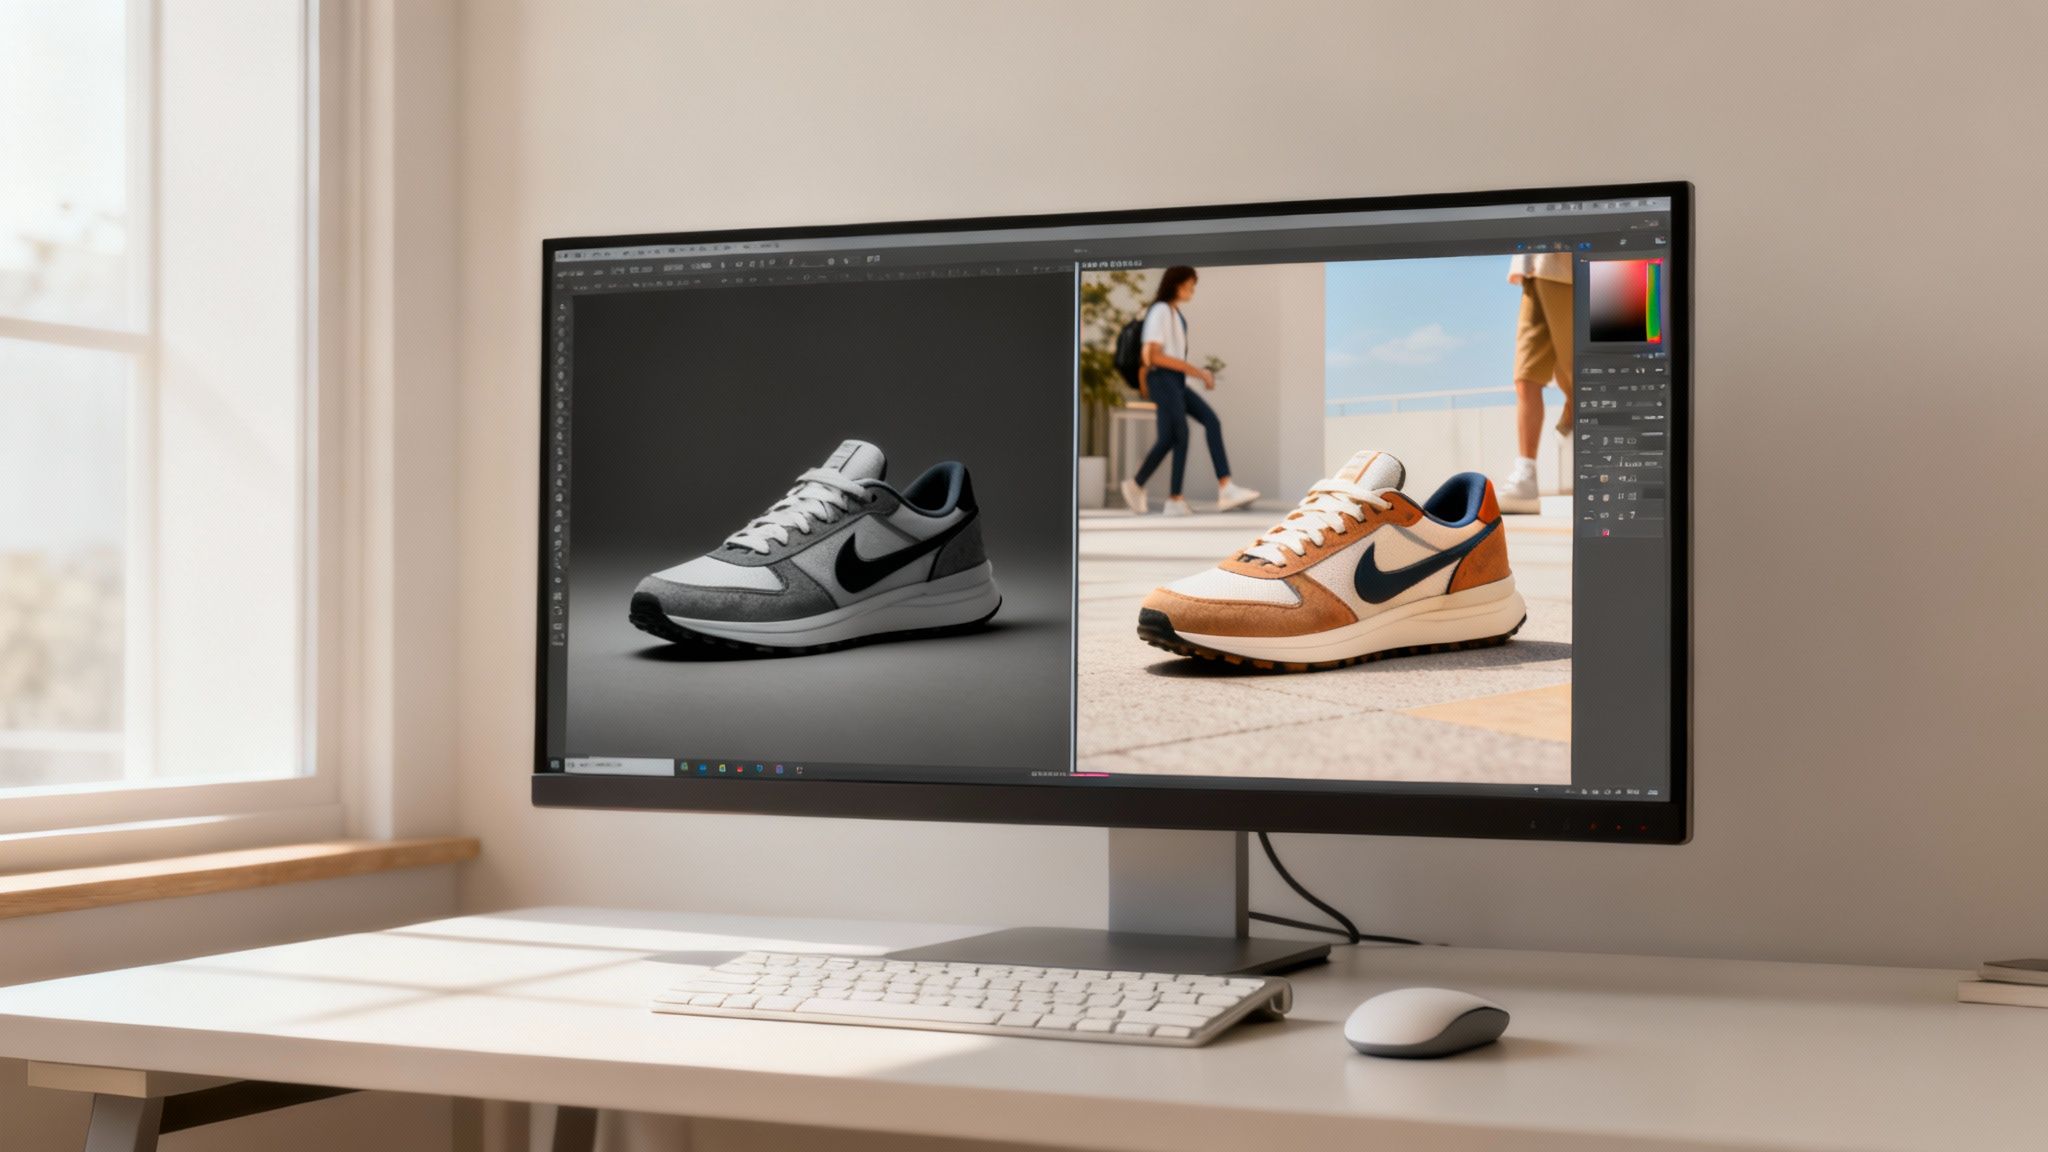
Look at how a simple, beautifully lit setup can instantly make a product feel premium.
See how the soft light pulls your focus right to the product? It highlights its shape and texture without any distracting noise. This is the kind of shot that builds immediate trust.
“In eCommerce, your product photography is your digital handshake. It’s the first impression that determines whether a customer stays to listen or clicks away.”
This isn’t a fleeting trend. The global product photography market is projected to hit a staggering $275 million by 2028. This growth signals a core truth about modern retail: what customers see directly impacts what they buy. You can explore the photography market trends if you’re curious.
At the end of the day, professional-level images aren’t about chasing perfection. They’re about forging a connection. They bridge the gap between the screen and the real world, giving your customer the confidence they need to click “Add to Cart.”
How to Build a DIY Photo Studio on Any Budget
Let’s get one thing straight: you don’t need a massive studio or a Hollywood budget to create images that stop the scroll. Some of the most successful Shopify stores started in a spare bedroom with a smartphone and a ton of hustle.
The secret to clean, compelling product shots isn’t how much you spend—it’s how resourceful you are. Let’s walk through how you can build an effective photo setup at home, no matter where your business is today.
Your Pro Product Photography Gear Guide
To make this practical, I’ve broken down the gear into three stages. Think of it as your shopping list, whether you’re just starting out or ready to scale up your visual game.
| Gear Category | The Scrappy Founder (Under $100) | The Growing Brand ($500-$1000) | The Pro Setup ($2500+) |
|---|---|---|---|
| Camera | Your smartphone (the latest models are amazing) | Entry-level DSLR/mirrorless with a 50mm f/1.8 lens | Full-frame mirrorless or DSLR |
| Lighting | A large window with indirect natural light | 2-light softbox kit for consistent, controlled light | Multiple strobes or continuous LEDs with modifiers |
| Backdrop | White poster board or craft paper | Seamless paper roll system (white, gray, black) | A variety of paper rolls or photography background cloth |
| Support | A steady hand or a stack of books | A sturdy, reliable tripod | Tripod + tethering station for live view on a computer |
| Essential Extra | White foam board for bouncing light | Remote shutter release | Light meter and color checker passport |
This isn’t about pressure to upgrade; it’s about having a clear path forward so you can invest wisely as your business grows.
The Scrappy Founder Setup (Under $100)
This is where grit and creativity meet. If you’re just launching, your smartphone is your secret weapon. The cameras in modern phones are shockingly good, and when paired with beautiful light, the results can easily compete with more expensive gear.
Your mission here is to master natural light.
Find the biggest window in your space that doesn’t get direct, harsh sun. That soft, diffused light is gold for product photos.
- Your Camera: The one in your pocket. Just promise me you’ll wipe the lens before every shoot!
- Your Light Source: That big, beautiful window. North or east-facing windows are usually best.
- Your Backdrop: Grab a white poster board from a craft store. Prop it against a wall and curve it down onto your table to create a seamless background.
- Your Secret Weapon: A second piece of white foam board. This is your reflector. Place it opposite the window to bounce light back and fill in any dark shadows.
The key here is consistency. Always shoot around the same time of day. This keeps your lighting uniform across your product line, which is the hallmark of a professional-looking store.
This simple flowchart nails the connection between investing in visuals and seeing a real impact on your sales. It reframes great photography from an expense into a direct lever for growth.
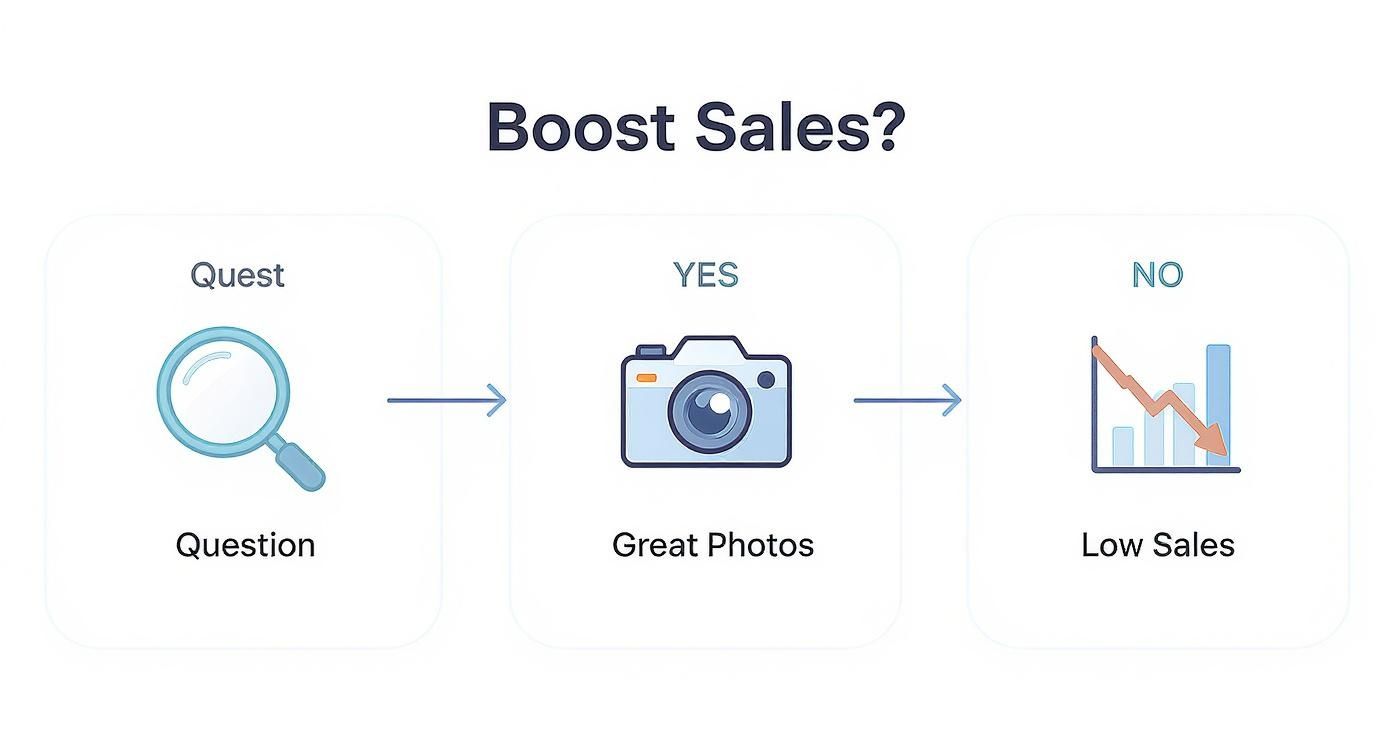
This visual hammers home a simple truth: when customers feel confident in what they see, they are far more likely to click “add to cart.”
The Growing Brand Toolkit ($500-$1000)
Alright, your business is picking up steam. Orders are flowing, and it’s time to invest in more control. This is where you move beyond chasing the sun and start building a setup that gives you repeatable, pro-level results, day or night.
Here, you graduate to a dedicated camera and your first real lights.
Your goal isn’t just taking pictures anymore; it’s about crafting a consistent visual identity. Upgrading your gear gives you the control to make that happen.
Here’s what your new toolkit looks like:
- Camera Upgrade: An entry-level DSLR or mirrorless camera is a fantastic next step. Think of a Canon Rebel or a Sony Alpha series camera paired with a “nifty fifty” 50mm f/1.8 lens. This combo is a workhorse for sharp images and that beautiful, blurry background.
- Lighting Control: A basic two-light softbox kit is a game-changer. These create soft, even light that perfectly mimics a bright, overcast day, freeing you from the whims of the weather.
- Sturdy Support: Get a reliable tripod. This is non-negotiable for keeping every shot perfectly sharp and consistently framed.
With this gear, you can batch-shoot products with identical lighting and angles, dramatically speeding up your workflow and elevating the look of your entire store.
The Pro Setup ($2500+)
You’re scaling, and fast. Your product line is growing, and you need a workflow that’s efficient, versatile, and delivers flawless quality every time. This setup is about investing in tools that give you maximum control and creative freedom.
- Pro-Level Camera: It’s time for a full-frame mirrorless or DSLR, known for incredible image quality and color science.
- Advanced Lighting: You’ll want multiple strobes or powerful continuous LED lights. The real magic is in the modifiers—things like octaboxes and grids that let you sculpt light with precision.
- Versatile Backdrops: You’ve moved beyond poster board. A system with seamless paper rolls in various colors or a high-quality photography background cloth opens up endless creative doors. For tips, check out our guide on choosing the perfect photography background cloth.
- Tethered Shooting: This is a workflow game-changer. Connect your camera to a computer so images pop up on a large screen in real-time. It’s perfect for nailing focus and composition on the spot, saving you a ton of time later.
No matter which stage you’re in, the principles never change: control your light, lock in your consistency, and always make your product the hero.
Mastering the Art of Light and Composition
Okay, you’ve got your DIY studio. Now the real fun begins. We’re moving beyond taking pictures and into crafting images—the kind that tell a story, spark emotion, and convince a customer they need what you’re selling.
This is where the magic happens, and it all comes down to two things: light and composition. Get these right, and even a smartphone can produce images that look like they belong in a high-end catalog.
Understanding the Language of Light
Think of light as the personality of your photo. It sets the entire mood. The biggest mistake founders make is assuming all light is created equal. It’s not. There are two main flavors you need to understand.
Hard Light: Picture the sun at high noon. It creates sharp, defined shadows. This light is bold and dramatic but can be unforgiving, highlighting every imperfection.
Soft Light: Now, imagine a slightly overcast day. The clouds act like a giant diffuser. This creates gentle, soft shadows. This light is flattering, forgiving, and makes products look clean and premium. For 90% of eCommerce, soft light is your best friend.
The quality of your light matters far more than the quality of your camera. A well-lit smartphone photo will always beat a poorly-lit shot from a professional camera. Mastering light is the ultimate shortcut.
How do you create soft light on demand? If you’re using a window, hang a thin white sheet over it. Instant diffuser. If you’re using an artificial light, place a softbox or a white sheet between the light and your product. This simple act of diffusion is often what separates amateur shots from pro ones.
Composing Your Shot Like a Pro
Composition is just a fancy word for how you arrange things in your photo. It’s the invisible hand that guides your customer’s eye exactly where you want it to go. Instead of plopping your product dead-center every time, let’s play with some timeless principles that just work.
The Rule of Thirds
Imagine your screen is divided by a tic-tac-toe grid. The “rule” is simple: place your product not in the center, but along one of the lines or where two lines intersect. This instantly creates a more dynamic and visually interesting image.
Leading Lines
Our eyes are hardwired to follow lines. Use this to your advantage by arranging things in your scene to create pathways that lead straight to your product. It could be the edge of a table or a subtle shadow. Brands like Brooklinen use the crisp folds of their sheets to guide the eye across the bed, creating a feeling of luxury.
Negative Space
Sometimes, what you don’t put in the frame is just as important. Negative space is the empty area around your product. Don’t be afraid to use it! A clean, uncluttered background makes your product the hero. It creates a feeling of sophistication, telling the customer, “This is what matters.”
While we’re on the subject of the perfect shot, the right camera can make applying these principles easier. We put together a breakdown of good cameras for product photography to help you find what fits your brand as you grow.
By combining soft light with thoughtful composition, you’re no longer just showing a product; you’re presenting it. You’re telling a visual story that builds desire and makes the decision to buy feel both easy and exciting.
Your Modern Workflow for Editing and AI Enhancement
The creative work doesn’t stop when you put the camera down. In many ways, that’s where the real magic starts. Post-production is where you sharpen your brand’s visual voice and make every image feel polished and intentional.
Today, this process is a blend of timeless editing skills and powerful AI tools. We’re moving beyond just tweaking brightness. We’re building workflows that are efficient and creatively liberating, letting you produce world-class visuals at a scale that was once unthinkable.
And the industry is taking notice. The global photographic services market, valued at $37.96 billion in 2023, is expected to skyrocket to nearly $64.68 billion by 2032. This is because businesses are finally investing in smarter visual strategies to win online.
The Foundation: Timeless Editing Essentials
Before we dive into AI, let’s get grounded in the fundamentals. These are the non-negotiable skills that form the bedrock of all great pro product photography.
Think of these as the three pillars of your editing checklist:
- Honest Color Correction: Your main goal is accuracy. Is that blue shirt really that shade of blue? Use the white balance tool to neutralize any weird color casts. This builds customer trust.
- Essential Retouching: The point isn’t to make your product look fake; it’s to eliminate distractions. Zap away tiny dust specks or clean up minor scratches on the backdrop. It’s the digital equivalent of wiping down a storefront window.
- Consistent Cropping and Sizing: Every product photo on your site should share a consistent aspect ratio. This creates a clean, organized grid on your collection pages. Decide on a standard—like a perfect square (1:1)—and stick to it.
The AI Advantage: Working Smarter, Not Harder
Now, this is where your workflow gets a massive upgrade. AI isn’t here to replace your creative eye. It’s here to be your most powerful assistant, automating the tedious tasks so you can focus on the big picture.
Imagine you have one perfectly lit shot of your product on a white background. In the past, creating lifestyle images meant a whole new, expensive photoshoot. Not anymore.
With a tool like Icona Studio, you can take that one image and instantly generate dozens of AI scenes. Want to see your new candle on a sleek marble countertop? Done. How about on a rustic wooden table? Just a click away. This lets you A/B test which backdrops and scenes truly connect with your audience and drive sales.
This is the new reality of eCommerce visuals. You’re no longer limited by your photoshoot budget. The only real limit is your imagination.
As you build this modern workflow, don’t forget site performance. It’s crucial to learn techniques and tools to compress images without losing quality. And for those times when you need to make an AI-generated image bigger, a good upscaler is a must. You can find tips on how to use an online image upscaler right here to keep everything looking crisp.
How AI Found the Perfect Scene: A Quick Example
Let’s look at a real-world scenario. A Shopify store selling handmade ceramic mugs was struggling to make their products stand out. Their white background shots were fine, but they lacked emotion. Using Icona Studio, they created three distinct variations for their best-selling mug:
- A minimalist, bright kitchen scene.
- A cozy, “dark academia” scene on a wooden desk.
- A vibrant, colorful café setting.
Running a simple A/B test with social media ads, they discovered the cozy, dark academia scene outperformed the others by over 45%. The test revealed their audience wasn’t just buying a mug; they were buying the feeling of a quiet morning that the image captured perfectly.
This is the power of a modern editing workflow. By blending solid editing fundamentals with the speed of AI, you can test, learn, and optimize your visuals in ways that were pure fantasy just a few years ago.
Creating Interactive Visuals That Truly Sell
Let’s be honest, static images are table stakes now. The real magic in 2025 is making your store immersive, interactive, and frankly, a lot more engaging. It’s time to think beyond the standard photo grid and see how leading brands are crafting experiences that customers actually remember.
Great photos build trust. But interactive visuals? They build a real connection. They brilliantly close that gap between browsing online and truly feeling a product in your hands.
Stepping Beyond the Static Grid
The modern product page is no longer a simple gallery. It’s a dynamic, digital showroom. Today’s shoppers expect more than a few white-background shots. They want to see your product from every angle, see it in motion, and imagine it in their own lives.
Here are a few powerful ways savvy brands are pulling this off:
- 360-Degree Views: This is an easy win. It gives shoppers the power to “spin” your product and zoom in on details, silently answering a dozen questions they didn’t even know they had.
- Shoppable Videos: Think bigger than a basic demo. A great shoppable video turns passive viewing into active shopping. It can showcase your product in a lifestyle context and let customers add items to their cart right from the video player.
- Augmented Reality (AR) & Virtual Try-Ons: This is the exciting frontier. For a furniture store, it’s letting someone see how a couch actually looks in their living room. For an apparel brand, it’s showing how a jacket fits a customer’s specific body type.
These aren’t just flashy tech novelties. They are hardcore conversion tools. They tackle the single biggest point of friction in online shopping: the fear of the unknown. Eliminate that uncertainty, and you give a customer the confidence to click “buy.”
The Undeniable Power of Virtual Try-On
Let’s zoom in on virtual try-ons, because they solve a massive headache for both shoppers and merchants. For customers, it’s that nagging voice asking, “But how will it really look on me?”
For you, it’s the all-too-real cost of returns. A tool like Icona integrates a virtual fitting room directly onto your product page. A shopper can upload a photo and instantly see how a shirt will drape on their own body. This simple interaction accomplishes three critical things:
- It skyrockets buyer confidence, leading to higher conversion rates.
- It creates a memorable, personalized experience that builds brand loyalty.
- It drastically cuts down on return rates, which is a huge win for your profit margins.
Turning Your Visuals into a Revenue Engine
This shift toward interactive visuals is more than a trend; it’s a new way of doing business. You’re not just selling a product anymore—you’re selling an experience.
We’re seeing this play out with photographers, too. Those who adopt strategic techniques are seeing incredible results. For example, offering personalized viewing appointments can boost revenue by up to 20 percent, while direct product sales linked to visual services have leaped by 33 percent. It’s proof that a high-touch, interactive approach is something people will happily pay for.
To maximize your store’s potential, look into tools that provide a seamless Shopify video shopping cart integration. The goal is to make every visual on your site work harder for you, transforming your product page into a confidence-building machine that truly sells.
Your Pro Photography Questions Answered
We’ve just walked through everything from DIY studios to the magic of AI. But I get it—taking that first step into pro-level product photography can feel a bit daunting. You’re probably juggling questions about settings, budgets, and whether you’re on the right track.
Let’s treat this like a quick coffee chat to tackle those lingering questions. My goal is to give you clear answers so you can get back to building your brand with confidence.
How Do I Optimize Images for My Shopify Store Speed?
This is one of the most critical questions you can ask. Jaw-dropping photos that make your site load at a snail’s pace are actually costing you sales. The game is finding the balance between quality and file size.
- Pick the Right Format: Use a modern, web-friendly format. JPEG is reliable, but WebP is even better, offering high quality and tiny file sizes.
- Compress Your Images: Use a compression tool to reduce file size. Aim for under 200KB for most product images without making them look pixelated.
- Let Shopify Help: Don’t forget that Shopify has some great built-in features and an app store full of tools that automate image compression.
Should I Hire a Pro or Do It Myself?
The classic tug-of-war between time and money. Honestly, there’s no single right answer—it all comes down to where your business is right now.
The DIY route has never been more powerful. For new brands, it’s a fantastic way to build a strong visual library without a huge upfront cost. Plus, it forces you to learn the fundamentals.
But a professional brings years of expertise. For growing stores, I often recommend a hybrid approach. Handle your simple product-on-white shots in-house, and bring in a pro for your hero images or a big campaign launch.
How Can AI Help if I’m Not an Editor?
This is where the game really changes, especially for founders wearing a dozen hats. Think of AI as your new creative partner—one that flattens the learning curve and gives you back your most precious resource: time.
AI isn’t here to replace your creative vision. It’s here to amplify it. It takes care of the tedious stuff so you can focus on the big picture: telling your brand’s story.
Tools like Icona Studio are designed with an intuitive interface that automates tasks that used to take years to master.
- One-Click Background Removal: Instantly pop your product out of its background without the headache.
- AI Scene Generation: Dream up realistic lifestyle scenes without scouting a location or hiring models.
- Endless Variations: Generate dozens of unique backdrops in minutes, perfect for A/B testing to find out what actually connects with your customers.
Simply put, AI tools tear down the technical barriers, letting you create professional-grade imagery without becoming a Photoshop wizard.
What Is the Single Most Important Element to Get Right?
If you walk away with only one piece of advice, let it be this: lighting is everything.
I can’t stress this enough. Great lighting is the foundation of every amazing product photo. It shapes colors, brings out textures, and sets the entire mood. You can have a $5,000 camera, but terrible lighting will make your photos look amateurish every time.
On the flip side, even if you’re shooting with your smartphone, focusing on getting soft, beautiful light will have the biggest possible impact on your results. You can fix a lot in post-production, but you can almost never salvage a poorly lit photo.
Ready to close the gap between browsing and buying? Icona gives your customers a virtual try-on experience that builds confidence and drives sales, all while creating incredible AI-generated product photos on demand.
Discover how Icona can transform your Shopify store today.
We’ve all been there. You find the perfect dress online, stare at the confusing size chart, and click ‘buy’ with a hopeful guess. The package arrives, the fit is all wrong, and now you’re stuck printing a return label. This isn’t just a customer problem; it’s a multi-billion dollar headache for online stores.
But what if you could give your customers the confidence to know it will fit before they even add it to their cart? What if you could turn that guesswork into a moment of delight?
The End of Online Shopping Guesswork
That sinking feeling when a new outfit doesn’t fit is a universal pain point in eCommerce. It’s the friction that costs Shopify merchants a fortune in returns, lost sales, and eroded customer trust. For years, the only solution was a static size chart—a tool that barely accounts for the beautiful diversity of human body shapes.
A fundamental shift is happening in 2025. Imagine your customers trying on your latest collection from their living room, seeing exactly how a garment drapes on their unique body. This isn’t a sci-fi dream; it’s what virtual fitting rooms are making possible for Shopify stores right now.
This is where technology meets emotion, turning uncertainty into a confident “yes.”
Moving from Novelty to Necessity
For a long time, virtual try-on felt like a gimmick. Early versions were clunky, unrealistic, and frankly, more frustrating than helpful. But thanks to massive leaps in AI and augmented reality, that’s changing—fast. In 2025, virtual fitting rooms are moving from a quirky feature on a few big-brand sites to an accessible, essential tool for ambitious Shopify stores.
This guide will show you how this technology solves one of the biggest challenges in online fashion. You’ll learn how to:
- Build a stronger brand by offering an experience your competitors can’t match.
- Forge deeper customer connections by solving their biggest frustration.
- Drastically reduce costly returns, creating a more sustainable and profitable business.
Before we dive in, remember that success builds on solid foundations. If you’re strengthening your apparel business, our guide on essential tips for selling clothes online is a great starting point. Virtual try-on is the next step in that journey, transforming how you sell and how your customers shop.
Let’s explore what’s possible.
What Are Virtual Fitting Rooms, Really?
Let’s pull back the curtain. A virtual fitting room isn’t some single, mystical piece of tech. It’s a family of solutions designed to answer one simple, crucial question for every online shopper: “How will this look on me?”
Think of it as the next evolution of the shopping experience. For years, customers were stuck with flat, confusing size charts. Now, we have something far more personal—an interactive stylist, powered by AI, that lives right on your product page. It closes the gap between what a customer sees on their screen and what they’ll experience in reality, turning a hopeful guess into a confident “add to cart.”
This isn’t just a cool feature; it’s a direct solution to the core problems that eat away at an eCommerce store’s profits.
Take a look at this diagram. It lays out the common challenges online stores face, all stemming from a single source: fit uncertainty.
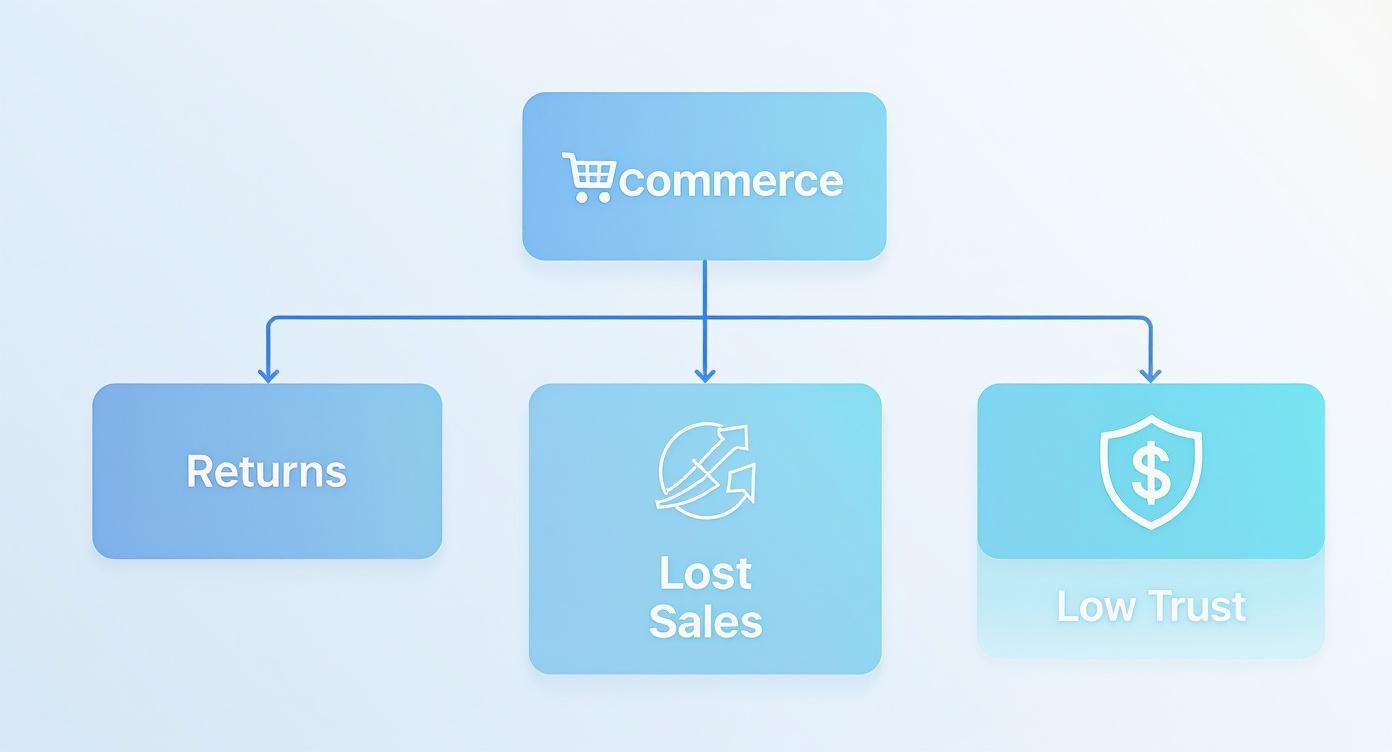
Sky-high returns, abandoned carts, and a lack of customer trust aren’t separate issues. They are all symptoms of the same root problem—a customer’s inability to truly visualize the product on their own body.
Three Types of Virtual Fitting Room Technology
While the end goal is always the same—giving customers confidence—the technology behind virtual try-ons comes in a few different flavors. Each one offers a unique experience and solves the “will it fit?” problem in its own way. Understanding them helps you choose the right tool for your store.
Here’s a quick look at the three main approaches.
| Technology Type | How It Works | Best For |
|---|---|---|
| Augmented Reality (AR) Try-On | Uses a phone’s camera to overlay a digital product onto a customer’s live video feed. Think of it as a “magic mirror.” | Accessories like glasses, hats, and jewelry where a quick, shareable visual is the main goal. |
| AI Body-Mapped Try-On | Customers provide photos or measurements, and AI creates a personalized 3D avatar. The garment is then simulated on the avatar. | Apparel where the drape, stretch, and true-to-life fit are critical. It offers the highest level of accuracy for clothing. |
| Image-Based Try-On | A customer uploads a photo, and the product image is realistically placed onto their body. It’s fast, simple, and requires no camera feed. | Apparel stores wanting a low-friction, high-impact solution. Solutions like TryIcona use this method to give a realistic preview without the complexity of 3D. |
Each path leads to a more confident customer, but the journey is a little different.
A clunky try-on experience can do more harm than good, frustrating a shopper instead of guiding them. The goal is to make the experience seamless and genuinely helpful, not just a flashy gimmick.
An Industry-Wide Shift Is Happening
This isn’t just an online trend. Virtual fitting room technology is being embraced by everyone, from nimble digital-native brands to established brick-and-mortar giants, to perfect the shopping journey and slash the massive cost of returns.
In fact, physical stores captured over 66% of the virtual fitting room market in 2024, retrofitting dressing rooms with smart AR mirrors that suggest accessories and gather priceless data on fit. For eCommerce stores, the growth is even more explosive, with a projected compound annual growth rate (CAGR) of 25.13% heading into 2025 and beyond. Every return avoided goes straight to your bottom line. You can explore more about these trends and see what they mean for the future of retail.
Ultimately, the right technology comes down to what you sell. For Shopify apparel merchants, AI-powered solutions that focus on accurate fit simulation offer the most direct path to reducing returns and boosting conversions. They tackle the core problem head-on, giving customers the one thing they’ve been missing all along: certainty.
Why Your Bottom Line Will Love Virtual Try-Ons
Adopting new tech can feel like a big leap, so let’s talk about what really matters: measurable results. When you think about a virtual fitting room, don’t just see a cool gadget—see a powerful engine for profitability. It’s a tool that directly tackles the most expensive problems in online fashion.

Slash Your Return Rates
The single most powerful benefit? A massive drop in returns. The true cost of a return is so much more than just the refund. You have shipping labels, warehouse labor, inspections, restocking, and sometimes, items that are too damaged to resell. It all adds up.
When a customer uses a virtual try-on to choose the right size with confidence, that entire expensive, painful cycle vanishes. You’re not just saving cash; you’re building a more sustainable and efficient business.
And this isn’t a small change. The global virtual fitting room market was valued at about USD 6.21 billion in 2024 and is on track to explode to USD 32.29 billion by 2032. This incredible growth is happening for one simple reason: it works.
Boost Conversions by Curing Fit Anxiety
Think about it. How many shoppers have abandoned their cart because they were stuck between a medium and a large? This hesitation, what we call “fit anxiety,” is the silent killer of conversion rates in fashion eCommerce.
A virtual try-on tool is the perfect cure. It removes the biggest point of friction in the buying journey. By finally answering the question “Will this actually fit me?” you give customers the final nudge of confidence they need to click “buy.” In the same way that we’ve seen how AI-powered product photography can boost conversion rates by making products feel more tangible, virtual try-ons make the fit feel real.
It’s more than a tool. It creates a memorable, shareable shopping experience that builds brand loyalty and makes you stand out in a crowded market. It’s an investment in customer happiness.
Unlock Priceless Customer Insights
Beyond the immediate sales impact, a virtual fitting room becomes your secret weapon for data. Every time a customer “tries on” an item, you learn something valuable.
Imagine having a dashboard that shows you:
- Most Tried-On Styles: Pinpoint which products are grabbing attention, even if they aren’t your top sellers… yet.
- Common Fit Issues: See if a particular dress is consistently tried on but rarely purchased, hinting at a sizing or design flaw.
- Size Distribution Data: Understand the true size range of your engaged audience to make smarter inventory decisions.
This isn’t generic data; it’s a direct line into your customers’ thoughts. You can use these insights to perfect your next collection, fine-tune your inventory, and design products you know your audience is waiting for. This is how you shift from being reactive to proactive, building a brand that truly listens.
Inspiring Brands Winning with Virtual Fitting
Theory is one thing, but seeing this technology in action is where the magic happens. Let’s look at how forward-thinking Shopify stores are already creating incredible customer experiences and growing their businesses.
From High Returns to Happy Customers
Imagine running a swimwear brand. It’s one of the toughest products to sell online. Fit is everything, and a generic size chart can’t capture how a specific cut will look on a unique body. This is why customers often “bracket”—buying multiple sizes of the same item, knowing they’ll send most of them back.
Now, picture that same brand adding an AI-powered try-on tool. A shopper uploads a quick photo and instantly sees how different styles look on her body. She can see for herself that the high-waisted bottom gives her the coverage she wants, and the halter top provides the support she needs.
This isn’t a gimmick; it’s a genuine solution. The brand suddenly sees a massive drop in returns and a wave of glowing five-star reviews. They’re no longer just selling swimwear; they’re selling confidence.
Turning Social Browsers into Engaged Shoppers
The power of virtual fitting goes beyond your product page. Think about a fashion boutique dropping a new collection. They could post static photos to their Instagram Story, but what if they did something more?
With AR technology, they could add a “Try It On” sticker. A person casually scrolling taps the screen, their front-facing camera opens, and suddenly, they’re wearing the new statement blazer from the collection.
This simple interaction transforms a passive scroll into an active, memorable experience. The customer isn’t just seeing the product; they’re engaging with it. This is how you stop thumbs and start conversations.
That immediate, immersive connection is an incredible way to turn casual followers into interested shoppers, pulling them from social media right into your Shopify store with a real desire to buy.
Making Advanced AI Accessible
For a long time, this kind of tech felt out of reach—only for retail giants with massive budgets. That’s just not true anymore.
Solutions like TryIcona are built specifically for the Shopify platform, putting sophisticated AI try-ons within reach for ambitious brands of any size. By plugging directly into your store, you can add a branded “Try On” button to your product pages in minutes, without writing a single line of code.
This shift is part of a global movement. The virtual fitting room market is exploding in the Asia-Pacific region, projected to grow at a CAGR of 27.73% from 2025 to 2030. Tech-savvy shoppers are already embracing these tools, setting a new standard for what online shopping should feel like. You can read more about this global retail evolution and see what it means for merchants everywhere.
These stories aren’t just case studies; they’re a blueprint for what’s next. They prove that building trust and creating “wow” moments are the keys to winning your customers’ loyalty.
Your Shopify Implementation Playbook
Ready to bring a virtual fitting room to your store? It sounds intimidating, but it’s far more achievable than you might think. Getting started isn’t about a massive, complex overhaul. It’s about taking clear, intentional steps to create an experience that feels like a natural part of your brand.
Think of it like setting up a new display in a physical store. You wouldn’t just throw products on a shelf. You’d choose the perfect spot, get the lighting right, and make sure it looks fantastic. The same care applies here.
Step 1: Choose the Right Solution
First, you need to pick the right partner. Not all virtual fitting room solutions are built the same. You need a tool that feels native to your world.
Here’s what to look for in a Shopify-first solution:
- Seamless Integration: Does it install easily from the Shopify App Store? Can you manage everything from your admin dashboard?
- Performance Focus: Your site speed is sacred. The app must be lightweight and load asynchronously, meaning it won’t slow down your pages.
- Product Compatibility: Does the tech work well with your items? For most apparel, AI-powered image-based try-ons offer a fantastic sweet spot between realism and ease of use.
- Branding and Customization: The “Try On” button and its interface should be fully customizable to match your store’s colors, fonts, and vibe.
For a deeper dive, our guide on Shopify product page customization has great insights for creating a cohesive look.
Step 2: Set Up Your Digital Showroom
Once you’ve chosen your app, setup should be simple. With a solution like TryIcona, it’s often as easy as a few clicks—no coding required. The app will automatically sync with your product catalog.
Your main task is preparing your digital assets. This is critical. The quality of the try-on experience depends entirely on the quality of your product imagery. A great virtual fitting room needs clear, high-resolution photos to work its magic.
Pro Tip: Think of your product photos as the fabric of your virtual fitting room. High-quality, well-lit images on a clean background give the AI the best possible material to work with, resulting in a more realistic try-on.
For more advanced solutions, a key step is turning flat photos into interactive digital versions. Learning how to efficiently convert 2D images to 3D models can give you a major advantage, making your virtual catalog as lifelike as possible.
Step 3: Launch to Your Customers
You’ve built this amazing new feature—now show it off! A successful launch isn’t just about flipping a switch; it’s about guiding your customers to discover and love the new experience.
Consider a multi-channel launch strategy:
- Email Announcement: Send a dedicated email to your list. Use a GIF or short video to show how easy it is. Frame it as the solution to their biggest shopping problem.
- Social Media Buzz: Create posts and stories that showcase the feature in action. Encourage user-generated content by asking followers to share their virtual try-on looks.
- On-Site Guidance: Use a simple banner or pop-up on your homepage to announce what’s new. On product pages, a small, helpful tooltip next to the “Try On” button can offer a quick tutorial.
- Gather Feedback: After you launch, be proactive. Use a simple survey or follow-up email to ask customers about their experience. This feedback is gold for making improvements.
By following these steps, you can roll out your virtual fitting room smoothly and make it a valuable part of your customer’s journey from day one.
Your Shopify Virtual Fitting Room Checklist
Here’s a simple roadmap from idea to launch.
| Phase | Key Action | Pro Tip |
|---|---|---|
| 1. Research & Discovery | Define your goals (e.g., reduce returns by 15%). Research Shopify-native apps like TryIcona. | Focus on solutions that prioritize site speed. A slow VFR is worse than no VFR. |
| 2. Selection & Vetting | Schedule a demo. Confirm the app supports your product types and customization needs. | Ask about their support. You want a partner who will be there to help you succeed. |
| 3. Preparation | Audit and upgrade your product photography. Ensure you have clean, high-res front-facing images. | Create a simple style guide for your product photos to ensure consistency across your catalog. |
| 4. Implementation & Setup | Install the app from the Shopify App Store. Customize the button and interface to match your branding. | Test thoroughly on mobile! Most of your customers will use the feature on their phones. |
| 5. Pre-Launch Testing | Have your team and a small group of loyal customers test the experience. Gather initial feedback. | Ask testers: “Was it easy?” and “Did it make you feel more confident about buying?” |
| 6. Launch & Promotion | Announce the new feature via email, social media, and on-site banners. | Create a short video or GIF showing exactly how to use it—show, don’t just tell. |
| 7. Post-Launch Analysis | Monitor analytics: conversion rates, return rates, and feature engagement. Solicit customer feedback. | Set a reminder to review your key metrics 30 days after launch to measure the initial impact. |
This checklist breaks the journey into manageable steps, setting you up for a launch that wows your customers and delivers real results.
Your First Step Toward a Smarter Store
We’ve covered a lot, from the core concepts of virtual fitting rooms to the real-world impact they have on your bottom line. It’s clear this isn’t a passing trend—it’s a real shift in how customers connect with fashion online. The era of crossing your fingers and hoping for the best with sizing is over.
This change is about swapping uncertainty for confidence. It’s about building a smarter, more profitable business by solving the billion-dollar problem of returns. The future of online retail is personal, engaging, and built on trust.
Your Journey Starts Small
Getting started doesn’t mean you need a massive, store-wide project overnight. It can be as simple as exploring a solution designed for merchants on Shopify. The best way to grasp the power of this technology is to see it through your customers’ eyes.
The goal isn’t just to add a new feature. It’s to eliminate one of the oldest and most frustrating friction points in online shopping. When you solve your customer’s biggest headache, you earn their loyalty.
Think for a moment about the value this could unlock. A solution like TryIcona can be experienced with a simple demo, giving you a firsthand look at how smoothly an AI try-on can fit into your product pages. It’s a chance to see what the future of your brand looks like.
Leading the Way Forward
Bringing a virtual fitting room to your store is about more than keeping up with tech. It’s about taking the lead. It’s about building a brand that truly listens and solves problems with empathy and creativity.
The tools to make this happen are more accessible and powerful than ever. By giving your customers the certainty they’ve always wanted, you build a brand they won’t just buy from—they’ll trust it, love it, and come back time and time again. Your smarter store is waiting.
Common Questions Answered
You’ve got questions, and that’s a great sign. It means you’re thinking seriously about how a virtual fitting room can elevate your store. Let’s dig into the common concerns we hear from Shopify merchants like you.
Will a Virtual Fitting Room Slow Down My Shopify Store?
Performance is everything, and this is the first question you should ask. The good news is that modern solutions are built to be incredibly lightweight.
A Shopify-first app like TryIcona loads asynchronously. This means your most important content—your product images, description, and “Add to Cart” button—all load first. The try-on magic only kicks in when a shopper clicks the button, so it never bogs down your initial page load speed.
Is This Technology Accurate Enough for Customers?
Accuracy has come a long way. AI-powered body mapping can now reach an incredible level of precision, making it far more trustworthy than a generic size chart.
The secret is feeding the system high-quality digital versions of your garments. While no tech is 100% perfect, the aim is to give shoppers a drastically better idea of fit than they could ever get from guessing. This is what turns uncertainty into confidence and puts a major dent in fit-related returns.
The goal isn’t to be flawless—it’s to be genuinely helpful. A well-designed virtual try-on replaces a customer’s anxious guess with a confident choice.
What Happens to My Customers’ Data and Photos?
Privacy is non-negotiable. Any reputable provider builds their solution with data security as the foundation.
Typically, customer photos are either processed on their own device or are encrypted for secure processing on a server, but they are not stored long-term. Always choose a solution that’s transparent about its data policies and complies with standards like GDPR. The data used for fit analysis should always be anonymized and aggregated, never tied back to an individual without consent.
How Much Does a Virtual Fitting Room Cost?
This is where things have really changed for the better. The cost has become much more accessible for Shopify merchants thanks to subscription models. Instead of a massive upfront investment, most solutions run on a flexible monthly fee.
Pricing is usually tiered based on your store’s traffic or catalog size. You’ll find that many apps on the Shopify App Store offer free trials or affordable starter plans, which is perfect for proving the ROI for yourself before you commit.
Ready to see how an AI-powered try-on can change your customer experience? Explore TryIcona and discover a virtual fitting room built to blend seamlessly with your Shopify store, build shopper confidence, and drive more sales. Get started with a free plan today.
We’ve all been there. You find the perfect dress online, but your cursor just hovers over the “add to cart” button. A storm of questions floods your mind: Will it actually fit me? Is the color the same in real life? That tiny moment of doubt is where sales die and frustrating returns are born.
But what if you could erase that doubt for your customers? The try before you buy dresses concept isn’t a gimmick; it’s a direct answer to the biggest pain point in online fashion. In 2025, it’s about closing the gap between the convenience of online shopping and the confidence of an in-person fitting room, turning hesitation into a happy, decisive purchase.
The End of Online Shopping Guesswork
The ‘try before you buy’ model isn’t just a passing fad. It’s a powerful response to a deep-seated customer need for confidence. It’s about bringing the trusted experience of the dressing room right into their living room. By taking the speculation out of the equation, these tools are becoming an essential piece of modern conversion optimization strategies, giving customers the final push they need to click “buy.”

Why This Matters More Than Ever
The demand for this isn’t just a feeling—the data tells a compelling story. An incredible 74% of apparel shoppers admit to abandoning a purchase simply because they can’t try the item on first. What’s more, a huge majority say they would actively choose a store that offers a try-on feature over one that doesn’t. You can discover more about these consumer trends and see for yourself just how significant this shift in shopper expectation has become.
But this is about so much more than securing one sale. It’s about transforming your relationship with your customers. When you remove the biggest point of friction in their journey, you start to see a cascade of incredible benefits:
- Dramatically Lower Return Rates: When a customer knows how a dress will fit and look, there are far fewer unwelcome surprises, which means fewer packages heading back to your warehouse.
- A Huge Boost in Customer Loyalty: A confident and satisfied shopper is one who comes back again and again—and tells their friends about you.
- Skyrocketing Conversion Rates: Eliminating doubt is the most direct path to more completed checkouts. It’s that simple.
For any Shopify store owner who is serious about slashing return rates and building a base of fiercely loyal fans, offering a modern try-on experience is the most powerful next step you can take.
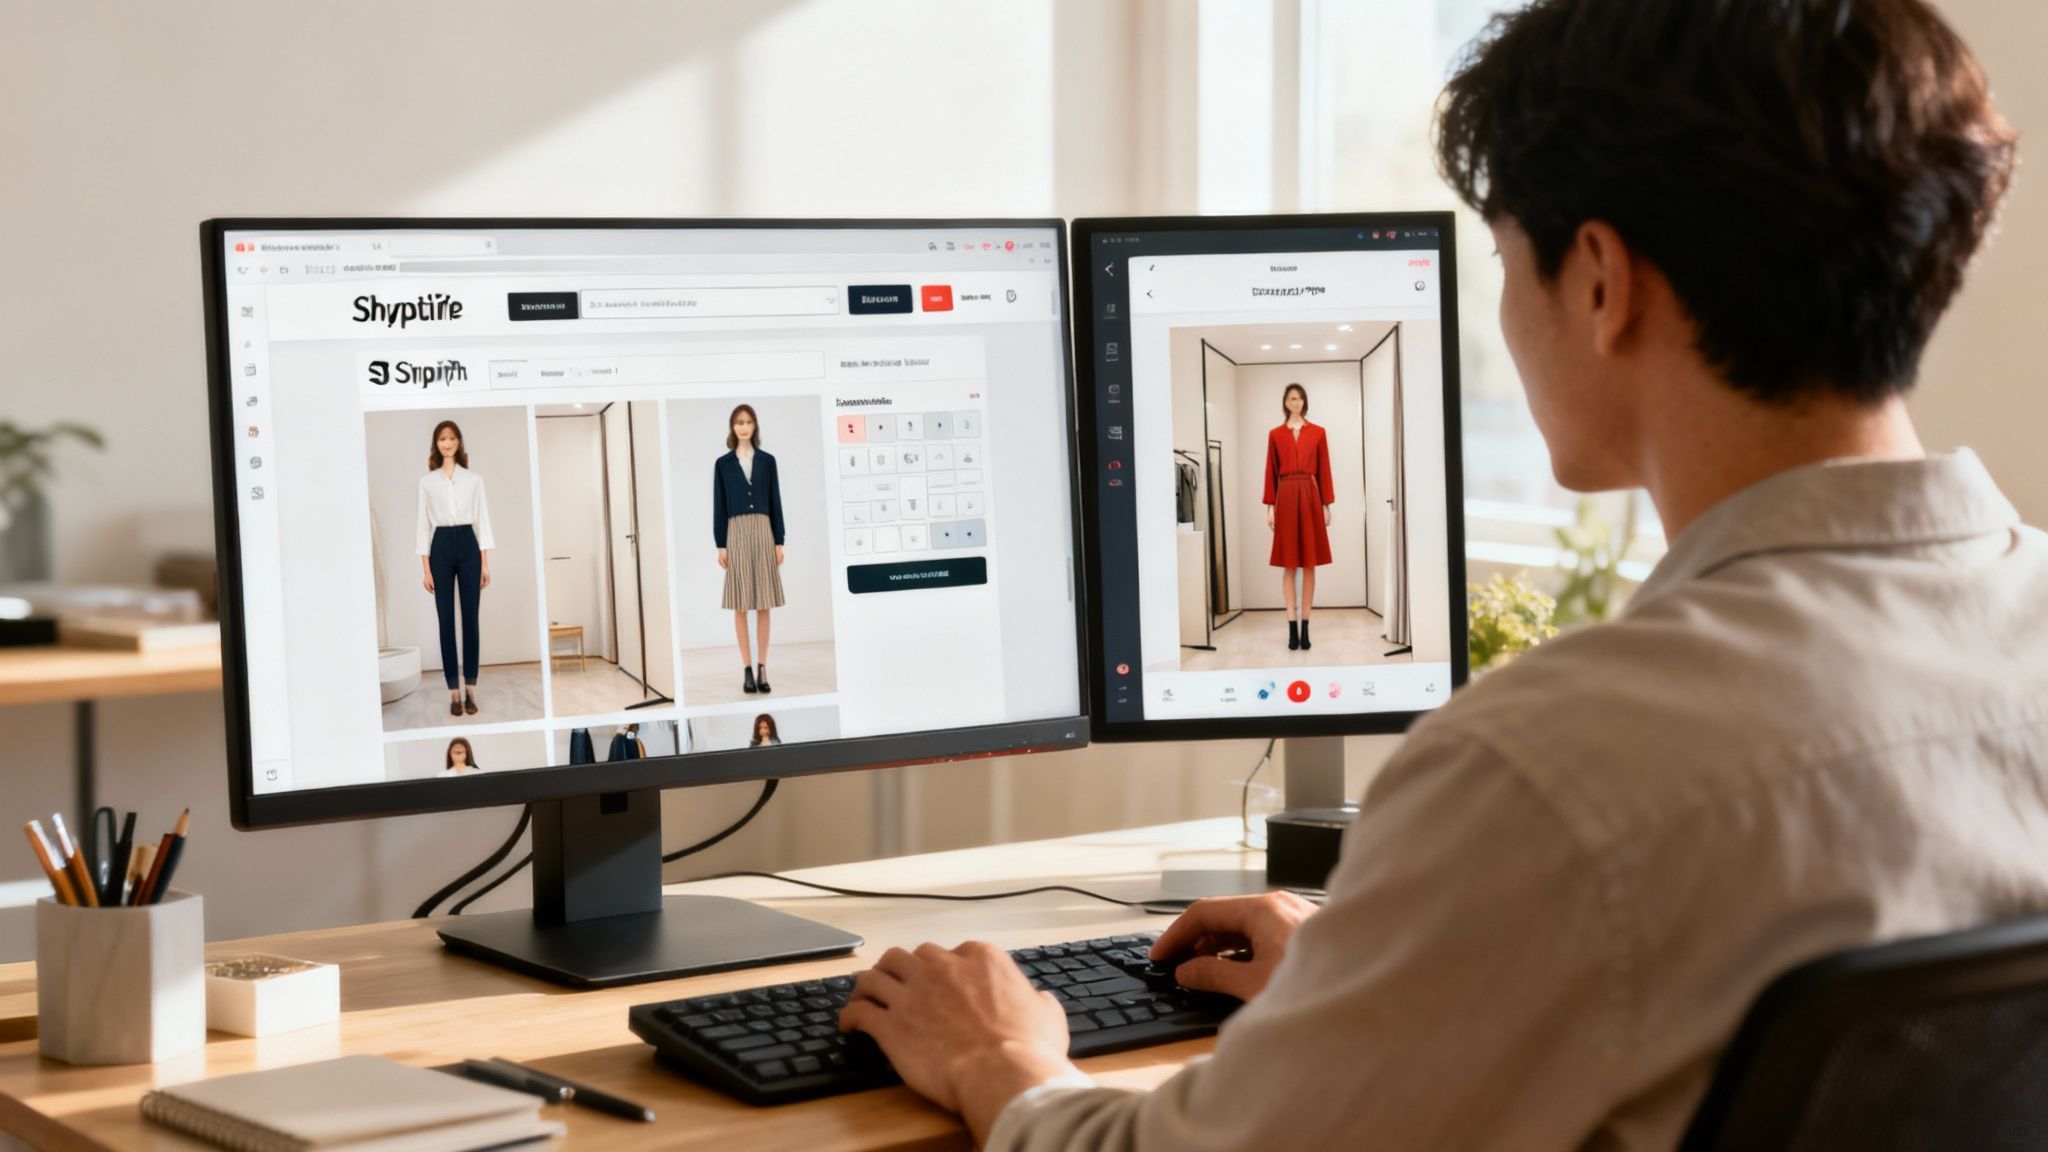
Bringing the Fitting Room to Your Product Page
Imagine turning your static product pages from simple photo galleries into dynamic, confidence-building experiences. This is where you can dissolve a shopper’s hesitation and turn it into a confident “add to cart” click.
Thankfully, integrating a virtual try-on feature into your Shopify store isn’t the complex, code-heavy project it once was. With a tool like Icona, you can get this up and running directly from the Shopify App Store in just a few minutes. No digging into theme files, no hiring developers. You’re in the driver’s seat.
So, where do you start? I always advise merchants to focus on where they can make the biggest impact first. Which dress collections cause the most sizing headaches? Which ones have stubbornly high return rates? That’s your starting line. You can selectively enable the feature for specific products or entire collections, giving you the power to test and roll it out with a clear strategy.
Placing Your Confidence Booster
Once you’ve picked your dresses, the next big decision is where to put the ‘Try It On’ button. You want it to be impossible to miss, incredibly inviting, and a natural part of how someone shops your store.
From my experience, the sweet spot is right near the size selector and the ‘Add to Cart’ button. This isn’t by accident. It strategically positions the try-on as a core part of the decision-making process.
Think of it this way: your customer is considering the size, the color, and now, how it will actually look on them. Placing the try-on button right in that decision zone makes it an essential step, not just a cool feature.
The whole point is to present this as a genuinely helpful service. The button’s design and placement should feel like a premium feature that makes their life easier, not a clunky add-on that gets in the way.
Configuration Without the Complication
Getting set up should be fast and laser-focused on results. The best tools handle all the heavy lifting behind the scenes, making sure the feature loads in a snap without hurting your page speed—something we all know is critical for keeping shoppers from bouncing.
From your Shopify admin, you can manage everything you need:
- Model Setup: Start by uploading your high-quality product photos.
- Feature Activation: Simply toggle the try-on feature on for your chosen dresses.
- Button Customization: Tweak the look and feel of your call-to-action button so it blends perfectly with your brand’s aesthetic.
The entire process is designed to be straightforward. If you’re curious about the mechanics, you can explore the concepts behind this powerful virtual try-on technology to see what makes it all work.
Ultimately, your mission is simple: turn that moment of customer uncertainty into a powerful reason to buy, making your store the go-to destination for anyone looking to purchase a dress online with total peace of mind.
Crafting a Try-On Experience That Feels Real and Inclusive
A virtual try-on is only as good as it is believable. If the experience feels clunky, fake, or disconnected from reality, you’ve lost the very trust you were trying to build. This is where we move from just flipping a switch on a new feature toward creating a genuine connection with every person who visits your store.
It all begins with your product photography. This is your foundation. We’re talking clear, well-lit shots from multiple angles that honestly capture the fabric’s texture and the dress’s true color. Think of your product photos as the canvas; the AI technology is the brush that brings the final masterpiece to life.
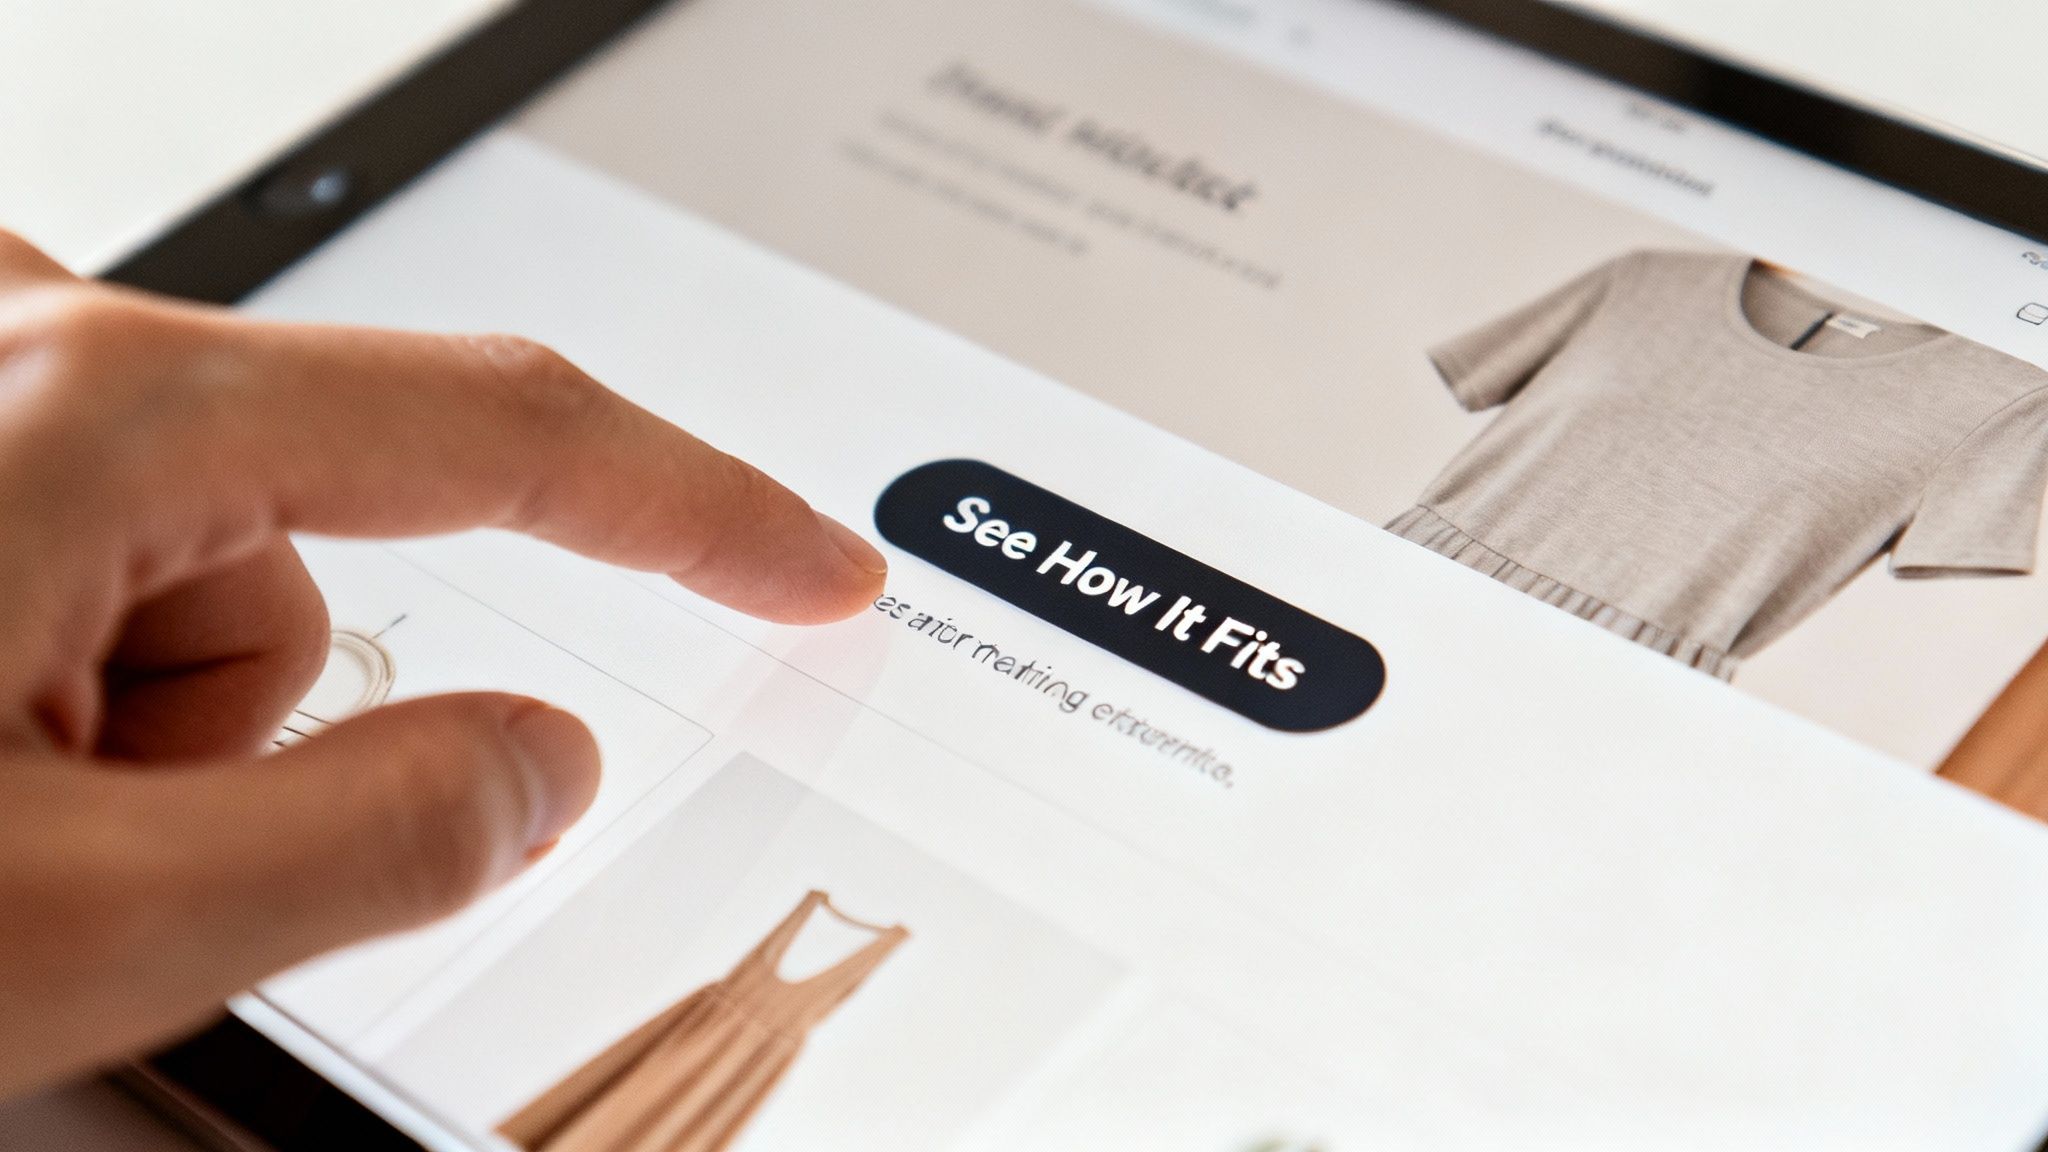
The whole point is to make this journey seamless for your customer. They see a dress they love, and in a couple of clicks, they can see how it might look on them. It’s that simple.
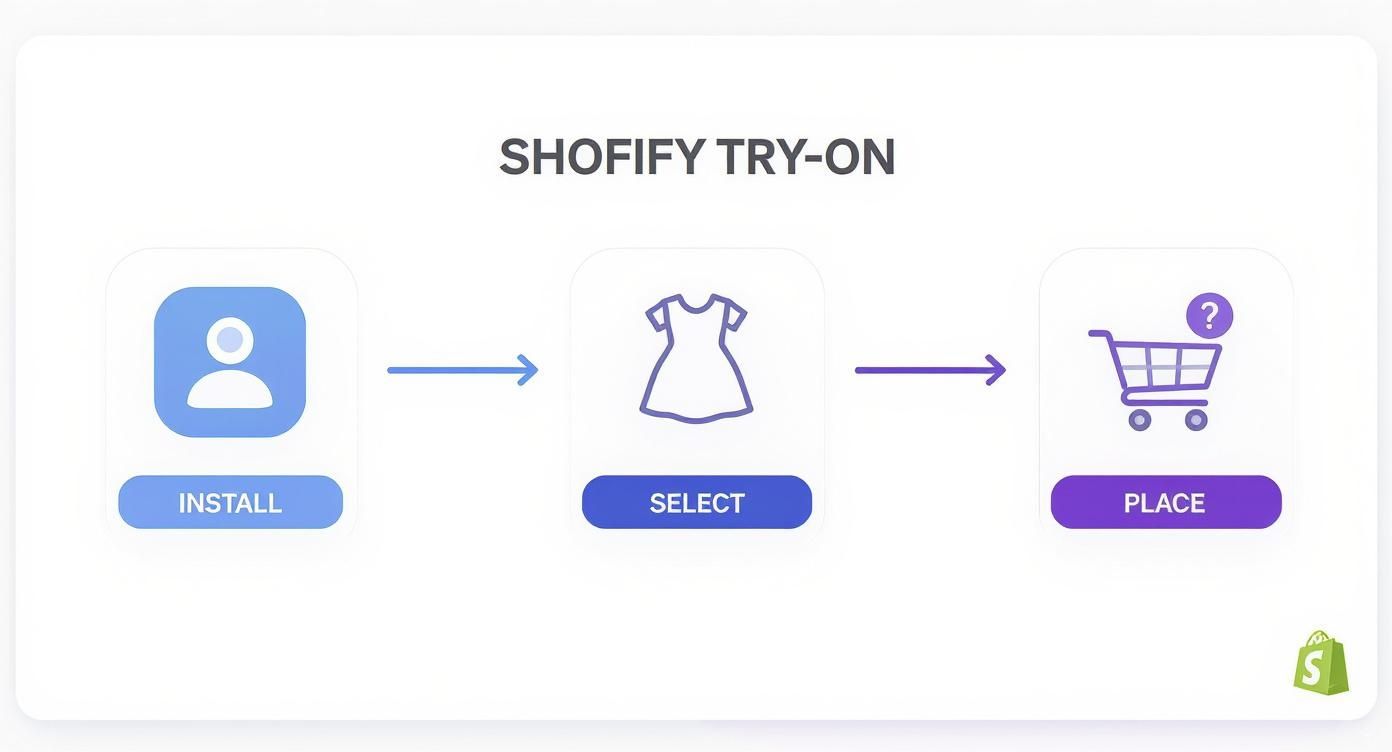
This quick, three-step flow is designed to feel effortless, removing any friction that might stand between your customer and that “add to cart” button.
From Mannequins to Mirrors
Here’s the game-changer: moving away from lifeless mannequins and embracing a lineup of models that actually looks like your customers. This is how you go from just selling dresses to building a loyal community. Using a tool like Icona Studio, you can generate a beautifully diverse range of AI models without the eye-watering cost of traditional photoshoots.
The goal? Make every single shopper feel seen.
- Diverse Body Types: Show your dresses on a variety of body shapes and sizes. This is more than just a nod to inclusivity—it directly answers the shopper’s biggest question: “But how will it look on me?”
- A Spectrum of Tones & Heights: Represent the real, beautiful diversity of the women you’re selling to. When a customer sees a model who reflects her own image, the product instantly becomes more personal, more attainable, and far more desirable.
This isn’t some fleeting trend; it’s where the entire industry is headed. The virtual fitting room market is projected to skyrocket from USD 5.57 billion in 2025 to an incredible USD 20.65 billion by 2030. That explosive growth is happening because technology is finally making it possible for brands of all sizes to offer realistic, inclusive shopping experiences. You can see the full research on the virtual fitting room market to truly appreciate the scale of this shift.
Showing Off the Perfect Fit
Getting the visuals right is what separates a good try-on experience from a great one. The way a dress drapes, hangs, and moves is something a flat image on a mannequin can never capture. To help you nail this, here’s a quick cheat sheet.
Visual Best Practices for Virtual Try-On
| Visual Element | What to Avoid (Low Conversion) | What to Do (High Conversion) |
|---|---|---|
| Model Posing | Stiff, robotic, or unnatural poses. | Natural, relaxed stances that mimic real life. |
| Lighting | Inconsistent, shadowy, or flat lighting that hides details. | Clear, even lighting that shows off fabric texture and color accurately. |
| Product Angle | A single, front-on shot that doesn’t show the full garment. | Multiple angles (front, back, side) to give a 360-degree feel. |
| Model Diversity | Using only one body type, height, or skin tone. | Showcasing the dress on a wide range of representative models. |
| Focus | The background is busy or distracting. | The dress and the model are the clear heroes of the image. |
Ultimately, you want your visuals to do the heavy lifting—answering questions about fit and feel before they’re even asked.
The best virtual try-on doesn’t just show what a dress looks like; it shows how it behaves. A static, lifeless image can’t communicate the flow of a silk skirt or the structure of a tailored bodice.
Use poses that feel authentic and highlight what makes each dress special. A slight turn of the hip can reveal intricate back detailing, while a casual, hand-in-pocket stance can convey everyday comfort. It’s all about creating an empowering, confidence-boosting moment that closes that nagging gap between the screen and reality. Get this right, and you’ll see those costly, fit-related returns start to disappear.
Writing Copy That Inspires a Click
You’ve done the hard work of setting up a beautiful, inclusive visual experience. The technology is running smoothly. But what good is it if your customers don’t feel that little spark of curiosity to actually click the button? The words you choose are every bit as important as the feature itself.
Sure, the generic “Try It On” is a starting point, but let’s be honest—it’s a bit dry. We’re not just offering a function here; we’re offering a feeling of confidence, of excitement, of certainty. The goal is to shift from a simple command to an emotional invitation.
Beyond the Basic Button
Put yourself in your customer’s shoes for a second. What are they really thinking in that moment of hesitation before they buy? They’re trying to imagine how that dress will look on them, not just on the model. Your call-to-action (CTA) needs to speak directly to that desire.
This is the perfect place to run a few A/B tests and see what truly resonates with your audience. Instead of the default, try a few more compelling alternatives:
- See How It Fits: This is my personal favorite. It’s direct, benefit-focused, and answers the biggest question on their mind.
- Visualize Your Look: This one is a bit more aspirational, inviting them to dream and play with their style.
- Find My Perfect Fit: I love this because it feels personal. It positions your tool as a helpful, problem-solving assistant.
A simple wording change can completely reframe the feature, moving it from a cool gimmick to an essential shopping tool. It’s one of the most powerful yet overlooked tips for selling clothes online, and it can dramatically change how shoppers engage with your products.
The Power of Reassuring Microcopy
While the button grabs their attention, it’s the small, supporting text nearby—the microcopy—that builds the trust they need to take the next step. This is your moment to quickly explain the why behind the click and get rid of any friction or doubt.
Think of your microcopy as a quiet whisper of reassurance. It’s there to say, “This is easy, this is for you, and this will help you make a choice you’ll love.” It’s all about making something new feel familiar and safe.
Place this text right below or beside your CTA button. It’s your secret weapon for overcoming objections before they even fully form.
Microcopy Examples That Build Trust:
| Goal | Example Copy |
|---|---|
| Highlight Confidence | “Shop with confidence. No more size surprises.” |
| Emphasize Simplicity | “See it on a model like you in seconds.” |
| Focus on the Outcome | “Get the perfect fit, the first time.” |
| Address Privacy | “Your photo is private and deleted automatically.” |
This isn’t about writing an essay; it’s about choosing the perfect few words. By pairing a compelling CTA with a line of reassuring microcopy, you transform your virtual try before you buy dresses feature into a genuinely intuitive and valuable part of the shopping journey. You’re no longer just asking for a click—you’re guiding them toward a purchase they’ll feel fantastic about.
Measuring the Impact on Your Bottom Line
So, you’ve rolled out this incredible virtual try-on experience. It looks great, customers are curious, but now comes the real question: how do you prove it’s more than just a slick new feature? You have to connect it directly to your bottom line.
Forget gut feelings. We’re talking about hard numbers that show the real impact on your store’s health. This isn’t about getting lost in endless spreadsheets, either. It’s about zeroing in on a few crucial metrics that tell a powerful before-and-after story. Your own Shopify Analytics dashboard is the perfect place to start digging.
The whole point is to draw a straight line from a customer clicking “See How It Fits” to tangible, positive changes in your revenue and operational costs. This is how you make an undeniable case for the ROI.
The Metrics That Truly Matter
Vanity metrics don’t pay the bills. We’re focusing on the numbers that directly pad your pocketbook. Once you start tracking these, the value of a try before you buy dresses program becomes impossible to ignore.
Here’s exactly what I tell my clients to watch like a hawk:
- Conversion Rate Lift: This is the heavyweight champion of metrics. Simply compare the conversion rate on product pages with the try-on feature against those without it. A lift of even 1-2% on your best-selling dresses can mean a huge boost in new revenue over the year.
- Reduced Return Rates: This one is pure gold. Track the return rate for your key dress styles before and after you went live. Every return you prevent is a direct win for your bottom line, saving you a ton of money, time, and logistical migraines.
- Average Order Value (AOV): When a customer feels certain about a dress, does it give them the confidence to add more to their cart? Keep a close eye on your AOV. I’ve seen it happen time and again—once they know that one key piece will fit, they feel much more comfortable grabbing that matching clutch or a pair of earrings.
Tracking User Engagement
Beyond the final sale, you need to know if people are actually using the feature. This insight is everything. Your app dashboard, like the one inside Icona, should let you see exactly how many people are clicking the try-on button and how long they’re interacting with it.
Think of engagement as the leading indicator of success. High engagement proves the feature is solving a real customer problem—hesitation. When shoppers are actively using the tool, a lift in conversions and a drop in returns are sure to follow.
This is especially true in a hyper-competitive space. The fast fashion industry, for instance, is projected to explode from USD 148.23 billion in 2025 to nearly USD 318 billion by 2032. In a market that massive, features that remove friction and build trust are what separate the winners from everyone else. You can learn more about the fast fashion market’s growth and see why try-on is becoming a must-have.
By keeping an eye on both sales impact and user engagement, you get the full story. You’ll have the concrete data to prove that your investment in a virtual fitting room isn’t just another expense—it’s a powerful engine for growth.
Common Questions About Virtual Try-On
Jumping into a new way of selling always brings up a few questions. That’s a good thing—it means you’re thinking strategically. When it comes to something as personal as a virtual try before you buy dresses experience, I’ve found that merchants usually circle back to the same core concerns about performance, setup, and scope.
Let’s clear the air and tackle the big ones head-on, so you can move forward with total confidence.
Will This Slow Down My Shopify Store?
This is, without a doubt, the number one question I get—and for good reason. We’ve all spent countless hours optimizing site speed, and the last thing anyone wants is a new feature undoing all that hard work.
Here’s the good news: modern virtual try-on solutions like Icona were built with this exact problem in mind. They’re designed to load independently, almost like a separate element on the page. Your crucial content—product images, descriptions, and that all-important ‘Add to Cart’ button—loads first, keeping that snappy experience your customers expect. The try-on feature only fully activates when a shopper actually clicks on it, so it never becomes a performance bottleneck.
How Many Models Should I Offer?
The goal here isn’t to overwhelm your customers with endless choices, but to provide meaningful representation. You absolutely don’t need a hundred models; you just need the right ones.
A great starting point is to offer between 4-6 diverse models. Focus on showcasing a range of body shapes, sizes, and ethnicities that genuinely reflect your customer base. This gives most shoppers enough variety to find a model they connect with, making them feel seen and understood without causing “choice paralysis.” You can always add more later based on your analytics and customer feedback.
If you’re still wrapping your head around the core concept, this guide explaining what a virtual model is offers a great deep-dive into the technology.
Can I Use This for More Than Just Dresses?
Absolutely! While dresses are a perfect place to start—we all know how tricky their fit can be—this technology is incredibly versatile. Just think about any other category where fit is a major hurdle for your customers.
We’ve seen it work wonders for:
- Tops and blouses
- Jackets and blazers
- Skirts and even some styles of pants
The principle is universal: reduce uncertainty, build confidence. My advice? Be strategic. Start with the product category that has the highest return rate due to fit issues. For many stores, that’s dresses. Nail your process there, prove the ROI, and then expand.
By taking a focused approach first, you can master the strategy before rolling it out across your entire store. It’s a smart way to scale a feature that can fundamentally change how customers connect with your brand, turning your store into the place they trust for a perfect fit, every single time.
Ready to turn shopper hesitation into confident sales? Icona makes it simple to add a powerful, AI-driven virtual fitting room to your Shopify store in minutes. Boost conversions, slash returns, and give your customers the confidence they deserve. Start your free plan today and see the difference for yourself.
We’ve all been there. You launch a new collection you’re obsessed with, and… crickets. Or a bestseller suddenly starts getting returned more often. It feels like you’re trying to navigate in the dark.
But what if the map to better decisions was right there, held by the very people you’re trying to serve? This is where modern, thoughtful customer feedback forms become your superpower. They’re not just about satisfaction scores; they’re your direct line to understanding why your customers do what they do, uncovering truths that raw data will always miss.
Why Feedback Is Your Most Valuable Asset in 2025
Let’s get one thing straight: this isn’t about those clunky, ten-page surveys from a decade ago. In 2025, gathering feedback is all about starting smart, personal conversations at scale. Your Shopify store is packed with moments where a single, perfectly timed question can reveal a game-changing insight.

These forms aren’t just another tool; they represent a fundamental shift in how you connect with your community. They’re your secret weapon for:
- Finding hidden friction: Pinpointing those annoying little snags in the shopping journey that your analytics reports will never show you.
- Validating new ideas: Testing the waters for a new collection or feature before you sink a ton of money into it.
- Building real loyalty: When you show customers you’re actually listening, you turn casual shoppers into brand advocates.
Think of it this way: Analytics tell you what happened, but your customers tell you why. That “why” is where the magic lives. It’s the difference between guessing what works and knowing for sure.
This guide is your roadmap to asking better questions. We’re going to dive into how weaving feedback opportunities directly into the shopping journey can give you the kind of insights that truly transform your business. You’ll learn how to ask questions that uncover not just what people think, but the emotions and motivations that drive their decisions.
To make sure you’re getting the most out of every interaction, it’s worth learning how to design truly high-converting customer feedback forms that get you the data you need without annoying your customers.
Weave Feedback into the Customer Journey
The real genius of these forms comes to life when you integrate them seamlessly into your customer’s experience.
Imagine asking for a quick opinion right after someone uses a virtual try-on tool. Instead of a generic rating, you’re capturing their immediate, gut reaction to seeing your dress on their body. Some of the best insights come when you ask for feedback in context, for example after a shopper uses TryIcona to see how an item fits.
This kind of contextual feedback is pure gold. It helps you see every part of your marketing funnel through your customer’s eyes. You’re no longer just guessing; you’re having an active conversation that helps you fine-tune everything from product descriptions to your return policy based on real input. When you start treating customer voices as your most valuable asset, you stop making assumptions and start building a brand that people know is listening.
How to Ask Questions That Spark Real Insights
The difference between a generic answer and a game-changing insight always comes down to the question you ask. “Rate your experience” is easy, but it won’t tell you why a customer ditched their cart right after a virtual try-on. To get real answers, you have to ask real questions.
Forget vague queries. Your goal is to start a conversation that reveals the hidden thoughts and feelings behind every click. For apparel brands, this is everything. You’re not just selling a product; you’re selling a feeling, a fit, an entire experience. Your questions have to reflect that.

This is your guide to crafting strategic questions that feel less like a survey and more like a personal stylist genuinely asking for an opinion. It’s all about knowing what to ask—and more importantly, when to ask it.
The Power of Open vs. Closed Questions
Think of your questions as a toolkit. You’ve got different tools for different jobs, but the two most important are closed-ended (like multiple-choice or ratings) and open-ended (those inviting free-form text).
- Closed-Ended Questions: These are your scalpel—perfect for getting quick, quantifiable data. Use them to measure satisfaction, confirm a choice, or let users quickly categorize their experience. They are fast to answer and a breeze to analyze.
- Open-Ended Questions: This is your conversation starter. An open text box is an invitation to tell a story. It’s where you’ll uncover the “why”—the emotional, detailed context that raw numbers can never give you.
The real magic happens when you pair them up. Kick things off with a simple closed question for a quick response, then immediately follow up with an open-ended one to dig deeper. For instance, “Did the virtual try-on help you decide?” (Yes/No), followed by, “What could have made the experience even better?”
This simple blend gets you incredibly rich data without causing the dreaded survey fatigue. You respect their time while still making it easy for them to share what’s really on their mind.
Questions for Every Stage of the Journey
Your customer’s mindset shifts as they move through your store, so your questions need to shift right along with them. To make sure your questions are hitting the mark, it can be a huge help to review proven customer feedback survey templates to see what works.
To get you started, here’s a simple matrix to help you match your questions to the right moment in the customer journey.
Feedback Form Question Matrix for Apparel Stores
Tailor your questions to the specific customer touchpoint to gather the most relevant insights for your Shopify apparel store.
| Customer Journey Stage | Goal of Feedback | Sample Question (Multiple Choice) | Sample Question (Open-Ended) |
|---|---|---|---|
| After a Virtual Try-On | Understand fit perception and purchase confidence. | How confident do you feel about the fit after using the virtual try-on? (5-star rating: 1=Not confident, 5=Very confident) | What was the one thing you noticed about the fit that helped you make a decision? |
| On the Order Confirmation Page | Uncover the final trigger that led to a purchase. | What was the main reason you decided to buy today? (Options: The style, The virtual try-on, A special offer, A recommendation) | We’re so excited for you to get your order! What are you most looking forward to about this item? |
| Post-Delivery Follow-Up Email | Measure product quality, real-world fit, and overall satisfaction. | Now that you’ve tried it on, how did the actual fit compare to your expectation? (Options: Better than expected, As expected, Worse than expected) | How did you feel when you wore it for the first time? We’d love to hear the details! |
By asking the right questions at the right time, you’re not just collecting data; you’re building a brand that listens, adapts, and grows right alongside its community.
Finding the Perfect Moment to Ask for Feedback
Timing is everything. Ask for feedback at the wrong time, and it’s just noise—an annoying interruption. But ask at the right moment? It feels like you’re reading your customer’s mind.
The secret is to stop treating feedback as a separate, formal event. Instead, you need to weave it directly into the natural flow of the shopping experience. The goal is to make your request feel so intuitive and helpful that customers actually want to share their thoughts.
This isn’t about blasting every visitor with a generic popup the second they land on your site. It’s about spotting those small but critical moments where a customer has just formed a strong opinion and making it incredibly easy for them to voice it.
Pinpoint Your High-Impact Touchpoints
Every Shopify store has these little “golden windows” for feedback—those moments when a customer is most engaged and most likely to have something powerful to share. You just have to know where to find them.
These are the spots where a single, well-placed question can deliver a goldmine of insight:
- Right After a Virtual Try-On: This is your prime opportunity. Don’t miss it. The customer has just seen how your garment looks on their own body. A simple, non-intrusive prompt here captures that raw, unfiltered reaction to the fit, style, and their overall confidence in the item.
- On the Order Confirmation Page: They just said “yes!” The excitement is fresh, the credit card is away. This is the perfect time to hit them with a forward-looking question like, “What was the one thing that sealed the deal for you today?” Their answer might be the virtual try-on, a specific product photo, or a customer review you never realized was so impactful.
- In Your Post-Purchase Emails: Once the package lands on their doorstep, the experience shifts from digital to physical. An email a week or so later asking how the clothes actually fit and feel in the real world is crucial. This is how you find out if your virtual try-on and product descriptions are truly aligned with reality.
Think of these moments as a natural conversation. You wouldn’t interrupt a friend mid-story to ask what they think of you. You’d wait for a natural pause. Your store’s customer journey is full of these pauses—learn to use them.
Get Creative with Your Channels and Triggers
While your website is home base, your customers are interacting with your brand all over the place. By using smart triggers and creative placements, you can capture valuable feedback from every corner of your brand’s world without ever feeling pushy.
Let’s move beyond the basic email survey or the predictable on-site popup. In 2025, shoppers are surprisingly open to sharing their thoughts, but only if the process is seamless and they feel like you’re actually listening. The data backs this up: 60% of customers have posted a business review when prompted by a brand. To dig deeper, check out the full report on customer service trends from Nextiva.
This willingness opens up some really exciting new ways to connect.
Fresh Ideas for Feedback Collection
Ready to meet your customers where they are? Give these modern approaches a shot:
- Smart Behavioral Triggers: Don’t show your feedback form to everyone. Set it to appear only after a shopper takes a specific action, like viewing three dresses from the same collection or adding a second item to their cart. This shows you’re paying attention to their individual journey.
- QR Codes on Packing Slips: This is a brilliant, low-tech tactic that too many brands sleep on. A simple QR code on the packing slip can link directly to a mobile-friendly form. Ask about the unboxing experience or their first impression of the fit right out of the box.
- SMS Follow-Ups: For customers who’ve opted into your SMS list, a quick, friendly text a few days after delivery feels incredibly personal and gets fantastic response rates. Something as simple as, “Hey [Name], how are you loving the new jeans? We’d love your thoughts!” can work wonders.
By mastering the art of the perfect moment, you turn a simple feedback form into a powerful engine for building real relationships, uncovering game-changing insights, and creating a brand that people are genuinely excited to be a part of.
Making Your Feedback Work for You: A Shopify Integration Guide
Collecting feedback is one thing. But letting those golden insights sit untouched in a spreadsheet? That’s a missed opportunity. The real magic happens when you plug that customer voice directly into the tools you use to run your store every single day.
Think of it this way: your customer feedback is a live conversation. Your Shopify ecosystem is where you make all your big decisions. You need that conversation to be front and center for everyone—your marketing team, your product designers, your customer service heroes.
When your data flows freely between your tools, you can stop just reacting to issues and start getting ahead of them. This is how you build a brand that people truly feel connected to.
Choosing Your Feedback Hub
First, you need a way to build and manage your forms. The Shopify App Store is packed with great options, and the best one for you really depends on what you want to ask and how deep you want to go.
Here are a few of the most trusted players in the game:
- Shopify Forms: This is Shopify’s own tool, and it’s fantastic for getting started. It’s clean, simple, and perfect for creating on-brand email sign-up forms or basic contact pages right from your admin. No fuss, no muss.
- Typeform: If you want your forms to feel more like a friendly chat than a survey, Typeform is a beautiful choice. Its conversational style and smart “logic jumps” are perfect for guiding customers through more detailed feedback sequences without it feeling like a chore.
- Jotform: For those who need a true workhorse with near-limitless customization, Jotform is a powerhouse. It has a massive template library and can handle anything from a quick poll to a super-detailed post-purchase questionnaire.
The most important thing? Pick a tool that not only looks great but also integrates smoothly with the rest of your tech stack.
Creating a Single, Unified Customer View
Now, let’s get to the exciting part. Integrating your forms with other platforms is what transforms scattered comments into a powerful intelligence engine. You’re trying to marry the qualitative “why” from your feedback with the quantitative “what” from your analytics.
This is where you see the complete story. Imagine a customer leaves a comment about “the sleeves being shorter than expected.” By connecting your feedback tool to an analytics platform, you can see that comment right alongside their virtual try-on session for that exact product. Boom. You’ve just found a concrete, actionable insight.
This connected system becomes your single source of truth. It’s how you spot trends that would otherwise be invisible, like realizing that shoppers who use the virtual try-on and leave positive feedback are 50% more likely to become repeat customers.
To make this happen, start by focusing on these key integrations:
- Sync with Your Email & SMS Platform: Connect your form to a tool like Klaviyo. When a customer leaves feedback, you can automatically tag their profile. You could create a “Fit Confident” segment for everyone who gave a 5-star rating on fit and send them a special campaign for new arrivals.
- Connect to Your Help Desk: Hook your feedback into Gorgias or Zendesk. If a customer reports a problem, a support ticket can be created instantly. Your team can then jump on it, solve the issue, and turn a potentially negative experience into one they’ll remember for all the right reasons.
- Feed Data into Your Analytics: Most importantly, make sure your feedback data is flowing into your core analytics platforms. Seeing a customer’s comments next to their try-on data is how you finally connect the dots between how they thought something would fit and how it actually does.
Building out this connected ecosystem is a fundamental part of modern commerce, and there are many powerful eCommerce personalization tools that can help you create these kinds of seamless experiences. When your tools talk to each other, you’re not just collecting data—you’re building a smarter, more responsive business.
Turning Customer Insights into Fewer Returns
This is where it all comes together. The effort you put into gathering feedback is about to pay off—big time. The comments are rolling in, your data is synced, and now it’s time to transform those raw customer thoughts into tangible, bottom-line results for your Shopify store. Think of yourself as a detective for your own brand.
You’re hunting for patterns. You’re listening for the quiet whispers that, when grouped together, become a roar. Is one specific fabric consistently called “scratchy”? Are a dozen different shoppers saying your bestselling dress “runs small”? These aren’t just complaints; they’re a goldmine of opportunities just waiting to be dug up.
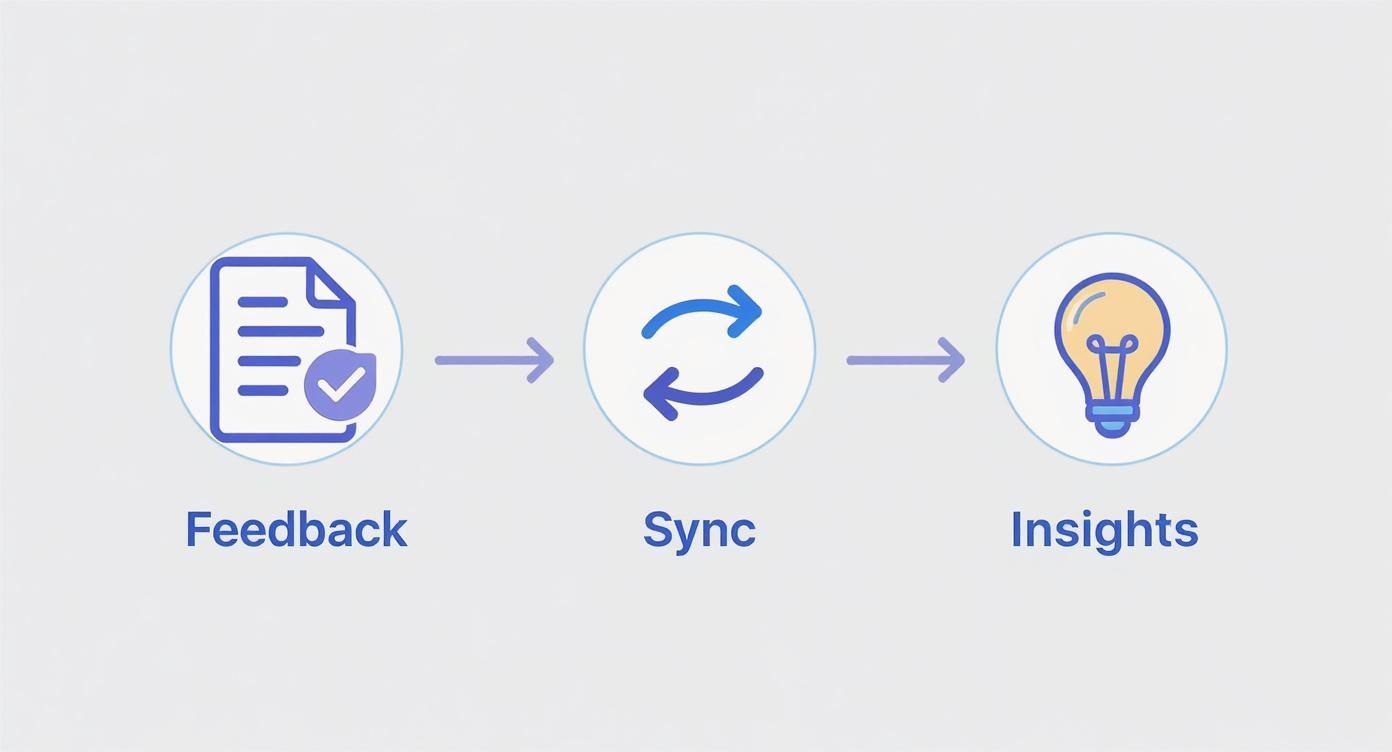
The key takeaway here is that feedback only becomes valuable once it’s synced with your other data and turned into concrete, actionable insights.
From Feedback to Actionable Fixes
Once you start spotting these recurring themes, the next step is to translate them into real-world fixes. This is where you connect the “what” (the feedback) with the “how” (the solution). It’s a simple but incredibly powerful framework that can systematically chip away at your return rates and send customer satisfaction through the roof.
Let’s walk through a few real-world scenarios you might run into:
- The Vague Product Description: You notice multiple comments saying a sweater “looked different” in person. Your action? Get hyper-specific with your product description. Instead of “soft-knit fabric,” try something like “a lightweight, breathable merino wool blend with a slightly textured, heathered finish.”
- The Sizing Surprise: Feedback consistently mentions a pair of jeans is “tighter in the thighs than expected.” Your action? This is a perfect moment to combine feedback with sizing analytics. Update your sizing chart with specific thigh measurements and add a note to the product page suggesting customers who are between sizes should size up for a more relaxed fit.
- The Color Conundrum: Customers are saying the “sky blue” top they ordered looks more like a muted gray in real life. Your action? Time to reshoot. Retake your product photos in bright, natural lighting, or use a tool to generate new, more accurate images that truly reflect the garment’s true color.
Think of every piece of feedback as a conversation with a customer who cares enough to help you get better. Your job is to listen intently and then prove you were paying attention by making a change.
From Feedback to Action: A Simple Framework
This table provides a practical guide to transforming raw customer comments into measurable business improvements that reduce returns and boost conversions.
| Feedback Theme | Potential Business Impact | Actionable Step | Success Metric |
|---|---|---|---|
| “The sizing for the ‘Poppy’ dress runs small” | High return rate for a specific product, customer frustration | Update the product page with a “Runs Small – Size Up!” note. Adjust the sizing chart with specific measurements. | 20% reduction in returns for the “Poppy” dress within 60 days |
| “Color of the ‘Ocean’ tee is not accurate” | Lower conversion, negative reviews | Reshoot product photos in natural light and update all listings. Generate new, color-accurate images. | Increase in add-to-cart rate for the “Ocean” tee |
| “Virtual try-on was great, but I was unsure” | Cart abandonment, lost sales potential | Add a small pop-up or tooltip within the VTO experience explaining how to best interpret the fit map. | 10% decrease in cart abandonment for VTO users |
| “Material felt cheaper than I expected” | Brand perception damage, high returns | Rewrite product description to better manage expectations (e.g., “lightweight synthetic blend” vs. “luxurious silk-like feel”). | Drop in negative reviews mentioning material quality |
This framework isn’t just about putting out fires; it’s about proactively building a better product and a more trustworthy brand, one piece of feedback at a time.
The Power of Closing the Loop
Now for the final step—the one most brands completely forget. It’s also the most important for building fierce, long-term loyalty. After you’ve made a change based on feedback, you must tell your customers about it. This is called “closing the loop.”
It’s your way of proving that their voice actually matters.
When you do this, you aren’t just fixing a problem; you’re building an unbreakable bond of trust. Customers who feel heard are far more likely to stick around, forgive a future mistake, and rave about you to their friends.
This has a direct impact on future sales, too. In fact, research shows that products featuring just five reviews are 270% more likely to be purchased compared to products with zero reviews. By showing you act on feedback, you encourage more of it, creating a powerful, self-sustaining cycle of social proof.
Closing the loop doesn’t have to be a huge production.
- Send a targeted email: Reach out to the specific customers who flagged the issue. A simple, “Hey, remember when you said our sizing was off on the A-line skirt? You were right. We fixed it—thanks to you!” is pure gold.
- Make a social media announcement: Post an Instagram Story or a quick update saying, “You asked, we listened! Our new and improved sizing chart is now live.”
- Update the product page: Add a small but visible note like, “Updated Fit: Based on your feedback, we’ve adjusted the fit to be true-to-size.”
By using customer insights to refine everything from your product descriptions to the accuracy of your virtual try-on technology, you create a better experience for everyone. You’re not just selling clothes anymore; you’re co-creating a brand with the people who matter most—your customers.
Your Top Questions About Customer Feedback, Answered
Jumping into customer feedback can feel like you’re about to open Pandora’s box. It’s totally normal to have questions and maybe even a little hesitation. You’re not alone.
Most Shopify store owners I chat with have the same few worries before they start. So, let’s clear the air and tackle those common questions head-on. My goal is to help you see feedback not as a chore, but as your new secret weapon.
“How Often Should I Ask for Feedback?”
This is the big one, isn’t it? The simple answer is this: only ask when you genuinely need to know something specific and important. Fight the urge to constantly poll your customers just for the sake of it.
Instead of thinking about a rigid schedule, think about key moments in the customer journey. These are the points where their opinions are the freshest and most valuable.
- Transactional Touchpoints: Pop up a quick question right after a meaningful action, like completing a purchase or, even better, using a virtual try-on.
- Relational Check-ins: Once or twice a year, send a slightly broader survey to your email list to get a pulse on your overall brand perception.
The golden rule is to respect their time. A single, perfectly timed question is a thousand times more powerful than a dozen random ones.
“What If I Get Negative Feedback?”
First things first, take a breath. Negative feedback isn’t an attack—it’s a gift. Seriously. It’s free consulting from someone who cares enough about your brand to point out what’s not working.
How you respond to criticism truly defines your brand. Don’t get defensive. Don’t sweep it under the rug. Lean into it as a chance to prove you’re actually listening.
A customer whose problem you solve can become fiercely more loyal than one who never had an issue in the first place. The goal isn’t to dodge complaints; it’s to get incredible at resolving them.
When a tough comment comes in, use it as fuel for improvement. Then, go one step further and “close the loop”—reach back out to that customer and let them know what you did with their feedback. That simple act can turn a critic into your most passionate advocate.
“How Many Questions Should My Form Have?”
Way fewer than you think. When it comes to feedback forms, brevity is your best friend. Every single question you add is another reason for someone to get frustrated and abandon the form.
For most of those “in-the-moment” surveys, stick to one to three questions, maximum. Start with a quick multiple-choice or a rating scale, and then add a single, optional open-ended question like, “Is there anything else you’d like to share?”
You’ll be blown away by the depth of insight you can get from just one or two well-worded questions. Remember, the goal isn’t to collect mountains of data; it’s to gather rich, actionable insights.
“Is This Really Worth the Effort?”
Absolutely, one hundred percent. Investing in a solid customer feedback loop isn’t just a “nice-to-have” anymore. It’s becoming a non-negotiable for brands that want to thrive. In fact, by 2025, 74% of organizations plan to increase their spending on customer experience, and a huge slice of that pie is dedicated to better feedback systems. You can read more about these expanding customer service initiatives.
Starting this today puts you way ahead of the game. You’re building a foundation of listening, learning, and adapting that will pay off for years—through fewer returns, higher conversion rates, and a loyal community of customers who feel seen and heard.
Ready to turn that shopper confidence into conversions? With Icona, you can give your customers a realistic virtual try-on that finally answers their biggest question: “How will this actually look on me?” Start cutting down on returns and boosting your sales today. Get started for free on tryicona.com.
Are you struggling to turn store visitors into loyal customers? This isn’t about some far-off, futuristic concept reserved for the giants of the industry. Integrating fashion and AI is a practical, powerful advantage that savvy Shopify stores like yours are using right now to increase conversions and carve out their space. Here’s how you can do it too.
The New Reality of AI in Your Fashion Store
Let’s demystify AI. Forget images of robots taking over. Instead, picture the smartest, most intuitive assistant you could ever hire for your store—one that never sleeps. It’s a set of brilliant tools designed to tackle the very challenges you face every single day as a fashion entrepreneur.
This assistant works quietly in the background, making your business sharper, your marketing more resonant, and your customer experience truly special.
Forget the intimidating jargon. At its heart, AI for your store is about using data to make smarter decisions, automate the repetitive work that drains your time, and create those “wow” moments for your shoppers. It’s the difference between guessing what your customers might like and knowing what they’ll fall in love with.
What AI Really Means for Your Store
So, what does this actually look like on a day-to-day basis? It’s about creating a new reality where you can:
- Predict Future Trends: Stop reacting to what’s already trending. AI helps you get ahead of the curve, anticipating the next big thing so your inventory is always fresh and desirable.
- Create Perfect Product Photos: Imagine generating stunning, on-model images without the huge cost and coordination of a professional photoshoot. You can finally show off every piece in your collection exactly as it deserves to be seen.
- Deliver True Personalization: Give every visitor their own unique shopping journey. We’re talking product recommendations so spot-on it feels like you’re their personal stylist, guiding them to pieces they’ll adore.
- Build Unshakeable Buyer Confidence: Allow customers to virtually try on your clothes from the comfort of their own home. This single feature demolishes one of the biggest hurdles to buying apparel online.
This isn’t science fiction anymore. This is the new benchmark for a thriving online fashion brand.
The global AI in fashion market was valued at around $2.23 billion in 2024. But it’s projected to rocket to over $89.41 billion by 2035. That kind of explosive growth tells you one thing: AI is quickly becoming a non-negotiable part of the industry’s backbone.
This incredible adoption isn’t fueled by hype; it’s driven by tangible results. Integrating artificial intelligence is now a core strategy for growth, and you can explore more data on this incredible market expansion to see just how fast this wave is moving.
And here’s the best part: you don’t need a team of data scientists to ride it. Many of the most powerful AI tools—from personalization engines to virtual try-on solutions—are built specifically for platforms like Shopify and can be set up in just a few clicks. This guide will show you exactly how you can use these tools to drive real, measurable growth for your business.
4 Ways AI Can Reshape Your Shopify Fashion Store
Now that you see the big picture, let’s get into the nitty-gritty. How can AI actually make a difference for your Shopify store, today? Think of these AI applications as your new superpowers—the secret weapons that will drive real, measurable growth. Let’s explore how AI stops being a buzzword and starts becoming the smartest part of your business strategy.
1. Build Unshakable Confidence with Virtual Try-On
One of the oldest hurdles in selling fashion online is that nagging customer question: “But how will it look on me?” It’s the moment of doubt that kills countless sales. Virtual try-on (VTO) technology completely erases that uncertainty.
Tools like Icona plug right into your Shopify store, letting your shoppers upload a photo and instantly see your clothes on their own bodies. Suddenly, the guesswork is gone. This simple, interactive experience smashes through purchase anxiety, builds incredible trust, and directly tackles the #1 reason for returns: bad fit.
Actionable Takeaway: You’re no longer just showing a product; you’re creating an experience. By turning your product page into a personal fitting room, you give customers the confidence they need to click “Add to Cart.” A Shopify store that implemented VTO saw a 67% increase in conversion rates by giving shoppers this confidence.
2. Deliver Hyper-Personalization That Feels Like a Private Stylist
Imagine every single person who lands on your site gets a shopping experience built just for them. That’s the magic of AI-powered personalization.
AI acts like a brilliant personal stylist for your store, analyzing a customer’s browsing habits, past purchases, and even how they navigate your store in real-time. It then intelligently surfaces the exact products they’re most likely to fall in love with, creating a shopping journey that feels intuitive and exciting.
This isn’t just a nice-to-have; it’s a massive market driver. In fact, product recommendations and personalized shopping are the leading applications of AI in fashion retail. As of 2024, this segment captured a commanding 26.40% market share—proving that your customers don’t just want personalization, they expect it.
3. Generate On-Model Imagery Without the Photoshoot Price Tag
Let’s be honest: professional photoshoots are a huge pain. They’re expensive, slow, and a logistical nightmare. But what if you could get stunning, on-model imagery without ever booking a studio or hiring a photographer?
That’s exactly what AI-generated product imagery delivers.
With just a single flat-lay or mannequin photo of your garment, AI can generate a virtually endless variety of professional shots. You can showcase your collection on a diverse range of models, place them in beautiful settings, and capture every angle. This gives your store that high-end, polished look for a tiny fraction of the cost and effort.
4. Use Smart Forecasting to Prevent Stockouts and Waste
Few things hurt more than running out of a bestseller during a sales spike or getting stuck with a warehouse full of duds. AI forecasting tools are designed to stop both of these nightmares from happening.
By analyzing your historical sales data, watching market trends, and even monitoring social media buzz, these systems predict future demand with stunning accuracy. This allows you to:
- Order Just Right: Stop tying up your cash in items that won’t sell.
- Prevent Stockouts: Never miss out on a sale because your most popular item is gone.
- Spot the Next Big Thing: Get ahead of the curve by seeing what’s about to take off.
This turns inventory management from a stressful guessing game into a sharp, strategic advantage.
Your 4-Step AI Integration Roadmap
Feeling inspired but a little unsure where to even begin? I get it. The good news is that weaving the power of fashion and AI into your Shopify store doesn’t require a computer science degree. Let’s walk through a practical, step-by-step guide to get you started, focusing on the easiest wins that deliver the biggest impact.
Think of this as a phased rollout, not an overnight overhaul. The secret is to choose one key area, implement a smart AI tool, measure your results, and then build on that success.
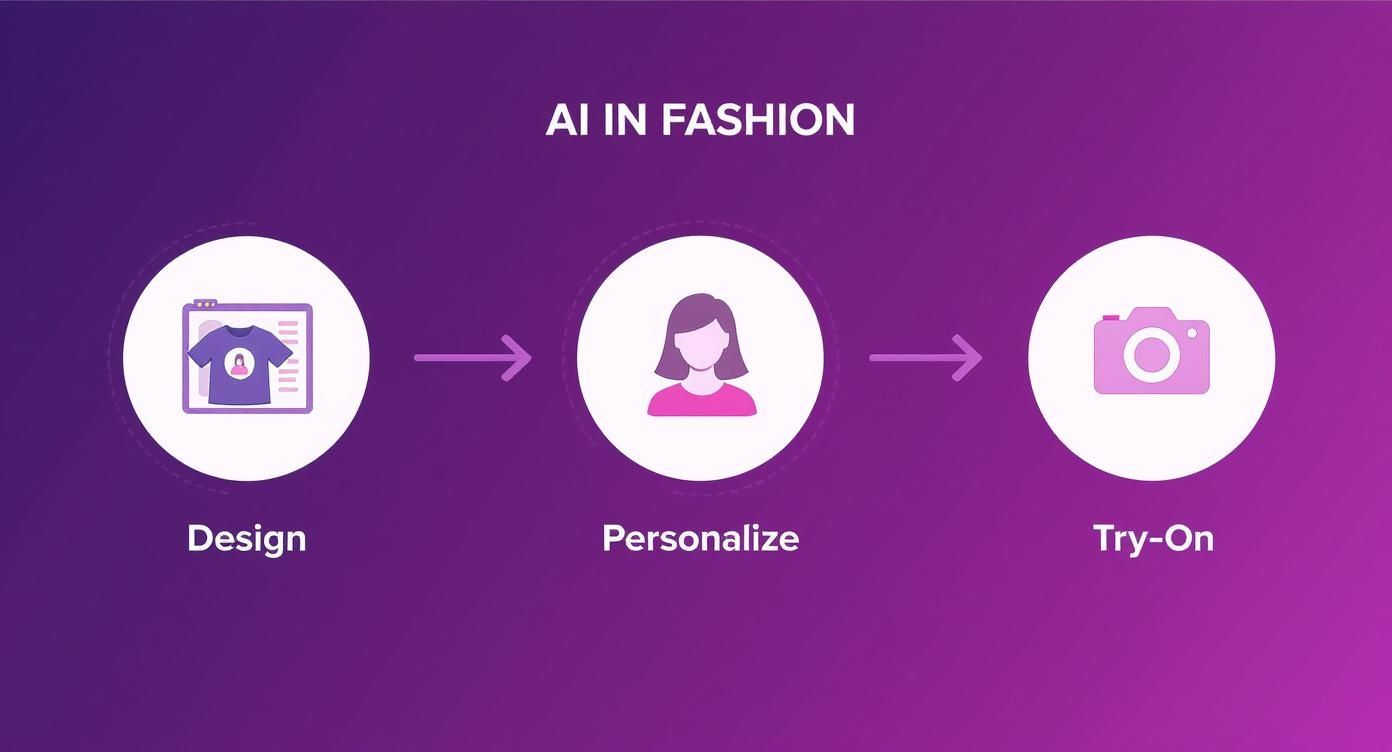
This workflow shows how AI seamlessly connects your creative vision with your customer’s real-world needs, making their entire shopping journey smarter and far more engaging.
Step 1: Start with One Clear Business Goal
Before you even glance at a single Shopify app, stop and ask yourself one simple question: “What is the biggest challenge or opportunity in my store right now?”
Your answer to that question becomes your North Star. By starting with a specific, tangible problem, you make sure your first venture into AI is focused, measurable, and meaningful.
Here are a few common goals I see with fashion stores:
- Reduce High Return Rates: If items are constantly coming back due to poor fit, your mission is to build purchase confidence.
- Increase Conversion Rates: If shoppers are browsing but hesitating to buy, your goal is to remove that friction and get them to click “add to cart.”
- Boost Average Order Value (AOV): If customers typically buy just one thing, your job is to show them other products they’ll love.
- Lower Marketing Costs: If photoshoots are eating your entire budget, you need a more efficient way to create stunning product visuals.
Seriously, just choose one. Trying to solve everything at once is a classic recipe for overwhelm.
Step 2: Choose Your First AI Application
Okay, you’ve got your goal. Now you can pick the right tool for the job. The Shopify App Store is full of incredible “plug-and-play” AI solutions that require zero coding.
Let’s match a tool to each of the goals we just talked about:
To Reduce Returns: Your best bet is a virtual try-on (VTO) tool. When you let customers see how clothes look on their own bodies, you eliminate the guesswork. A solution like Icona adds a simple try-on button right on your product page, giving shoppers the confidence to buy the right size the first time.
To Increase Conversions: Implement an AI-powered personalization app. These tools act like a personal stylist for every single visitor. They analyze browsing behavior to recommend products that customer is most likely to adore, guiding them toward a purchase.
To Boost AOV: Look for an app with AI-driven “Shop the Look” or bundling features. These systems are smart enough to suggest the perfect top to go with that skirt, making it incredibly easy for customers to add more to their cart.
To Lower Marketing Costs: This is where AI image generation tools are a game-changer. These platforms can take a single flat-lay photo of your product and generate a whole photoshoot’s worth of on-model images. You can showcase your collection on a diverse range of models without the time and expense of a physical shoot. See just how accessible this is when you create an AI fashion model.
Step 3: Launch and Measure Your Impact
Once you’ve installed your chosen app, this next step is absolutely crucial: measure its impact. Don’t just set it and forget it. You have to know if your investment of time and money is actually paying off.
Before you launch, take a snapshot of your baseline metrics. Jump into your Shopify Analytics and look at the 30 days before you installed the AI tool.
Your Pre-AI Checklist:
- What is your current conversion rate?
- What is your average order value?
- What is your return rate for apparel?
- How much are you spending on product photography per collection?
After the AI tool has been live for 30 days, pull those exact same numbers again.
The comparison will give you a clear, data-backed answer on how it’s performing. Seeing a 15% drop in returns or a 20% lift in conversions isn’t just a nice-to-have; it’s the hard proof you need to validate your strategy.
Step 4: Expand and Iterate
Once you’ve seen the value from your first AI application, you’re ready to tackle the next challenge on your list. This is how you build a smarter store—not in one giant leap, but through a series of smart, informed decisions.
Maybe you started with virtual try-on and solved your returns problem. Fantastic. Now you can shift your focus to boosting AOV with a personalization engine. This is how you build an intelligent, AI-powered brand: one strategic step at a time.
Measuring Your Return on AI Investment (ROI)
Bringing powerful new AI into your store is an incredible feeling. But let’s be honest—excitement doesn’t pay the bills. The real question is always: is it actually working?
To really get a grip on what your fashion and AI strategy is doing for you, you have to dive into the numbers that truly matter. Proving your return on investment (ROI) is about focusing on the key performance indicators (KPIs) that directly signal the health and growth of your business.
Pinpointing the Right KPIs for Each AI Tool
Different AI tools are built to solve different problems, which means they move the needle on different metrics. You have to connect the tool to the specific KPI it was designed to improve.
Here’s a simple way to track what matters for each AI application:
- For Virtual Try-On (VTO): Track your Conversion Rate and Return Rate. When a VTO tool is working, conversions should climb because shoppers feel more confident, and returns should plummet because they’re getting the right fit.
- For AI Personalization: Keep your eyes glued to Average Order Value (AOV) and Customer Lifetime Value (CLV). Smart personalization inspires customers to add more to their cart and builds the loyalty that keeps them coming back.
- For AI-Generated Imagery: The most immediate KPI is your Cost Per Collection. Add up what you’re saving on photographers, models, and studio rentals. Another huge win to track is Time to Market—how much faster you can get a new collection live.
By isolating these specific metrics, you go from guessing to knowing. You can draw a straight line from launching a virtual try-on feature to seeing a 15% decrease in returns, proving its value in a language everyone understands: the bottom line.
Your Simple Framework for A/B Testing
So, how do you know for sure that your new AI tool is behind that sales lift? The answer is A/B testing, and it’s way less complicated than it sounds. The whole idea is to create a controlled comparison: your store with the AI versus your store without it.
You can often set this up using an app from the Shopify App Store. For example, with a new personalization engine, you might show the AI-driven recommendations to 50% of your website traffic while the other 50% sees your standard product grid.
After letting the test run for a few weeks, just compare the results. Did the group who saw the AI recommendations have a higher AOV? This kind of head-to-head comparison gives you rock-solid proof of the tool’s real-world impact.
Tracking Engagement to Understand the Why
Beyond the big financial KPIs, it’s also incredibly insightful to keep an eye on engagement metrics. These numbers tell you the story of how your customers are interacting with the new technology.
For a tool like virtual try-on, you’d absolutely want to track:
- Try-On Button Clicks: Are people using the feature? This tells you if it’s visible and appealing.
- Conversion Rate of VTO Users: This is the kicker. Do the shoppers who use the virtual try-on convert at a higher rate than those who don’t? (Spoiler: the answer is almost always a resounding yes!)
These engagement stats help you understand the narrative behind the numbers and double down on what’s working.
Weaving AI into Your Brand, Responsibly
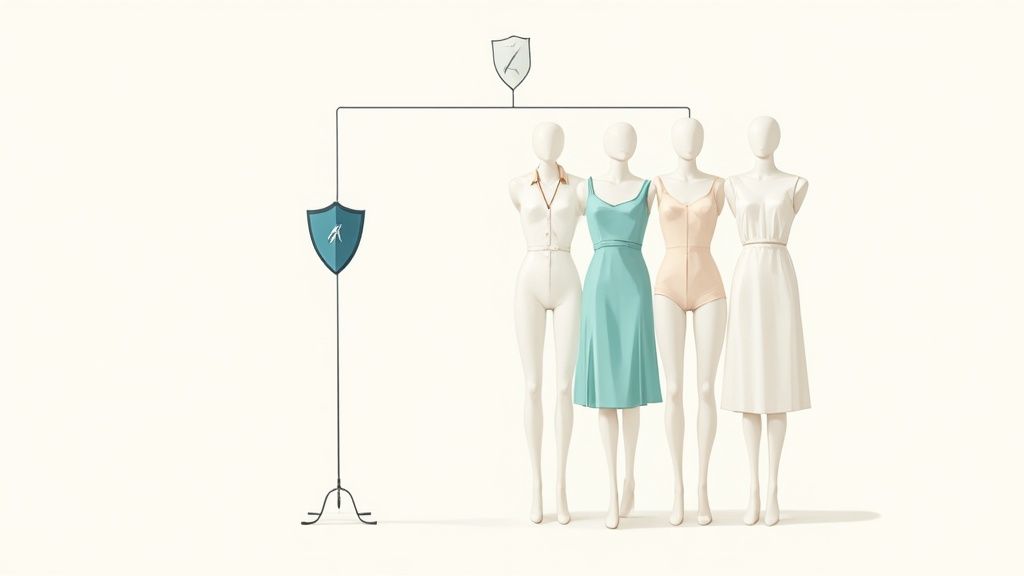
As you start blending the incredible possibilities of fashion and AI into your Shopify store, one thing is non-negotiable: earning and keeping your customers’ trust. Bringing AI into your brand isn’t just a tech move; it’s a promise to uphold your brand’s integrity. Getting this right is what separates a short-lived gimmick from a genuinely great, trusted brand.
Championing Data Privacy and Transparency
Your customers have a right to know how their information is being used. Real transparency isn’t about burying details in dense legal documents. It’s about clear, honest communication that makes your customers feel safe.
Here are a few straightforward ways to be transparent:
- Make Your Privacy Policy Human: Ditch the legalese. Use plain English to explain what data you collect and how AI uses it to make their shopping journey better.
- Give AI a Name Tag: A small, friendly note like “Personalized for you by our style AI” next to product recommendations is an easy, honest touch.
- Pick Partners Who Share Your Values: When you choose an AI tool, dig into its privacy policies. For example, a virtual try-on tool like Icona was built with privacy as a cornerstone—customer photos are encrypted and automatically deleted for good after use.
Tackling Algorithmic Bias Head-On
An AI system is only as good as the data it learns from. In fashion, this can surface as algorithmic bias, where the technology might unintentionally favor certain body types or skin tones, leaving other customers feeling invisible.
For your brand, championing inclusivity isn’t just the right thing to do—it’s brilliant business. You want every single person who lands on your store to feel seen and welcomed.
Actively working against bias means you’re not just selling clothes; you’re building a community. It shows your customers that you care about representing the real world.
Your Action Plan for Responsible AI
So, how do you turn these principles into practice?
- Audit Your AI-Generated Content: Regularly look at the product images your AI creates. Do they feature a diverse range of models that reflect your customer base?
- Test for Fairness: When using personalization tools, are they recommending products across your entire range of sizes and styles? Make sure the algorithm isn’t just creating an echo chamber for your bestsellers.
- Listen to Your Community: Ask your shoppers for feedback. Their input is the ultimate compass for ensuring your AI is serving all of your customers.
By embracing these responsible practices, you’re building a modern, trustworthy brand that uses AI to create a better, more inclusive shopping experience.
The Future is Here: Your First Step into AI Fashion
You’ve seen what’s possible when fashion and AI come together. This isn’t about futuristic ideas anymore; it’s about a real, tangible roadmap for growing your Shopify store. The time for thinking is over—it’s time to act.
So, where do you begin? Start with a single, clear goal. Pick an AI tool that solves a genuine problem you’re facing today. Then, keep a close eye on your results.
What’s Your Next Move?
Take a moment and think about the one challenge that’s giving you the biggest headache right now. Is it the constant cycle of returns eating into your profits? Or the struggle to create beautiful, on-brand imagery without spending a fortune?
Whatever it is, pick one AI application from this guide that hits that problem head-on.
- Drowning in returns? It’s time to seriously look into a virtual try-on tool. This is your most direct path to helping customers choose the right size the first time.
- Struggling with photoshoot costs? Your next step should be exploring the world of AI product photography. Just like TryIcona helps customers visualize products before purchase, popups help them take the next step in their journey.
The future of fashion is smarter and more personal. Your journey to the forefront of this new era starts not with a giant leap, but with a single, focused step. Go on, take it.
FAQ: Your Questions About AI in Fashion, Answered
Still have a few things you’re wondering about? That’s completely normal. This world of fashion and AI is moving fast. Here are some real-world answers to the questions I hear most often from Shopify store owners just like you.
Do I Need to Be a Tech Whiz to Use AI?
Absolutely not. This is the biggest myth holding people back. Many of the most powerful AI tools for Shopify are “plug-and-play.” You can install an app for personalized recommendations or integrate a service like Icona for virtual try-on with just a few clicks—no code, no headaches. The trick is to start with a clear goal and pick a tool designed to solve that one specific problem.
Is AI Too Expensive for a Small Business?
It doesn’t have to be. While you hear about giant companies spending millions, there are tons of affordable and scalable options perfect for growing brands. A lot of Shopify apps run on a simple monthly subscription, often priced based on your store’s size.
Think of it as an investment, not an expense. For example, if you could save thousands a year by cutting down on returns, a modest monthly fee for a virtual try-on tool suddenly looks like a brilliant financial move.
How Does AI Actually Help Me Sell More?
AI drives sales in a few very direct and powerful ways by making the shopping experience better for every single customer.
Here’s a simple breakdown of how it happens:
- It Lifts Your Conversion Rate: Personalization engines act like a skilled personal shopper, showing each visitor the exact products they’re most likely to buy.
- It Creates Real Buyer Confidence: Tools like virtual try-on tackle the single biggest hesitation in buying clothes online: “Will this actually fit me?” When your customer feels certain, they’re much more likely to purchase.
- It Bumps Up Your Average Order Value (AOV): AI is a natural at upselling. It can intelligently suggest other items that complete an outfit (“Shop the Look” features), nudging shoppers to add just one more thing to their cart.
At the end of the day, AI works by making your store smarter and more personal. It creates a genuinely better shopping trip that naturally leads to more sales.
Ready to give your customers the confidence to click “Add to Cart”? Icona adds a virtual try-on button to your Shopify store in minutes, helping you slash returns and boost conversions. Start your free trial at tryicona.com and see the difference for yourself.
The best camera for your products isn’t just about megapixels. It’s about reliability, dead-on color accuracy, and the flexibility of your lenses. Think of your camera as the most dedicated salesperson you’ll ever hire—it shows your products in their absolute best light, turning a casual browser on your Shopify store into a confident buyer.
Why Your Camera Is Your Best Salesperson
I get it. Staring at a wall of camera specs feels like trying to read a foreign language. Let’s cut right through that noise. This guide is your roadmap to finding a camera that doesn’t just snap pictures but actively works to sell your products.
A great camera transforms your product shots from simple images into powerful conversion tools for your Shopify store.
High-quality photos build a bridge of trust. When a customer can zoom in and see the intricate details on a piece of jewelry or the true texture of a knit sweater, they feel a surge of confidence in their decision to buy. You’re giving them the closest possible experience to putting the product directly into their hands, right through their screen.
The Power of Professional Images
Your product photography is the visual heartbeat of your brand. It sends a message of quality, care, and professionalism long before a customer even glances at your product description. Investing in the right camera is a direct investment in your business’s success. Here’s how:
- You Build Customer Trust: Crystal-clear, detailed photos show you’re proud of your product’s quality. This transparency is key to winning over skeptical shoppers.
- You Increase Conversions: Did you know shoppers are 75% more likely to purchase after seeing high-quality photos? It’s a game-changer for your sales numbers.
- You Reduce Returns: When what your customers see is what they get, they’re happy. Accurate images set proper expectations, leading to fewer disappointments and returns.
- You Build a Stronger Brand: Consistent, professional photos make your store look polished and trustworthy, setting you miles apart from the competition.
The goal isn’t just to show what your product looks like. It’s to make your customer feel like they absolutely need it. Great photography closes the gap between simply seeing and truly wanting.
Ultimately, your camera is the tool that captures and communicates your product’s true value. And while amazing new tech offers alternatives, like exploring AI product photography to create stunning lifestyle scenes, it all starts with a great source image. Those core photos must be sharp, color-accurate, and compelling.
In the next sections, we’ll dive deep into the specific features—from sensors and lenses to lighting—that give you the power to create these essential, sales-driving images.
Understanding the Heart of Your Camera: The Sensor
Before we even get into brands and models, let’s talk about the single most important part of any camera for getting incredible product shots: the sensor.
Think of the sensor as the camera’s digital film. It’s the part that actually captures the light and turns it into an image. The size and quality of this little chip dictate everything—from the sharpness of your product’s texture to how your photos look in different lighting conditions. A better sensor literally sees your product more clearly, and that clarity translates directly to your customer’s screen.
Choosing the right camera starts here. A great sensor is the foundation for photos that don’t just show your product, but actually help sell it.

When you get the photography right, you build trust. And trust is what turns a browser into a buyer on your store.
Camera Sensor Size Comparison for Product Photography
To help you visualize the difference, here’s a quick comparison of the most common camera sensor sizes and how their characteristics impact product photos for your Shopify store.
| Sensor Type | Key Advantage for Product Photography | Best For | Typical Price Range |
|---|---|---|---|
| Full-Frame | Superior light capture, beautiful background blur (bokeh), highest detail. | Brands seeking a premium, high-end look; works well in all lighting. | $1,500 – $6,000+ |
| APS-C (Crop) | Excellent balance of quality, size, and cost. Professional results are very achievable. | Most e-commerce stores, from startups to established brands. | $600 – $2,000 |
| Micro Four Thirds | Very compact and lightweight system with a huge lens selection. | Small product photography, on-the-go shoots, and video content. | $500 – $1,800 |
| 1-inch Sensor | Better than a smartphone, but limited by smaller size. Found in premium compact cameras. | Beginners on a tight budget or as a secondary/backup camera. | $400 – $1,300 |
Ultimately, while Full-Frame is the top-tier choice for that unmistakable professional polish, a modern APS-C camera is a powerful tool that will absolutely deliver stunning, sales-driving images for your store.
Full-Frame vs. APS-C: The Simple Breakdown
You’ll hear two terms thrown around a lot: “Full-Frame” and “APS-C.” Don’t let the jargon intimidate you. It just refers to the physical size of the sensor we’ve been talking about, and it’s a key factor for your product shots.
Here’s a simple analogy: imagine you have two buckets out in the rain. One is a big, wide bucket (Full-Frame) and the other is a smaller one (APS-C). The big bucket is naturally going to catch more rain. A camera sensor works the exact same way with light.
Full-Frame Sensors: These bigger sensors drink in more light, which means cleaner, less “grainy” images. They also excel at creating that soft, out-of-focus background (called bokeh) that makes your product pop and gives your photos a luxurious, professional feel.
APS-C (Crop) Sensors: These are smaller, more affordable, and incredibly common in a huge range of fantastic cameras. They are more than capable of producing brilliant product shots, but they capture a bit less light and have what’s called a “crop factor,” which makes your lens view seem a little more zoomed in.
Do Megapixels Really Matter for Your Store?
Ah, megapixels. It’s the number every brand slaps on the box, but more isn’t automatically better for your business. A megapixel is just one million pixels—the tiny dots that build your digital image.
Think of it like having a bigger canvas. More megapixels let you print a giant billboard or crop in super tight on a photo without it falling apart. But for your Shopify store, where images are viewed on screens, you hit a point of diminishing returns pretty quickly. For most online stores, 24 to 30 megapixels is the absolute sweet spot.
Don’t get lost in the megapixel race. A 24MP camera with a high-quality sensor and a sharp lens will always outperform a 60MP camera with a mediocre sensor and lens. Focus on the sensor size and glass quality first.
The demand for high-quality cameras isn’t slowing down. The digital photography market was valued at USD 55.74 billion in 2025 and is projected to keep growing, largely because every business online needs amazing visuals. You can discover more insights about the photography market to see just how big this trend is.
Choosing the Right Lens: Your Creative Vision
If the camera sensor is the heart of your setup, then the lens is its creative eye. Honestly, the quality of your glass often has a more dramatic impact on your final image than the camera body itself. It’s what dictates sharpness, controls perspective, and shapes the entire mood of your product photos.
Choosing the right lens is what separates a flat, uninspired snapshot from a dynamic, professional image that makes customers stop scrolling. Think of it like choosing the perfect paintbrush for an artist—different brushes create entirely different strokes, and the same holds true for lenses.
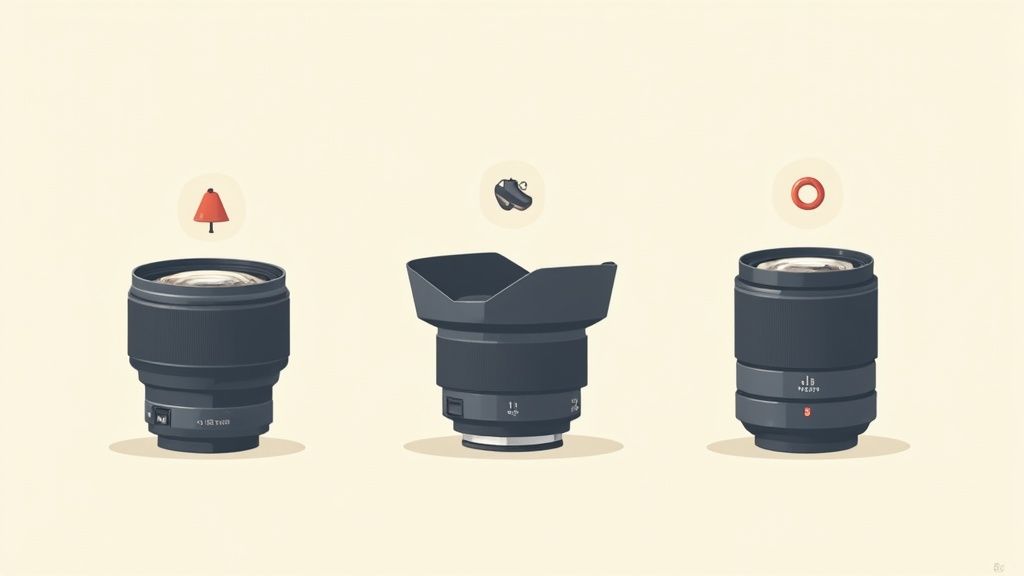
Prime Lenses vs. Zoom Lenses for Product Shots
As you start exploring, you’ll quickly run into two main camps: prime and zoom. Knowing the difference here is key to getting what your store really needs.
Prime Lenses: These have a fixed focal length (like 50mm or 100mm). You can’t zoom in or out with the lens; you have to physically “zoom with your feet” by moving the camera. While that might sound limiting, their simple design allows for superior optics, leading to exceptionally sharp and crisp images. For pure image quality, they are the gold standard.
Zoom Lenses: These give you a variable focal length (like 24-70mm), so you can reframe your shot without moving your entire setup. This flexibility is incredible, especially if you’re shooting products of all different sizes. The trade-off? That convenience can sometimes come at the cost of the absolute, pristine sharpness you get from a prime lens.
For most Shopify store owners just starting out, investing in a high-quality prime lens is a brilliant move. The incredible sharpness it delivers will make your products look their absolute best, straight out of the camera.
Understanding Focal Length
Focal length, measured in millimeters (mm), is a bit more than a technical number. It determines your field of view and, more importantly, how it portrays your product. Get this wrong, and your product can look weirdly distorted instead of true-to-life.
A wide-angle lens (think 24mm) can make products look stretched and warped, especially near the edges of the photo. It’s almost never the right choice for product photography.
On the other hand, a telephoto lens (something like 100mm) beautifully compresses the background and gives you a flattering, realistic perspective. This is exactly what you want for most product shots.
For product photography, your sweet spot is typically between 50mm and 100mm. This range gives you a natural perspective that closely mimics how the human eye sees things, ensuring your products look accurate and appealing.
The Magic of Aperture and F-Stop
Aperture is the opening inside your lens that lets light pass through to the sensor. It’s measured in “f-stops” (like f/1.8, f/8, f/11), and it controls one of the most powerful creative tools in all of photography: depth of field.
Simply put, depth of field is how much of your image is in sharp focus from front to back.
A Low f-stop (e.g., f/2.8): This means the aperture is wide open, letting in a ton of light. The result is a shallow depth of field, where only a small slice of your product is tack-sharp, and the background melts away into a beautiful, creamy blur. This is perfect for creative lifestyle shots where you want the product to be the undeniable hero.
A High f-stop (e.g., f/11): This creates a tiny pinhole opening in the lens. This gives you a deep depth of field, keeping everything from the front of your product to the very back in crisp focus. This is your go-to setting for those classic, clean product-on-white photos for your catalog.
Mastering aperture gives you total creative freedom. You get to decide whether to isolate your product against a dreamy background or show off every single intricate detail with crystal clarity. For most standard e-commerce shots, an aperture between f/8 and f/11 is the ideal starting point for getting maximum sharpness.
Essential Gear That Creates Professional Shots
A great camera and lens are your starting point, but the real secret to consistently jaw-dropping product photos? It’s all in the supporting cast. The right accessories are what will take your images from “good enough” to truly professional, building a studio setup that pays for itself over and over again.
Think of it like this: your camera simply captures the image, but your gear creates the entire scene. This is where you gain absolute control over light, stability, and consistency—the three pillars of incredible product photography.

The Unsung Hero: A Sturdy Tripod
Before you even think about lights, get a tripod. Seriously. This isn’t just a friendly suggestion; it’s the bedrock of professional product photography. Why? Because it kills camera shake, freeing you up to use slower shutter speeds and lower ISO settings for the cleanest, sharpest images imaginable.
Even more importantly, a tripod guarantees consistency. When you’re shooting the same product from five different angles, a tripod ensures every shot has the exact same framing, height, and perspective. This is the key to a polished, cohesive look across your entire product page.
Lighting: Your Most Powerful Tool
Lighting is everything. It carves out the shape of your product, shows off its texture, and sets the entire mood. While that beautiful light from a nearby window is lovely, it’s also wildly inconsistent. For a growing business, you need control.
You’ll generally run into two types of studio lighting:
Continuous Lights: These are your “what you see is what you get” option. They stay on the whole time, so you can see precisely how the light and shadows are hitting your product before you ever snap a photo. This makes them incredibly friendly for beginners. LED panels are a fantastic, affordable choice that don’t get too hot.
Strobes (or Flashes): These pack a serious punch. They deliver a powerful, instantaneous burst of light that freezes motion and provides a massive amount of clean, bright illumination. They have a bit of a learning curve, but they’re the industry standard for a reason—their power lets you overpower any other light in the room, giving you the final say.
A simple two-light kit is a perfect place to start. This gives you a main “key” light to do the heavy lifting and a secondary “fill” light to soften any harsh shadows, creating that balanced, pro-level look.
Shaping the Light With Modifiers
A bare bulb throws harsh, ugly shadows. That’s where light modifiers come in. These are tools you pop onto your lights to soften, diffuse, and shape the beam, giving your photos that high-end, polished feel.
The single most essential modifier for any product photographer is a softbox. It’s just a fabric box that fits over your light, but its magic lies in how it diffuses the light, creating a soft, even, and flattering glow that wraps beautifully around your products.
This soft, gentle light is the secret sauce behind the clean, premium images you see on all the top eCommerce sites. It makes things look desirable.
Essential Workflow Accessories
Finally, there are a few small tools that will make a massive difference in your day-to-day shooting, saving you tons of time and headaches.
- Remote Shutter Release: Even on a tripod, the simple act of pressing the shutter button can cause a microscopic vibration that ever-so-slightly blurs your shot. A remote shutter—whether it’s a simple cable or a wireless clicker—lets you fire the camera without touching it, guaranteeing maximum sharpness.
- Tethering Cable: This is a game-changer. A tethering cable connects your camera directly to your computer, so your photos pop up on the big screen the instant you take them. No more squinting at the tiny camera display to check focus—you see everything clearly and can make adjustments on the fly.
- Backdrops: A clean, seamless background makes your product the undeniable star of the show. A simple white sweep is a timeless classic, but don’t be afraid to find something that fits your brand. You can learn more about choosing the right photography background cloth to really nail your aesthetic.
By investing in this essential gear, you’re not just buying equipment; you’re setting your store up to compete at the very highest level.
Finding the Right Camera for Your Budget
You’ve got the theory down—sensors, lenses, and lighting are no longer a mystery. Now for the fun part: picking the right camera to bring your brand’s vision to life. The global digital camera market is huge, valued at an estimated USD 24.08 billion in 2024, which is great news for you. It means there’s a perfect camera out there for every ambition and budget.
We’re going to walk through three practical tiers to help you find your match. Think of this less as a technical spec sheet and more as a field guide to making a smart investment in your store’s visual identity. You can always dig into the full research on the digital camera market if you’re curious about the industry’s growth.
Entry-Level Powerhouses (Under $1,000)
Starting on a budget doesn’t mean you have to compromise on quality. Today’s entry-level cameras are packed with features that, just a few years ago, were strictly pro-level. These are ideal for new Shopify merchants who need crisp, clean product shots from day one without breaking the bank.
Canon EOS R50: This is a brilliant first step into serious photography. Its APS-C sensor and Canon’s legendary color science mean your products will look true-to-life right out of the camera. The autofocus is quick and sticky—even on tiny items like jewelry—and the flip-out screen is a lifesaver for shooting awkward angles like flat lays.
Sony a6400: An absolute workhorse that has earned its reputation. The a6400 is famous for one thing above all else: its incredibly fast and reliable autofocus. It just locks onto your product and stays there, which saves a ton of time and frustration during a shoot. The image quality from its APS-C sensor is sharp, detailed, and perfect for your product pages.
Mid-Range Champions ($1,000 – $2,500)
This is the sweet spot where most growing ecommerce brands find their perfect tool. Moving into this tier gets you a significant leap in image quality, durability, and creative control. You’re getting into bigger sensors and more advanced features that empower you to create truly high-end commercial imagery.
Fujifilm X-T5: A photographer’s camera, through and through. The X-T5 boasts a super-high-resolution 40MP APS-C sensor that captures stunning detail. But its secret weapon is Fujifilm’s famous “Film Simulations.” These built-in color profiles can give your photos a gorgeous, distinctive look with minimal editing—a massive shortcut in your workflow.
Canon EOS R8: Want the magic of a full-frame sensor without the typical full-frame price? This is your camera. A full-frame sensor gives you amazing performance in lower light and that beautiful, creamy background blur (bokeh) that makes lifestyle shots pop. The R8 is a fantastic choice if you’re shooting both still photos and video for your brand.
Professional-Grade Workhorses ($2,500+)
When your business is scaling fast and every single pixel is a reflection of your brand, it’s time to invest in a professional tool. These cameras deliver the absolute pinnacle of image quality, speed, and rock-solid reliability. They’re built to perform, day in and day out, in a demanding studio environment.
A professional camera isn’t just about more megapixels. It’s about unwavering reliability, flawless color accuracy, and features like dual card slots that protect your valuable work during a high-stakes photoshoot.
Sony Alpha 7 IV (A7 IV): Many pros call this the ultimate “do-it-all” camera, and for good reason. The A7 IV is an absolute beast for product photography. Its 33MP full-frame sensor captures breathtaking detail and dynamic range, meaning you can pull information out of the brightest highlights and the darkest shadows. The autofocus is arguably the best on the market, and you can customize nearly every button to fit your exact workflow.
Nikon Z7 II: If your work demands the highest possible resolution, the Z7 II is an absolute titan. Its 45.7MP full-frame sensor is engineered to capture every last thread, texture, and detail. This makes it perfect for shooting intricate products or for clients who need massive files for print or large-format displays. It’s a tough, reliable tool built for the rigors of commercial photography.
Bringing Your Product Photos to Life
Alright, you’ve absorbed the theory. You know what makes a camera tick, you can talk lenses, and your gear list is ready. Now comes the exciting part: putting all that knowledge into practice and capturing the incredible product shots your Shopify store needs to thrive.
This is where the magic really happens. It’s the moment you stop thinking about equipment and start thinking about creating an experience—transforming a simple item in your inventory into something a customer absolutely has to own. Your camera is just the tool; your vision is what builds that critical first impression.
Your Action Plan for Amazing Photos
Getting those pro-level shots is more straightforward than you might think. Just follow these key steps as you start shooting.
- Step 1: Focus on What Matters Most. Your sensor and your lens are the two most critical pieces of the puzzle. They will have the single biggest impact on your image quality, so invest wisely here.
- Step 2: Build a Rock-Solid Foundation. A tripod isn’t optional. Seriously. It’s the secret to getting consistently sharp, perfectly aligned photos, shot after shot.
- Step 3: Become the Master of Light. Great lighting is everything. It’s not a bonus, it’s a necessity. Even a basic two-light kit with softboxes hands you the power to shape how your product looks and feels.
After you’ve captured your images, they need to be perfectly prepped for your storefront. If you find your photos aren’t quite big enough for Shopify’s zoom feature or other high-detail placements, a good online image upscaler can increase the resolution without losing that crisp quality you worked so hard for.
Your goal isn’t just to take a picture. It’s to create a visual handshake that makes a shopper feel confident enough to click “Add to Cart.” Every image is a chance to prove your product’s worth.
Just like a tool such as TryIcona helps customers visualize your products before purchase, your photography is what provides the high-quality, trustworthy foundation for that entire experience. You now have the complete roadmap to pick the right gear and set up a process that creates images that don’t just show your products—they sell them. Your journey to inspiring confidence and driving more sales starts right now.
Common Questions About Good Cameras for Product Photography
Let’s tackle some of the most common questions Shopify owners ask when they’re ready to get serious about their product photos. I’ll give you the straight-up advice you need to make a confident choice and start taking pictures that truly sell.
Can I Just Use My Smartphone to Take Product Photos?
Honestly, for your first-ever batch of photos, a modern smartphone can definitely get the job done. But as your brand finds its footing and starts to grow, you’ll pretty quickly run into some hard limits that can cap your store’s professional feel and even hurt your sales.
It all comes down to physics. Smartphones have tiny sensors, which means they struggle to capture rich detail and often produce grainy images in less-than-perfect light. Their built-in wide-angle lenses can also subtly distort your products, making them look a little “off” compared to how they look in real life.
When should you upgrade? The moment brand consistency becomes a priority, it’s time for a dedicated camera. A real camera gives you the manual control you need over focus, lighting, and perspective, which is the secret to making every product on your site look like it belongs in the same high-end collection.
What Are the Best “Set It and Forget It” Camera Settings?
Diving into manual mode can feel like learning a new language, but the good news is you only need to master three key settings for about 90% of your product shots. Think of this as your starting recipe for crisp, clean images.
Here are the go-to settings to dial in from day one:
- Aperture (f-stop): f/8 to f/11. This is your sweet spot. It gives you a deep depth of field, which means your entire product will be perfectly sharp from front to back. No more blurry edges.
- ISO: 100-200. Keep this number as low as your camera will go. A low ISO is the key to getting noise-free, ultra-clean images packed with detail.
- Shutter Speed: Adjust this last. Since your camera will be on a tripod, you don’t have to worry about shaky hands. Simply adjust the shutter speed up or down until your exposure looks just right.
These three settings are the foundation for almost all fantastic product-on-white photography.
Should I Buy a DSLR or a Mirrorless Camera?
While you can get beautiful results from both, if you’re building an eCommerce business in 2025, a mirrorless camera is the smarter long-term investment. The big difference is how you see the picture before you click the shutter.
A DSLR has an optical viewfinder, which is like looking through a small window. You see what the lens sees, but you can’t see how your settings are changing the final photo until after you’ve taken it.
Mirrorless cameras, on the other hand, have an electronic viewfinder (EVF). This is a tiny screen inside the eyepiece that shows you a live preview of exactly what the sensor is capturing—exposure, white balance, and all. This “what you see is what you get” feedback is a huge time-saver. It takes the guesswork out of the equation and makes it much faster and more intuitive to get that perfect shot, especially when you’re just starting out.
Ready to create stunning product visuals without the hassle of a traditional photoshoot? Icona offers Icona Studio, allowing you to generate high-quality AI product images in minutes. Plus, our virtual try-on technology boosts conversions by letting shoppers see how your apparel looks on them, building confidence and reducing returns.
Start converting more visitors with Icona today
Ready to turn your passion for fashion into a thriving online business? Fantastic. You’ve got the vision, and this guide has the roadmap. Building a successful clothing brand from the ground up comes down to three key pillars: nailing your brand identity, picking the right business model, and getting your legal setup squared away. Get these right, and you’re not just starting a store—you’re building an empire.
Your Blueprint for a Thriving Online Clothing Brand
Selling clothes online isn’t a niche hobby anymore; it’s a dominant force in retail. The global apparel market is on track to hit a mind-boggling $1.84 trillion in revenue in 2025, with almost half of all fashion sales happening online.
That’s a fundamental shift in how people shop, and it’s a massive opportunity for you. If you want to understand just how big this is, digging into the latest online clothing shopping statistics is a real eye-opener. This guide cuts through the noise and gives you the actionable steps to launch your brand and claim your piece of the pie.
Let’s get past the “what if” and dive right into the “how-to.”
1. Carve Out Your Brand Identity
Before you touch a single fabric swatch, you need a story. Your brand identity is the soul of your business. It’s the reason a customer will choose your hoodie over the ten thousand others out there. This goes way beyond a cool logo—it’s about defining who you are, what you stand for, and who you’re speaking to.
To get there, ask yourself these critical questions:
- Who is your ideal customer? Don’t just say “women aged 20-30.” Get specific. Are they eco-conscious minimalists living in urban apartments? Are they streetwear fanatics who line up for the latest drops? Or are they busy parents looking for durable, stylish kids’ clothes? The more you know them, the better you can serve them.
- What problem are you solving? Maybe you’re creating truly inclusive sizing that big brands ignore. Perhaps you’re using innovative, sustainable materials. Or maybe you’re crafting designs for a passionate subculture that nobody else is serving. Your “why” is your competitive edge.
- What’s your brand’s personality? Is it irreverent and loud? Quietly confident and sophisticated? Rugged and built for adventure?
Your answers will become your compass, guiding everything from your website’s color palette to the tone of your Instagram captions. When you’re consistent, you build brand recognition and, more importantly, customer loyalty.
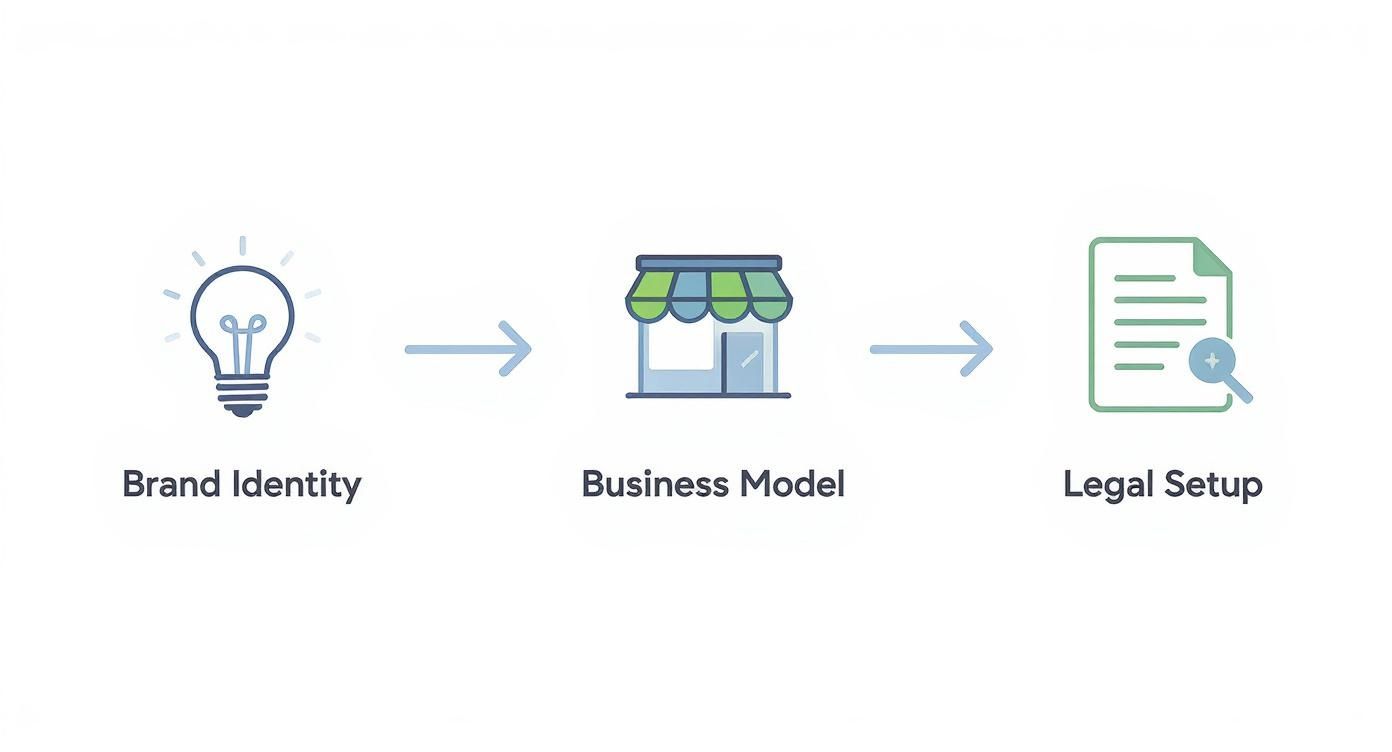
This process flows in one direction. You need that strong brand concept firmly in place before you can meaningfully choose a business model or tackle the legal paperwork.
2. Choose Your Business Model Wisely
How you make and sell your clothing will dictate your startup costs, daily operations, and how fast you can grow. There isn’t a single “right” answer here—just the one that’s right for your vision, budget, and risk tolerance.
To help you decide, let’s break down the most popular paths for new Shopify merchants.
Choosing Your Online Clothing Business Model
| Business Model | Upfront Cost | Inventory Management | Best For |
|---|---|---|---|
| Print-on-Demand (POD) | Very Low | None—handled by a third party. You pay per order. | Artists, designers, and influencers testing new ideas with zero inventory risk. |
| Dropshipping | Low | None—you’re a curator. A supplier handles stock and shipping. | Entrepreneurs who are great at marketing and want to offer a wide variety of styles without buying stock. |
| Private Label/White Label | Medium | You buy and manage bulk inventory from a manufacturer. | Brands wanting to sell proven products with their own branding, but without designing from scratch. |
| Design & Manufacture | High | Full control. You manage everything from production runs to warehousing. | Visionary founders who want complete creative control, unique products, and the highest profit margins. |
Each of these models has its pros and cons, but the key is to be realistic about your resources. Many incredible brands started with a simple print-on-demand or dropshipping setup to test the waters and build an audience before leveling up.
Your action step: Don’t feel pressured to start big. Many successful brands begin with a print-on-demand model to build an audience, then reinvest those profits into creating their own custom collection down the line.
3. Handle the Essential Legal Setup
Alright, let’s tackle the less glamorous but absolutely non-negotiable part: setting up your business correctly. This is what separates a hobby from a legitimate business that’s built to last.
Taking care of the legal stuff from day one protects you personally and builds a solid foundation for growth. This means choosing a business structure (like a sole proprietorship or an LLC), registering your business name, and securing any permits or licenses required in your city and state.
It might seem tedious, but getting these details sorted out now will save you from massive headaches and potential legal trouble later on. Think of it as laying the groundwork for the fashion empire you’re about to build.
Bringing Your Digital Boutique to Life with Shopify
Think of your Shopify store as more than just a website. It’s your digital storefront, the curated home for your brand, and the engine that will ultimately drive every sale. This is the moment your brand vision transforms into a real, professional online space where people feel confident and excited to shop.
Getting this part right is absolutely critical. A clunky, confusing, or amateur-looking store will send potential customers running. On the other hand, a beautiful, intuitive, and fast-loading site builds instant credibility and guides shoppers smoothly from their first glance to the final click of the “buy” button.
Choosing Your Shopify Theme
Your Shopify theme is the visual blueprint for your entire store. It sets the tone, dictates the layout, and defines your customer experience. It’s easy to get distracted by a flashy design, but you have to put yourself in your customer’s shoes. Can they easily find what they’re looking for? Does the site load in a snap, especially on a phone? Most importantly, does it make your product photos look incredible?
For any clothing brand, visuals are everything. You need a theme that puts your high-quality imagery front and center and includes features designed for fashion. Look for things like:
- Quick View: This lets customers peek at product details without ever leaving the main collection page. It’s a game-changer for smooth browsing.
- Image Zoom: Shoppers want to see the texture of the fabric and the quality of the stitching. High-resolution zoom is non-negotiable.
- Mega Menus: If you have a lot of products, these are perfect for organizing your collections by style, season, or clothing type, preventing customer overwhelm.
Themes like Broadcast, Pipeline, or Colorblock are fantastic starting points. They were built with fashion brands in mind and provide that clean, modern aesthetic that lets your apparel do the talking.
Your theme isn’t just about looking good; it’s a powerful conversion tool. One study found that 38% of people will simply leave a website if the layout is unattractive. You need a theme that’s the perfect marriage of beauty and brains.
Customizing Your Store for a Seamless Experience
Once you’ve landed on a theme, it’s time to make it your own. This is where you inject your brand’s unique personality into every pixel. It’s about more than just uploading your logo—it’s about crafting an effortless and enjoyable shopping journey for your customers.
Begin by building out the essential pages every customer instinctively looks for. These pages build trust and answer questions before a shopper even has to ask.
- About Us Page: This is your chance to tell your story! What’s your mission? Why did you start this clothing line? A compelling story creates an emotional hook that can turn a casual browser into a loyal fan.
- Contact Page: Make it ridiculously easy for people to reach you. A simple contact form, a clear email address, and prominent links to your social media accounts are a must.
- FAQ Page: Get ahead of the curve by answering all the common questions about shipping, returns, sizing, and garment care. This not only saves you time on customer service emails but also removes any hesitation a customer might have before buying.
Nailing the Checkout: Payments and Shipping
This is the operational backbone of your store, and there’s no room for error. A frustrating checkout experience is the number one killer of sales and the leading cause of abandoned carts. Your mission is to make paying for and receiving your products an absolute breeze.
Shopify Payments is the simplest way to hit the ground running, letting you accept all major credit cards right out of the box. You should also consider adding other popular options like PayPal, Apple Pay, and “buy now, pay later” services like Shop Pay Installments, which can give your conversion rates a serious lift.
When it comes to shipping, start by defining your shipping zones—the countries or regions you’ll be delivering to. An app like Shopify Shipping is a lifesaver, giving you access to discounted rates from major carriers and letting you print labels right from your dashboard. At checkout, keep it simple. Offer clear options like Standard Shipping and Express Shipping so customers know exactly what they’re getting and when to expect it. That transparency is the bedrock of the trust you need to close the sale.
Creating Product Visuals That Actually Sell
In online fashion, your photos do all the talking. They are your storefront. Since shoppers can’t feel the fabric or see the drape in person, your product visuals have to build that bridge. High-quality imagery isn’t just a nice-to-have; it’s the single most powerful tool you have for turning a curious browser into a confident buyer.
Think of this as your masterclass in creating visuals that make your apparel fly off the digital shelves.

The opportunity here is massive. The global apparel e-commerce market was valued at $779.3 billion in 2025 and is on track to hit a staggering $1.706 trillion by 2034. And with mobile commerce projected to make up 46% of all online sales in 2025, your visuals need to look incredible on every screen. This isn’t just about pretty pictures; it’s about creating an experience that builds trust and drives action. You can dig into more apparel e-commerce revenue statistics on bestcolorfulsocks.com to see just how big this wave is.
Start with High-Quality Product Photography
Before you even think about creative angles, you have to nail the fundamentals. Crisp, clean product photos are non-negotiable. These are the workhorses of your product pages, showing customers exactly what they’re getting.
Every single item in your store needs these three essential shots:
- The Studio Shot: This is your hero image—clean, clear, and set against a simple white or light gray background. It’s all about the product, with zero distractions.
- The Detail Shot: Get up close and personal. Show off the texture of the fabric, the quality of the stitching, or a unique button. These shots scream quality and craftsmanship.
- The On-Model Shot: This is an absolute must for clothing. Seeing a garment on a real person is the only way for customers to truly understand its fit, drape, and scale. A flat-lay just can’t compete.
Your action step: You don’t need a pro studio to get pro results. A modern smartphone, a simple backdrop (like a white wall), and good natural light from a window can work wonders. The real secret is consistency. Use the same lighting and background for all your main product photos to give your entire store a polished, cohesive look.
Tell a Story with Lifestyle Photography
If studio shots inform, lifestyle photos inspire. This is where your brand’s personality comes to life. Lifestyle photography helps shoppers see themselves wearing your clothes in their own lives, transforming a simple t-shirt into a coveted part of a whole vibe.
Put yourself in your ideal customer’s shoes. Where do they hang out? What do they love to do? A brand selling breezy linen dresses would feel right at home with a shoot at a sunny beach or a local farmer’s market. An urban streetwear line, on the other hand, would thrive against a backdrop of graffiti-covered walls and dynamic cityscapes. These are the images that will light up your homepage, social media feeds, and email campaigns.
The Rise of AI in Product Imagery
Not long ago, getting professional-looking on-model photos meant shelling out big bucks for photoshoots and models. That’s not the only game in town anymore. AI is completely changing the landscape, especially for new brands working with a tight budget.
With modern tools, you can now generate incredibly realistic on-model images without ever stepping foot in a studio. This approach can save you thousands of dollars and countless hours, giving you the power to create a diverse and compelling set of visuals in a fraction of the time.
Curious about how it works? Our complete guide on AI product photography shows you exactly how to create stunning, professional-grade images with just a few clicks.
Boost Conversions with Virtual Try-On
Let’s be honest: the biggest headache in online fashion is that shoppers can’t try things on. That “I wonder how this will actually look on me” moment is where most sales are lost. It fuels cart abandonment and, even worse, expensive returns.
This is where virtual try-on technology becomes your secret weapon.
Apps like TryIcona plug right into your Shopify product pages, letting customers see how an item might look on a model that reflects their own body type. Just like TryIcona helps customers visualize products before purchase, popups help them take the next step. This one feature can have a huge impact on a buyer’s confidence, pushing them to click “add to cart” and drastically reducing your return rate.
By blending crisp product shots, inspiring lifestyle photos, and smart tools like AI and virtual try-on, you build a visual experience that does more than just show off your clothes—it builds the trust you need to make the sale. Your images stop being just pictures; they become your most effective salespeople.
Designing Product Pages That Convert
Think of your product page as your best salesperson. It’s working 24/7 to turn a casual browser into a loyal customer. This is the moment a shopper’s curiosity tips over into a real desire to buy. You need to move beyond just listing specs and start crafting an experience that makes them feel excited and, most importantly, confident.
Your mission is to anticipate every question and squash every hesitation before it can form. A killer product page is a masterful blend of compelling storytelling, crystal-clear information, and undeniable proof that you’re the real deal. It’s all about guiding your shopper smoothly to that “Add to Cart” button.
Write Product Descriptions That Resonate
A product description is not a spec sheet. It’s a conversation. You need to use vivid, sensory language that helps your customer feel the fabric and picture themselves in the outfit.
Don’t just say, “Made from 100% cotton.”
Try this instead: “Crafted from impossibly soft, breathable 100% cotton that feels like a dream against your skin.” See the difference? One sells a material; the other sells an experience.
A structure that consistently works well includes:
- A Killer Hook: Start with a sentence that grabs them and speaks directly to what they want.
- A Little Storytelling: Paint a picture. Is this the perfect dress for a sun-drenched summer wedding? The go-to hoodie for a lazy Sunday?
- Scannable Key Details: Use bullet points for the nitty-gritty stuff—material, fit, and care instructions. This makes the practical info easy to digest.
This one-two punch of emotional appeal and practical information is incredibly effective. For a deeper dive, our complete guide on Shopify product page customization has even more advanced strategies to build pages that truly perform.
Nail Your Pricing Strategy
Pricing your clothes can feel like walking a tightrope. Go too low, and you cheapen your brand and kill your profit margins. Go too high, and you might send potential customers running. The right price reflects the quality of your materials, the uniqueness of your designs, and the overall value your brand brings to the table.
First, calculate your Cost of Goods Sold (COGS). This isn’t just the fabric; it’s the manufacturing, shipping to your warehouse, and any special packaging. Once you have that number, you can set a retail price that gives you a healthy profit. Aim for a 50-70% margin—this will cover marketing, overhead, and paying yourself.
Don’t be afraid to experiment with your prices. Sometimes a slightly higher price can actually increase how much people value your products.
Build Unshakeable Trust and Social Proof
When you sell clothing online, trust is your most valuable asset. Customers can’t touch the fabric or try on the fit, so they’re relying completely on you to be their eyes and ears. This is your chance to eliminate every ounce of doubt.
A Baymard Institute study found that 18% of shoppers abandoned a cart simply because they didn’t trust the site with their credit card info. Every single element on your page needs to be a trust-builder.
Here’s how you can build that rock-solid confidence right on your product page:
- Crystal-Clear Sizing Guides: A generic chart isn’t enough. Add specific model measurements (“Our model is 5’9″ and wears a size Medium”) and fit notes (“Runs true to size” or “Size up for a more relaxed fit”). This is your single best weapon against returns.
- An Easy-to-Find Return Policy: Don’t bury it. Link to your return policy from every product page and make it ridiculously simple. A customer who knows they can make a hassle-free return is far more likely to take a chance on you.
- Customer Reviews and Photos: Social proof is a powerhouse. Seeing real people wearing and loving your clothes is more persuasive than anything you could write. Use an app like Loox or Judge.me to automatically gather and display photo reviews. Highlighting this user-generated content can boost conversion rates by up to 90%.
By transforming your product pages from simple listings into high-performance assets, you’re not just selling clothes—you’re building a brand that customers trust, love, and keep coming back to.
How to Sell Clothing Online by Marketing Your Brand Effectively
You’ve built a stunning digital boutique with incredible product pages. Now, it’s time to swing open the doors and invite your ideal customers inside. A great product doesn’t sell itself; you need a smart, targeted marketing plan to build buzz and drive consistent traffic. This is the moment you transform from a store owner into a brand builder.

The opportunity in front of you is massive. The global online fashion retail market is on track to hit $1.08 trillion in 2025 and keep climbing. With so many stores vying for attention, standing out requires marketing that truly connects with your shoppers. For more details on this growth, you can check out these global fashion retail trends on marketresearch.com.
If you’re just starting out, it’s easy to feel overwhelmed. Where should you even begin? Focusing on a few key channels done well is far more effective than spreading yourself too thin.
Here’s a look at the most effective marketing channels that pack a punch for new fashion brands.
Beginner-Friendly Marketing Channels for Fashion Brands
| Marketing Channel | Primary Focus | Your First Action Step |
|---|---|---|
| Social Media | Brand building, community engagement, and visual storytelling. | Choose one visual platform (like Instagram or TikTok) and consistently post high-quality lifestyle content, not just product shots. |
| SEO | Attracting long-term, high-intent organic traffic from search engines. | Optimize your product titles and descriptions with keywords that real shoppers would use to find your items. |
| Email Marketing | Nurturing customer relationships and driving repeat purchases. | Set up a “welcome” email automation for new subscribers that introduces your brand and offers a small incentive. |
Each of these channels plays a unique role, and when they work together, the results are incredible. Let’s dig into how to make each one work for your brand.
Master Social Media for Fashion
For a clothing brand, social media is your runway, your community hub, and your sales floor all rolled into one. Platforms like Instagram and TikTok are visual playgrounds, making them the perfect place to show off your apparel and build a tribe of loyal fans.
Your goal is to create a lifestyle around your brand, not just post product shots.
- Showcase User-Generated Content (UGC): When customers tag you in photos wearing your clothes, feature them! This is the most authentic social proof you can get.
- Collaborate with Influencers: Partner with micro-influencers whose personal style genuinely aligns with your brand’s vibe. Their endorsement often feels more like a recommendation from a trusted friend.
- Run Targeted Ads: Use Meta’s ad platform to reach users based on their interests and online shopping habits. You can create dynamic ads that show people items they’ve already viewed on your site—a gentle nudge that is incredibly effective.
Climb the Ranks with SEO for Fashion
While social media delivers instant engagement, Search Engine Optimization (SEO) is your long game. This is how you attract customers who are actively looking to buy. When someone searches for a “black linen midi dress” on Google, you want your product to be one of the first things they see. That’s the magic of SEO.
Start with the basics. Focus on writing product titles and descriptions that include the keywords your ideal customer is actually using. Put yourself in their shoes: what words would they type into that search bar?
SEO is a marathon, not a sprint. Consistently optimizing your pages and creating relevant blog content will build your authority over time, leading to a steady stream of free, high-intent traffic.
Creating blog content like “5 Ways to Style a Classic White Tee” or “The Best Jackets for Fall 2025,” can also draw in new audiences, where you can naturally link back to your own products.
Build Loyalty with Email Marketing
Your email list is one of the most valuable assets your business will ever own. Unlike social media followers, you own your email list. It’s a direct line to your most engaged customers, completely free from the whims of unpredictable algorithms.
Your email strategy should be all about building relationships.
- The Welcome Series: When someone new subscribes, create an automated three-part series that introduces your brand story, showcases your bestsellers, and offers a small discount on their first purchase as a thank you.
- Exclusive Offers & Early Access: Make your subscribers feel like VIPs. Give them early access to new collections or exclusive discounts. This simple act builds incredible loyalty.
- Abandoned Cart Reminders: This is a must. Set up an automated email that goes out to shoppers who add items to their cart but don’t finish checking out. A friendly reminder can recover a huge percentage of otherwise lost sales.
Understanding these channels is the first step, but seeing how they work together is the real key. You can explore how each piece fits into the bigger picture in our guide to the eCommerce marketing funnel, which maps out the complete customer journey. By combining the appeal of social media, the power of SEO, and the personal touch of email, you’ll create a marketing engine that fuels your brand’s growth for years to come.
Your Top Questions About Selling Clothes Online, Answered
Jumping into the world of online fashion is a huge thrill, but it can also bring up a lot of questions. Think of this as a quick chat with a mentor who’s been there. We’ll cut through the noise and get you the clear, straightforward answers you need to move forward with confidence.
How much money do I actually need to start?
The honest answer is: it completely depends on your business model.
You could get a print-on-demand or dropshipping store off the ground with just a few hundred dollars. That’ll cover your Shopify plan and a small marketing budget. It’s the perfect low-risk way to test your ideas and see what resonates with customers.
On the other hand, if you’re dreaming of designing your own collection from scratch, you’ll need a bigger budget. Costs can easily run into the thousands once you factor in buying inventory, product design, and professional photography. The key is to map out a realistic budget before you spend a dime.
What clothing niches are profitable in 2025?
Profitability isn’t about a specific product; it’s about finding your people—a dedicated audience that’s hungry for what you have to offer.
While staples like graphic tees and leggings are always in demand, they’re also incredibly crowded markets. The real magic often happens in niches where you can become the go-to brand.
Consider communities built around:
- Sustainable and eco-conscious apparel
- Adaptive clothing designed for people with disabilities
- Carefully curated vintage or retro fashion finds
These aren’t just product categories; they’re communities with passionate, loyal customers.
Your action step: Use a free tool like Google Trends to see what people are actually searching for. Your mission isn’t just to sell a t-shirt; it’s to spot a gap in the market that only your brand can fill.
This research lets you validate your gut feelings with real data before you invest in a single piece of inventory.
How do I handle shipping and returns?
Nailing your shipping and returns process is non-negotiable. It’s one of the biggest trust signals you can send to a new customer. For shipping, start by integrating an app like Shopify Shipping. It’s a game-changer, giving you instant access to discounted rates and letting you offer clear choices like standard or express shipping right at checkout.
When it comes to returns, your policy needs to be simple and fair. A 30-day return window is standard and what most online shoppers expect. Decide from the get-go whether you’ll offer full refunds, exchanges, or store credit, and make it crystal clear on your site.
Remember, a seamless return experience can transform a one-time buyer into a lifelong fan. It shows them they can shop with you risk-free, and that kind of confidence is priceless.
Ready to give your customers that ultimate shopping confidence? Icona adds a virtual try-on button to your Shopify store, letting shoppers see how your clothes look on their own bodies. It’s the game-changing tool that boosts conversions and slashes return rates.
Explore Icona and start your free trial today!
Struggling to turn your store visitors into paying customers? You’re in the right place. E-commerce optimization is the key to transforming your Shopify store from a simple online catalog into a powerful sales machine. This isn’t about chasing temporary tricks—it’s about building a solid, strategic foundation that consistently lifts your store’s performance.
Your Blueprint for E-commerce Success
Think of your online store as a physical shop. If the aisles are cluttered, the checkout line is a mile long, or the lighting is poor, you know people will leave without buying. It’s the exact same online. E-commerce optimization is the craft of refining every single touchpoint—from the moment a visitor lands on your site to the final “thank you” page—to make their journey effortless and inspiring.
This guide is your roadmap to getting it done right. We’ll skip the vague advice and dive straight into actionable steps that move the needle. You’ll discover how to audit your store, pinpoint the hidden roadblocks killing your conversions, and roll out the technical and user experience upgrades that directly impact your bottom line.
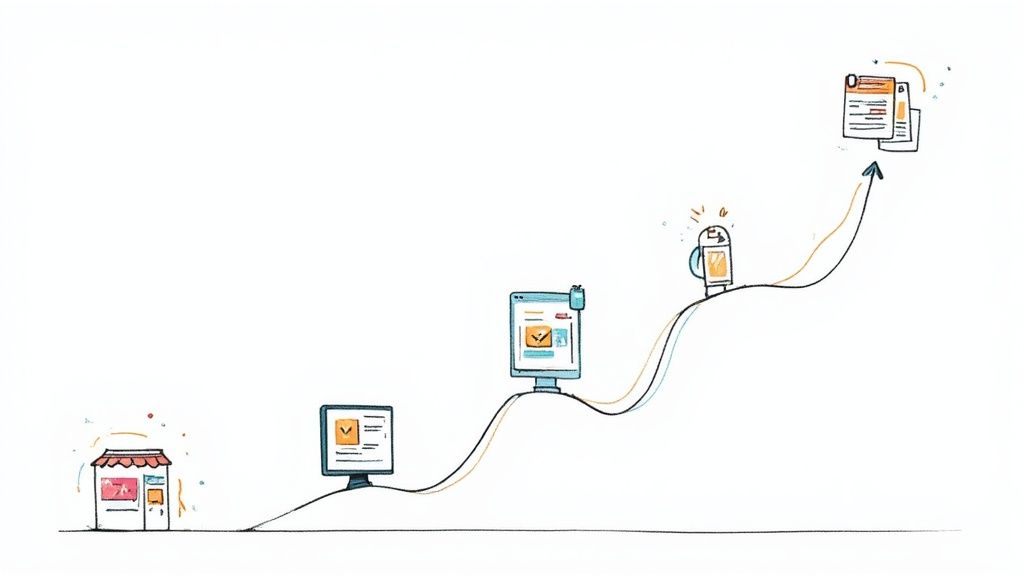
Why Optimization Is Non-Negotiable in 2025
Every visitor to your store is a potential sale. But the journey from discovery to purchase is fragile. In 2025, the global e-commerce conversion rate hovers around a sobering 2.27%. That means for every 100 visitors, only two or three will actually buy something.
This statistic isn’t meant to discourage you; it’s a call to action. It proves how crucial it is to get every detail right. Every improvement you make gives you a better shot at capturing those other 97 visitors. You can find more details on e-commerce benchmarks to see how your store stacks up.
This guide is built on the essential pillars of a high-converting store. Together, we’ll walk you through how to:
- Audit Your Performance: Find out exactly where and why you’re losing people in your sales funnel.
- Strengthen Your Technical Foundations: Nail your site speed, perfect the mobile experience, and build a rock-solid SEO base.
- Craft Persuasive Content: Learn to write copy and use visuals that resonate deeply with your audience and drive them to act.
- Implement and Test: Create a smart, repeatable process for continuous improvement driven by real data, not guesswork.
Key Pillars of E-commerce Optimization
To get a bird’s-eye view of our journey, this table breaks down the core areas we’ll be diving into. Think of each one as a foundational block; when they work together, they create an incredibly powerful system for your growth.
| Optimization Pillar | Primary Goal | Actionable Tactic |
|---|---|---|
| Performance Audit | Identify conversion leaks and user friction points. | Use heatmaps to see where users get stuck on your product pages. |
| Technical & UX | Ensure your store is fast, mobile-friendly, and easy to navigate. | Compress product images to improve your page load speed by 50%. |
| Conversion Copy & Visuals | Persuade visitors to purchase with compelling text and imagery. | Rewrite a product description to focus on benefits instead of features. |
| Analytics & Testing | Make data-driven decisions to continuously improve performance. | A/B test the color of your “Add to Cart” button to see which converts better. |
Each pillar builds on the last, creating a holistic strategy that turns your store into the best version of itself.
Ready? Let’s start transforming your approach and unlock the sales you know your store is capable of.
Finding and Fixing Your Hidden Conversion Killers
Your store might look fantastic, but small, nearly invisible snags could be draining your sales every day. I’m talking about conversion leaks—those little moments of friction in the customer journey that convince a potential buyer to walk away. Real e-commerce optimization begins when you put on your detective hat to hunt down where these leaks are and, more importantly, why they’re happening.
Before you can build a high-converting powerhouse, you need to map out what’s actually broken. This isn’t about guesswork; it’s about digging into the data to see your store through your customers’ eyes for the first time.

1. Start with the Hard Numbers: Your Funnel Audit
A goldmine of insights is already waiting for you in Google Analytics 4 (GA4). This is your command center. Your first job is to trace the exact path your visitors take from the moment they land on your site to the second they (hopefully) check out.
Where do they come in? And where do they give up and leave? The mission here is to pinpoint the specific pages where you’re losing the most people.
- Homepage Bounce Rate: Are people taking one look and leaving? This could signal a confusing message, a design that doesn’t resonate with your audience, or sluggish load times.
- Product Page Exits: Do shoppers browse a product but bail before adding it to their cart? Maybe your photos aren’t compelling or your product descriptions fall flat.
- Checkout Abandonment: This is the big one. A huge drop-off here almost always points to surprise shipping costs, a clunky form, or not enough payment options.
By digging into your GA4 funnel report, you stop asking vague questions like, “Why aren’t people buying?” and start asking specific, actionable ones like, “Why are 35% of our mobile users dropping off between the cart and the payment page?” That kind of specificity is where real progress is born.
2. Go Beyond the Numbers with Visual Insights
Analytics tells you what is happening, but it rarely tells you why. For that, you need to see your site in action through your customers’ eyes. This is where tools like heatmaps and session recordings from platforms like Hotjar or Microsoft Clarity become your secret weapon. They give you the visual proof of user frustration that numbers simply can’t.
- Heatmaps show you exactly where users click, move, and scroll. Are they clicking on images that aren’t actually links? Are they completely ignoring your main call-to-action button?
- Session Recordings are like having a screen recording of a user’s entire visit. You can watch them rage-click a broken button, struggle to fill out a form on their phone, or get lost in your navigation menu.
This kind of qualitative data is priceless. One Shopify store owner discovered from a single session recording that a promotional popup’s “close” button was nearly impossible to tap on mobile, causing a massive bounce rate. Analytics showed the drop-off; the recording showed the culprit.
3. Prioritize Your Fixes for Maximum Impact
After your audit, you’ll probably have a long list of potential improvements. Don’t get overwhelmed. The key is to prioritize ruthlessly, focusing on the leaks that are costing you the most money and are the easiest to fix first.
- Identify the Biggest Leaks: Start with the drop-off points that impact the largest number of users, like your checkout flow or your top-selling product page.
- Form a Hypothesis: For each leak, make an educated guess about the cause. For example: “I believe users are abandoning their carts because the shipping costs are a surprise at the very end.”
- Brainstorm a Solution: Based on that hypothesis, define a clear, simple fix. “I will add a shipping cost estimator right on the cart page.”
This structured approach turns a vague goal like “improve conversions” into a series of clear, manageable tasks. You’re no longer just changing things and hoping for the best. You’re performing targeted surgery on your sales funnel, armed with real data and ready to make changes that deliver tangible results.
Mastering Your Technical SEO and Mobile Experience
Let’s be honest. You can have the most beautiful store in the world, but if its technical foundation is shaky, you’re building on sand. A slow, clunky site is the fastest way to lose a sale, especially on a phone.
This is where your technical SEO and mobile experience become your secret weapons. We’re not just talking about aesthetics here. We’re talking about building a store that’s lightning-fast, a joy to use on any device, and a magnet for search engines like Google.
Speed Isn’t a Luxury, It’s a Feature
So, how fast is fast enough? The data doesn’t lie. An e-commerce site that loads in one second has a conversion rate 2.5 times higher than one that takes five seconds. Think about that. Every single second you can shave off your load time puts real money back into your pocket.
In a world of instant gratification, a loading spinner is the digital equivalent of a locked door. Your potential customers will simply turn around and leave. So, where do you even begin?
- Tackle Your Images First: Huge, unoptimized product photos are the number one culprit behind slow Shopify stores. Use a tool like TinyPNG to shrink those file sizes without turning your beautiful shots into pixelated messes.
- Do an App Audit: Every app you install adds more code, and more code can mean more drag on your site’s speed. Be ruthless. Go through your app list and ask yourself: “Does this directly help me make sales or improve my customer’s experience?” If the answer is no, it might be dead weight.
- Embrace Browser Caching: This simple technique tells a visitor’s browser to save parts of your site, like your logo and navigation. When they click to another page, those elements load instantly, creating a much snappier browsing experience.
The Mobile-First Mindset is Everything
The shift to mobile commerce isn’t a future trend; it’s your reality right now. By 2025, mobile is projected to account for 46% of all global e-commerce sales, with an incredible 77% of all retail site traffic coming from phones. You can see the bigger picture with these online shopping statistics.
This means your store isn’t just a website that also needs to work on phones. It’s a mobile experience, period. The desktop version is secondary.
A true mobile-first approach means you design every single element—from buttons to checkout forms—with a thumb in mind. If it’s hard to tap, confusing to navigate, or forces someone to pinch and zoom, you’re creating friction. And friction kills conversions.
Here’s a quick checklist to get your mobile experience on the right track:
- Simplify Your Navigation: A clean, obvious mobile menu (the classic “hamburger” icon) is your best friend. Make sure your search bar is front and center.
- Make Forms Effortless: Keep your checkout process as short as possible. Use features like address autofill and ensure the correct numeric keypads pop up for phone numbers and credit cards.
- Design for “Thumb-Friendliness”: Your “Add to Cart” and “Buy Now” buttons need to be big, bold, and easy to tap without accidentally hitting something else.
Building a Rock-Solid SEO Foundation
Once your site is fast and mobile-friendly, you need to make sure Google can actually find you. A speedy site that’s invisible to search engines won’t do you much good.
A clean site architecture is the bedrock of good SEO. This is all about organizing your products and collections in a way that’s logical for both your customers and search engine bots. A clear path like Homepage > Women's Apparel > Dresses > Summer Dresses is infinitely better than a chaotic mess.
Finally, you absolutely need to be using structured data (schema markup). This is special code that helps Google understand exactly what’s on your page—the product name, price, stock status, and those all-important customer reviews. When you do this, Google often rewards you with “rich snippets” right in the search results, making your listings stand out and practically begging to be clicked.
If you want to go deeper, our guide on essential SEO tips for Shopify stores is a great place to start. By getting these technical elements right, you’re creating an incredible experience that both your customers and search engines will love.
Bringing Your Products to Life with Killer Copy and Visuals
With your store’s technical foundation solid, we can now get to the fun part—the art of persuasion. This is where you move beyond a functional website and start building a brand that connects, inspires, and sells. All the e-commerce optimization in the world won’t matter if your words and images fall flat.
Think of your product pages as your best salespeople. They need to be charming, convincing, and ready to answer every unspoken question a customer might have. It’s not about listing specs; it’s about telling a story where your customer is the hero.
Write Product Descriptions That Actually Sell
Here’s a mistake I see all the time: stores describe what a product is instead of what it does for the customer. People don’t buy a drill because they want a drill; they buy it for the hole it creates. Your job is to connect the dots between your product’s features and the real-world benefits your customer is chasing.
A feature is a fact. A benefit is the feeling or outcome that fact delivers.
Every shopper is silently asking, “What’s in it for me?” Your product descriptions need to scream the answer, painting a vivid picture of how their life is about to get better.
Get to the heart of the problem you’re solving. A waterproof jacket has a GORE-TEX lining—that’s a feature. The benefit is the freedom to enjoy a hike in the pouring rain, staying perfectly warm and dry. Sell that feeling of worry-free adventure, not the fabric technology.
Conversion Copywriting Techniques
Here’s how you can transform standard, feature-focused descriptions into compelling, benefit-driven copy.
| Technique | Standard Approach (Feature-Focused) | Optimized Approach (Benefit-Focused) |
|---|---|---|
| Focus Shift | “This coffee maker has a 12-cup capacity.” | “Brew enough coffee for the whole family morning after morning, without anyone waiting.” |
| Emotional Appeal | “Our skincare serum contains hyaluronic acid.” | “Wake up to skin that feels plump, hydrated, and has a radiant, youthful glow.” |
| Problem/Solution | “These noise-canceling headphones have a 20-hour battery life.” | “Silence the distractions of your commute and enjoy your favorite podcast all day long on a single charge.” |
| Sensory Language | “Made from 100% cashmere wool.” | “Wrap yourself in the unparalleled softness and lightweight warmth of pure cashmere.” |
This simple shift from talking about yourself to talking about your customer is one of the most powerful changes you can make to your copy.
Weave in Psychological Triggers
Great copy isn’t just well-written; it’s smart. By tapping into a bit of human psychology, you can gently nudge your customers toward making a purchase.
- Social Proof: We’re wired to follow the crowd. Prominently feature customer reviews, testimonials, and user-generated photos. A simple banner stating “Over 5,000 happy customers” instantly builds credibility.
- Scarcity and Urgency: Phrases like “Only 3 left in stock!” or “Sale ends tonight” trigger a fear of missing out (FOMO). Just be sure to use them honestly, or you’ll erode trust.
- Authority: Have you been featured in a popular blog or won an award? Showcase those “As Seen In” logos. They act as a powerful third-party endorsement.
For a deeper dive into layout and design, our guide on Shopify product page customization has a ton of great ideas.
Master the Art of Visual Commerce
On the internet, your photos have to do all the heavy lifting. Customers can’t touch, feel, or try on your products, so your visuals need to bridge that sensory gap. Grainy, poorly lit images from one angle are a guaranteed conversion killer.
Invest in professional, high-resolution photography. Show your product from every conceivable angle, and don’t forget lifestyle shots. A backpack on a white background is fine. That same backpack on a smiling hiker at a scenic viewpoint? That’s what sells the dream.
But you can go even further to eliminate that “I wonder if this will work for me” hesitation. This is where modern tools are changing the game. Just like TryIcona helps customers visualize products before purchase, amazing visuals help them take the next step. Virtual try-on technology, for instance, can completely transform the buying experience, allowing shoppers to see how an outfit looks on their own body. This gives them the confidence to buy and dramatically cuts down your return rate.
Weaving in AI and Personalization for Explosive Growth
In a sea of look-alike stores, a generic, one-size-fits-all experience just doesn’t cut it anymore. It’s the fast track to being forgotten. Your customers crave a connection; they want to feel understood. The secret to making them feel truly seen is personalization.
The real magic in modern e-commerce optimization comes from tech that can anticipate what a customer wants and reshape their experience on the fly. It’s all about delivering the right message, to the right person, at exactly the right moment.
Dynamic Product Recommendations
Ever been on Amazon and seen those “Customers who bought this also bought…” carousels? That’s not a lucky guess—it’s smart AI in action. By looking at a shopper’s browsing history, past purchases, and even what’s in their cart, you can surface products they are genuinely going to love.
- Upsells on Product Pages: Gently suggest a premium version or a bundle. For example, “Complete the look with these matching accessories.”
- Cross-sells in the Cart: Before they check out, offer something complementary, like a protective case for a new phone.
- “Trending Now” on the Homepage: Use what everyone else is loving to show shoppers with similar tastes what’s hot right now.
These small, automated nudges are brilliant for increasing your average order value because they make product discovery completely effortless for your customers.
Hyper-Personalized Marketing That Actually Works
Your email list is a goldmine, but only if you stop treating it like a faceless crowd. Blasting the same generic newsletter to everyone is the quickest way to get ignored. AI gives you the power to slice your audience with incredible precision and send automated messages that actually hit home.
Personalization isn’t just a “nice-to-have” feature anymore; it’s a core expectation. When you make customers feel like you’re speaking directly to them, you build the kind of trust and loyalty that fuels repeat business for years to come.
Imagine this: a customer who bought running shoes a few months ago gets an email letting them know new-arrival running socks just dropped. That’s the kind of relevance that turns a passive subscriber into a passionate buyer.
The numbers don’t lie. By 2025, a staggering 92% of top e-commerce firms will be using AI tools for these tailored experiences. Brands who get this right are seeing up to a 20% increase in sales, and email marketing—the king of personalization—delivers an incredible average ROI of $38 for every dollar spent. Discover more key insights on e-commerce trends.
The Power of Smart Automation
It goes way beyond recommendations and emails. A new generation of AI-powered tools is here to make your store smarter and your life easier. For a deep dive into the specific apps making this happen, check out our guide on the top ecommerce personalization tools available right now.
Consider putting these powerful applications to work for you:
- AI-Powered Chatbots: Offer instant, 24/7 customer support by answering common questions about shipping, returns, or product details.
- Personalized Popups: Ditch the generic 10% off coupon. Instead, create popups that react to user behavior—like offering a special discount on an item they’ve been viewing, right as they’re about to leave your site.
- Dynamic Pricing: Some advanced AI tools can even analyze market demand and competitor pricing to suggest the perfect price in real time, helping you maximize your profit margins.
When you start integrating these smart technologies, you create a store that doesn’t just react to what your customers do—it anticipates what they need.
Your Implementation and Testing Roadmap
All this knowledge is great, but it’s just trivia until you put it into practice. We’ve walked through the pillars of world-class e-commerce optimization, from deep technical audits to crafting copy that sells. Now, it’s time to bring it all to life.
The key is to avoid the temptation to overhaul everything overnight. Instead, you’re going to build momentum through smart, iterative changes. You make a change, you measure the result, you learn, and you repeat. This creates a feedback loop of continuous improvement that makes your store smarter and more profitable over time.
Start With High-Impact Wins
First things first: you need to prioritize. Pull out your audit notes and pinpoint the changes that promise the biggest reward for the least amount of work. These are your “low-hanging fruit,” and they’re the perfect place to start.
Not sure where to begin? These quick wins can deliver big results:
- Compressing product images: An instant, store-wide speed boost is hard to beat.
- Clarifying shipping costs: Simply moving the shipping calculator to the cart page can dramatically cut down on abandoned checkouts.
- Rewriting your top product’s headline: A small tweak that focuses on a core benefit can give your add-to-cart rate a serious lift.
This is all about using data to inform your actions, which in turn drives growth.

True optimization always starts with understanding what your customers are doing, using that insight to refine their experience, and then measuring how it affects your bottom line.
Embrace the Power of A/B Testing
Guesswork is the enemy of growth. Your secret weapon for making data-driven decisions is A/B testing (or split testing). The idea is beautifully simple: you show two different versions of a page—an A and a B—to different groups of visitors and see which one performs better.
You can test just about anything, from the color of your “Buy Now” button to the entire layout of your checkout flow.
The golden rule of A/B testing is to only test one thing at a time. If you change both the headline and the main image in your test, you’ll never know which change actually caused the result.
A solid A/B testing process always follows these steps:
- Form a Hypothesis: Start with an educated guess. For example: “I believe that adding customer testimonials right below the ‘Add to Cart’ button will increase conversions because it builds trust.”
- Choose Your Tool: While Shopify has some native features, dedicated tools like Google Optimize or VWO offer more powerful capabilities.
- Run the Test: Be patient. You need to let the test run long enough to collect statistically significant data.
- Analyze and Implement: Once you have a clear winner, roll it out to 100% of your audience. If the results are flat, that’s still a win—you’ve learned something valuable. Form a new hypothesis and go again.
The journey to a fully optimized store starts with a single, decisive step. Take what you’ve learned here, pick just one high-impact change, and commit to testing it this week.
Still Have Questions?
You’re putting in the work to build an incredible Shopify store, so it’s only natural to have a few questions about making it the best it can be. Let’s tackle some of the most common ones.
What’s the One Thing I Should Focus on First?
If you only have time to fix one thing, make it your mobile experience and page speed. Seriously. It’s the bedrock of everything else.
Most of your customers are probably scrolling on their phones. If your site is slow or clunky on a small screen, you’ve lost them before they even see your amazing products. A fast, smooth mobile journey is non-negotiable—it influences your bounce rate, session duration, and ultimately, your sales.
How Often Should I Be Looking for Ways to Improve?
Optimization isn’t a “set it and forget it” task; it’s a rhythm you get into. I recommend a deep-dive audit of your entire store at least quarterly. This is when you step back and look at the big picture.
On a weekly basis, you should have a quick pulse-check on your key numbers. Keep an eye on your conversion rate, cart abandonment, and bounce rate. This regular check-in helps you catch any issues early and see what’s working (or what’s not) from the changes you’ve made.
Can I Really Do This Myself, or Do I Need to Hire Someone?
You can absolutely get started on your own. Many of the most powerful improvements don’t require you to be a tech wizard. Things like rewriting your product descriptions to connect with customers, compressing images to speed up your site, or setting up a simple email capture popup can move the needle in a big way.
Down the road, you might want to bring in a specialist for heavy lifting, like deep technical SEO or custom coding. But don’t let that stop you from starting now. Grab the low-hanging fruit, build some momentum, and grow your skills right alongside your store.
Ready to turn window shoppers into happy customers? Icona adds a virtual fitting room right on your product page, letting people see how your clothes will actually look on their body. It’s a game-changer for building confidence, boosting conversions, and dramatically cutting down on returns.
Give your customers the “try on” experience for free with Icona.