
Your product page is your digital sales floor. It’s the critical moment where a curious visitor decides to become a paying customer or clicks away forever. Effective Shopify product page customization isn’t about adding flashy gimmicks; it’s about engineering a persuasive, seamless journey that turns “what’s this?” into “I need this.”
Why Your Product Page Foundation Matters
Before diving into the theme editor or adding a new app, let’s get the fundamentals right. A high-converting product page is built on a deep understanding of your customer. It’s a masterful blend of stunning visuals, persuasive copy, and rock-solid trust that separates stores that just get by from the ones that truly thrive.
A confusing or cluttered page is a conversion killer. It creates friction, doubt, and ultimately, a lost sale. If your “Add to Cart” button is hard to find or a shopper can’t easily see your shipping policy, they’re gone. We’ve seen it happen time and again. For a deeper dive, our guide on how to reduce cart abandonment is a must-read. This is why establishing a clear visual hierarchy isn’t just a design choice—it’s essential for sales.
The Anatomy of a Winning Page
Think of your product page as a one-on-one conversation with your ideal customer. Your goal is to anticipate their questions and answer them logically, building confidence and excitement with every scroll. The most successful pages guide the user’s eye from one key piece of information to the next, making the decision to buy feel natural and easy.
Before we get into specific customizations, let’s ensure these core elements are optimized.
Core Elements for Product Page Success
This table breaks down the non-negotiables that every high-performing Shopify product page should have. Use it as your pre-flight checklist for boosting engagement and driving sales.
| Element | Purpose | How to Do It: Best Practice Example |
|---|---|---|
| High-Quality Visuals | Replace the physical experience of touching and seeing the product. | Build a gallery with 5-7 high-res images, a lifestyle shot showing the product in use, a close-up detail shot, and a short video. |
| Clear Call-to-Action (CTA) | Make the primary action (buying) obvious and effortless. | Design a brightly colored ‘Add to Cart’ button that contrasts with your page and stays visible as the user scrolls. |
| Compelling Product Description | Connect emotionally and sell the benefits, not just the features. | Instead of “Made with 100% cotton,” write “Experience the breathable, all-day comfort of our premium soft-spun cotton.” |
| Social Proof & Trust Signals | Overcome buyer hesitation and build instant credibility. | Prominently display star ratings, customer reviews, “secure checkout” badges, and a clear, easy-to-find return policy. |
Mastering these fundamentals creates the perfect launchpad for more advanced customizations.
The difference this makes is staggering. Strategic Shopify product page customization is one of the most powerful levers you can pull to increase your conversion rate. While the average Shopify store converts at around 1.4%, the top 20% of stores hit over 3.2%, and the top 10% achieve a massive 4.7% or more. That’s not just an improvement; it’s a different league entirely.
The infographic below puts this performance gap into perspective.
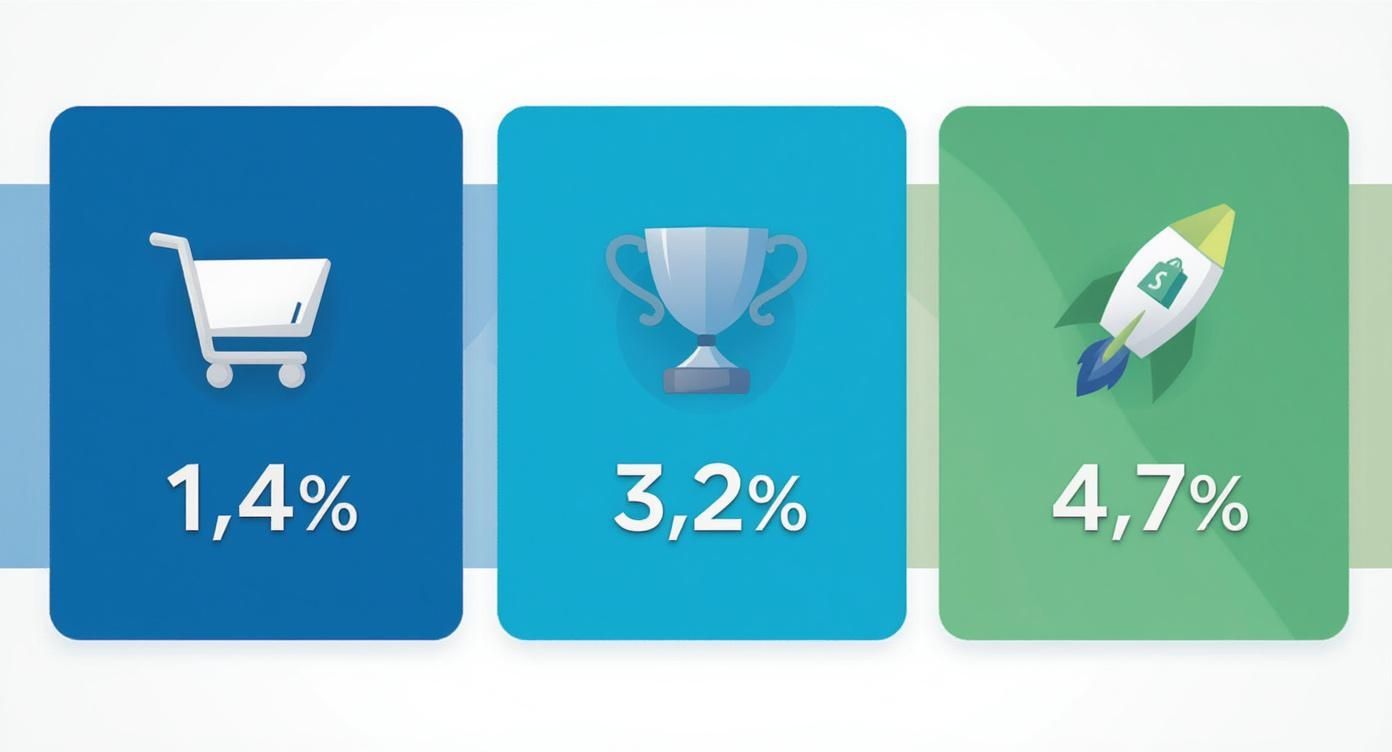
This data screams opportunity. Thoughtful, customer-focused optimization of your product page is the most direct path to joining the ranks of those top-performing stores.
How to Customize Your Page Without Writing Code
Think you need a developer to build a product page that truly pops? The good news is, those days are over. Modern Shopify themes, especially those built on the Online Store 2.0 framework, give you incredible control right from your dashboard. This is where your Shopify product page customization journey truly begins—and you won’t need to write a single line of code.
Your command center for this is the Shopify Theme Editor. It’s a powerful, visual tool that lets you build your page block by block. You can add, remove, and drag-and-drop different sections to create a layout that tells a compelling story about your product.
Actionable Steps: Mastering Sections and Blocks
The Theme Editor is your creative playground. Here’s how to get started:
- From your Shopify Admin, go to Online Store > Themes.
- Find your live theme and click the Customize button.
- Use the dropdown menu at the top of the page to navigate to Products > Default product. This is your main template.
- On the left-hand panel, you’ll see the sections that make up your page, like “Product information” and “Related products.”
This is where you can instantly change the flow of your page. Want to feature a glowing testimonial right below the “Add to Cart” button? Simply click “Add section,” choose a “Testimonials” block, and drag it into position.
Here are a few powerful sections you can add to transform a page:
- Collapsible Content: Perfect for creating a clean FAQ section. You can answer common questions about sizing, shipping, or materials without cluttering your main description.
- Image with Text: Use this to highlight a key benefit. Pair a stunning lifestyle photo with a short, punchy headline that shows how your product solves a real problem.
- Video: A well-placed video block can boost engagement significantly. Use it for product demos, unboxing experiences, or to share your brand’s story.
Actionable Steps: Unleashing the Power of Metafields
While sections control the layout, metafields are all about the content. Think of metafields as custom data fields that let you store and display unique information for each product. This is how you go from a generic template to a rich, detail-oriented experience.
Imagine you sell high-end leather bags. A standard description box can quickly become a wall of text. What if you could add specific, structured details that are easy to scan?
Pro Tip: Use metafields to display information that builds confidence and answers niche questions before a customer has to ask. This reduces friction and makes the decision to buy much easier.
Here’s how to use metafields to add structured details:
- In your Shopify Admin, go to Settings > Custom data.
- Under Products, click Add definition to create new metafields. For the leather bag, you could create fields for:
- Material Specs: (e.g., “Full-Grain Italian Leather”)
- Dimensions: (e.g., “15” x 11” x 4””)
- Care Instructions: (e.g., “Wipe with a damp cloth; condition monthly.”)
- Go to a product in your admin and fill out the new metafields you created.
- Back in the Theme Editor, click Add block within your “Product information” section and choose a Text block.
- Click the Connect dynamic source icon (it looks like a stack of coins) and select the metafield you want to display.
Now, instead of a messy paragraph, your page has clean, scannable information that makes your product feel premium and well-documented.
Elevate Functionality with Strategic Apps
Your Shopify theme is the foundation—the sturdy structure of your store. But apps? That’s where the real magic happens. Think of them as the interactive displays and helpful sales staff that transform browsers into loyal customers. This is your chance to add powerful, conversion-focused features that make your product pages unforgettable.
But let’s be friendly and honest—it’s easy to get carried away. The Shopify App Store is like a candy shop for merchants. The key is to be strategic. Every app adds code to your site, and too many can slow down your page speed, which is a classic conversion killer. We’re aiming for precision here, choosing only the tools that solve a real customer problem.
Actionable Steps: Choosing the Right Apps
Before you even open the app store, ask yourself: “What one thing could I add here to make it easier for my customers to say ‘yes’?” Your answer is the compass that will guide your search.
If you’re a fashion brand, the biggest hesitation is almost always fit and visualization. This is where an Augmented Reality (AR) or virtual try-on app can be a game-changer. Suddenly, a customer isn’t just looking at a flat photo; they’re seeing how that dress might actually look on them.
Here are a few other examples of how targeted apps can solve specific problems:
- Product Bundles: Apps like “Frequently Bought Together” are brilliant for increasing average order value by showing customers the perfect complementary items.
- Subscriptions: Selling coffee, skincare, or vitamins? Subscription apps are a must for creating that sticky, recurring revenue.
- User-Generated Content (UGC): There’s nothing more powerful than social proof. Tools that pull in customer photos from Instagram and display them on your product page build instant trust.
The goal is to make your product page feel less like a static catalog and more like a dynamic, helpful, and personal shopping experience. Every app should contribute to that feeling.
App Categories for Product Page Enhancement
To help you find the right tool, it’s useful to think about apps in terms of the function they serve. Here’s a breakdown of common categories and how they can level up your product pages.
| App Category | Functionality | Example Use Case |
|---|---|---|
| Reviews & Social Proof | Collects and displays customer reviews, ratings, and photos. | A clothing store shows customer-submitted photos of people wearing their jeans, helping new buyers see how they fit on different body types. |
| Virtual Try-On & AR | Allows customers to visualize products in their own space or on themselves. | An eyewear brand lets shoppers use their phone camera to “try on” different frames, boosting purchase confidence. |
| Upsell & Cross-Sell | Suggests complementary products or upgrades at key moments. | A skincare brand suggests a matching serum when a customer adds a moisturizer to their cart, increasing the average order value. |
| Subscriptions | Manages recurring orders for consumable products. | A coffee company offers a “subscribe and save” option, locking in repeat customers and predictable revenue. |
| Personalization | Shows different content or product recommendations based on user behavior. | An online bookstore displays a “Recommended for You” section based on a visitor’s browsing history. |
Choosing from these categories allows you to target specific weaknesses in your customer journey and turn them into strengths.
The Rise of AI and Built-in Theme Features
The world of Shopify product page customization is evolving fast, driven by AI-powered personalization and smarter themes. In fact, as of 2025, an incredible 92% of businesses are using AI to create more relevant shopping experiences. This isn’t just a trend; it’s a direct response to shoppers who have less time and higher expectations than ever.
This shift is great news for you. It means achieving sophisticated results is getting easier. Many modern Shopify themes now come with built-in features that once required multiple apps, like sticky add-to-cart buttons, “Only 3 left!” urgency banners, and countdown timers. You can often enable these with a simple checkbox, giving you an instant conversion lift without slowing your site down.
If you’re looking to go deeper, you can explore powerful ecommerce personalization tools that integrate with your store. The art of app selection today is about finding that perfect balance—knowing when to use your theme’s built-in power and when to add a specialized app that delivers a clear, measurable return.
Optimize for Every Shopper on Every Device
It’s easy to get lost in creating a beautiful desktop design and forget where most of your customers are shopping. Today, the majority of ecommerce traffic is on a smartphone. That means your Shopify product page customization absolutely has to be mobile-first. A clunky mobile page is a guaranteed sale-killer. Real mobile optimization means crafting an experience built for thumbs, taps, and short attention spans.
Actionable Steps: Designing for Mobile
Picture your customer: they’re probably scrolling with one hand while waiting for coffee. Your design needs to make their life easy. Your “Add to Cart” button should be big, bold, and impossible to miss. Text needs to be crystal clear without any pinching or zooming. And your images must load lightning-fast.
Here’s how to nail the mobile experience:
- Simplify Navigation: Tuck complex menus away behind a simple hamburger icon. Keep your search bar front and center.
- Embrace the Vertical Scroll: Stick to a single column for your content. No one wants to deal with frustrating horizontal scrolling on a phone.
- Create Big Touch Targets: Ensure every button and link is large enough for a thumb to tap confidently. Add plenty of space around them to avoid mis-clicks.
Think about the most crucial information. Your product images, the price, and that all-important CTA button should be immediately visible “above the fold”—no scrolling required.
Actionable Steps: Building an Inclusive and Accessible Page
When we say “optimize for every shopper,” we mean every shopper. Accessibility isn’t just about compliance; it’s about good business and great customer service. An accessible store opens your doors to a wider audience.
The great thing is, many accessibility improvements make the experience better for everyone. High-contrast text, for example, helps someone with a visual impairment, but it’s also great for anyone shopping on their phone in the bright sun.
By making your pages accessible, you’re not just helping a fraction of users; you’re fundamentally improving the clarity and usability of your store for every single visitor.
Here are a few things you can do right now to make a difference:
- Write Meaningful Alt Text: Don’t skip the alt text on your product images. Describe what’s in the photo. This helps visually impaired shoppers using screen readers and gives your image SEO a boost.
- Test Keyboard Navigation: Can someone browse your entire page—from selecting a size to adding to cart—using only their keyboard? They should be able to.
- Check Your Colors: Use a free contrast checker online to ensure your text is easily readable against its background.
Beyond these basics, learning how virtual try-on technology works can show you how to give customers more confidence and make online shopping feel more inclusive. These small adjustments ensure your beautifully customized page is a welcoming place for all potential customers.
Test, Measure, and Refine Your Page
You’ve put in the work to customize your Shopify product page. Now for the most important part: figuring out what’s actually working. Making changes without measuring the results is just a shot in the dark. This is where your efforts pay off—when they’re guided by real customer data, not just a hunch.

Actionable Steps: From Guesswork to Growth with A/B Testing
It all starts by asking simple, testable questions. “Would a green ‘Add to Cart’ button outperform our current blue one?” “Will a shorter, punchier headline hold attention longer?”
Instead of debating it, let your customers give you the answer. This is the magic of A/B testing (or split testing). You show two different versions of your page to different groups of visitors at the same time and see which one performs better. Thankfully, you don’t have to be a developer to do this. The Shopify App Store is full of tools that make it easy to test everything from your product images to your button copy.
The Metrics That Really Matter
To know if your changes are a hit, track the right numbers. Focus on the metrics that directly impact your sales.
- Conversion Rate: The big one—the percentage of visitors who make a purchase.
- Add-to-Cart Rate: How many people are adding products to their cart? A high rate here but a low conversion rate might signal an issue in your checkout process.
- Bounce Rate: The percentage of people who land on your page and leave without doing anything. A high bounce rate could mean your images, price, or description aren’t hitting the mark.
- Average Time on Page: How long are people sticking around? More time generally means more engagement.
Actionable Steps: Seeing Your Page Through Your Customers’ Eyes
Numbers tell you what is happening, but not always why. For that, you need to step into your customers’ shoes. This is where visual analysis tools become your secret weapon.
Heatmaps are incredible. They show you exactly where people are clicking, how far they’re scrolling, and where their mouse is hovering. You can instantly see if visitors are trying to click on something that isn’t a link or completely scrolling past a key benefits section. These insights are pure gold.
Your goal isn’t to get the page “perfect” on the first try. It’s to build a system of continuous improvement—test, measure, learn, and repeat. Each iteration gets you closer to a page that consistently turns browsers into buyers.
This iterative process can have a massive impact. Global benchmarks show that while the average Shopify store converts at 1.4%, highly focused and optimized product pages can achieve an average conversion rate of 6.6%. You can learn more about these product page conversion statistics and see what’s possible.
When you combine smart A/B testing with a close eye on your key metrics and visual insights, you’ll start making confident, data-backed decisions that lead to real growth.
Your Customization Questions Answered
Jumping into Shopify product page customization always brings up a few questions. Let’s tackle some of the most common hurdles merchants face so you can move forward with confidence.

How Often Should I Update My Product Pages?
Think of your product pages as living documents, not static brochures. While there’s no magic number, a quarterly review is a solid baseline. More importantly, keep a close watch on your analytics. If you see the conversion rate suddenly dip for a specific product, that’s your cue to investigate. You should also be running small, ongoing A/B tests on elements like headlines, images, or CTA buttons. And of course, whenever you get fantastic new customer photos or a glowing review, add it to the page immediately to keep things fresh.
Can Too Many Apps Slow Down My Product Page?
Yes, they absolutely can. Every app you add injects code that has to load when someone visits your page. Pile on too many, and you can seriously hurt your page speed, which harms both user experience and SEO.
Be incredibly intentional. Only install an app if it delivers a clear benefit to your customer’s journey. Before you install, scan recent reviews for comments on performance.
My Pro Tip: Every time you add a new app, run a test on a tool like Google PageSpeed Insights to see the impact. Make it a habit to audit your apps every few months. If you aren’t using an app or it’s not pulling its weight, uninstall it.
What Is the Most Important Element to Get Right?
This is the question I get most often. If I had to pick one thing, it’s the powerful duo of high-quality product imagery and a crystal-clear Call-to-Action (CTA) button. Your photos and videos create that initial spark of desire, replacing the tangible, in-store experience. The CTA—your “Add to Cart” button—is the final step. It has to be impossible to miss, standing out with a color that pops. If your visuals don’t build trust or your CTA gets lost in the noise, nothing else you do will matter as much.
Your Next Step to Higher Conversions
You’ve learned the strategies to build a product page that converts. Now it’s time to put them into action. Remember, effective Shopify product page customization is a continuous process of listening to your customers and refining their experience. By focusing on a strong foundation, using the right tools, and constantly testing, you can transform your product pages from simple listings into powerful sales engines.
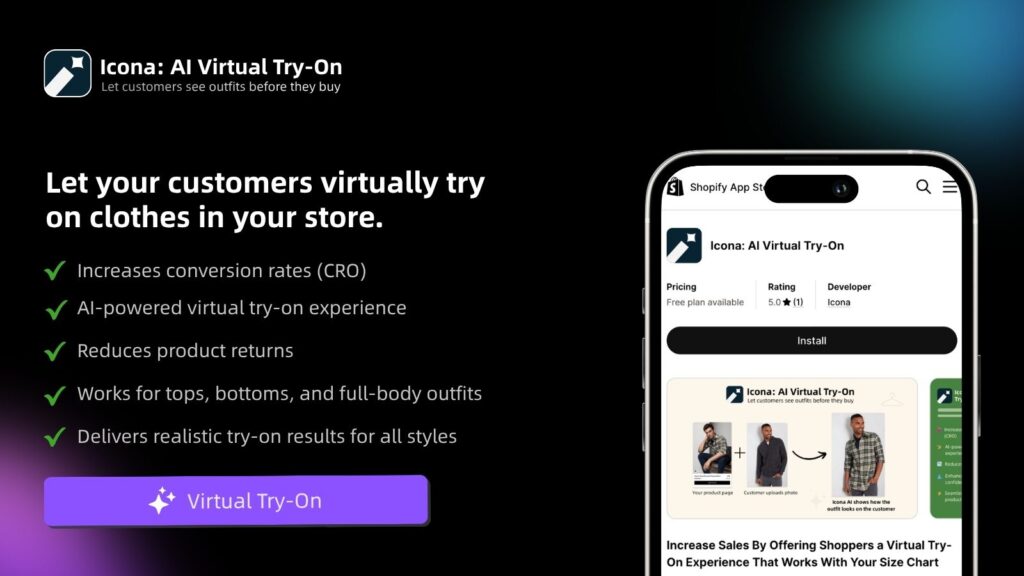
Ready to give your customers that final push of confidence and slash your return rates? Icona adds a powerful virtual try-on button right on your product page, letting shoppers see how your clothing looks on their own bodies in just a few seconds. Best of all, it’s completely code-free and takes just minutes to set up.
Start your free trial and transform your product pages today at tryicona.com